My Chocolate Season 2022: Chocolate Crêpes with Pecan-Banana Sauce by Chef Paul Prudhomme10/27/2022 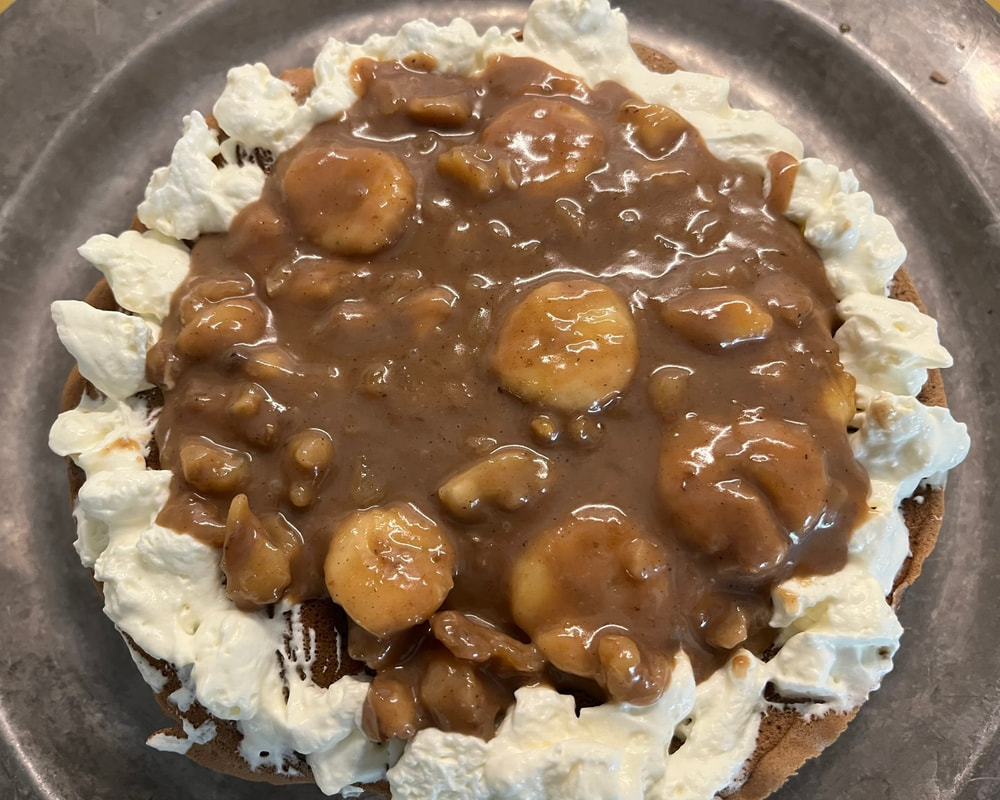 Early last evening, I stepped beyond my kitchen comfort zone when I set out to replicate this divine dessert from Chef Paul Prudhomme’s Kitchen Expedition (1997). I can't remember the last time I attempted to make crêpes-if ever! I also haven't owned any non-stick cookware in decades, so made-do with our well-seasoned iron skillets. And, when it came time to 'pipe' whipped cream with a pastry bag, the paper pastry bags from a long-forgotten corner of a kitchen cupboard didn't quite measure up. That said, I thoroughly enjoyed the results, during today's lunch with a couple of writing friends. With or without these chocolate crêpes, the sauce is absolutely AMAZING, too. Set aside several hours to put this dessert together and then savor every last bite. Chocolate Crêpes with Pecan-Banana Sauce Makes servings V.O.E. (‘Voice of Experience’) notes reflect my experience when making a recipe Special equipment needed 8” non-stick or well-seasoned frying pan 12” non-stick or well-seasoned frying pan A pastry bag fitted with a medium-size star tip (V.O.E. – my paper pastry bag didn’t work well, so I made small, whipped cream dollops with a table knife)  INGREDIENTS Crêpes ¾ cup all-purpose flour ½ teaspoon baking powder ¼ cup buckwheat flour ¼ teaspoon salt (a gluten-free flour!) 4 tablespoons unsweetened 2 cups milk cocoa powder 2 tablespoons vegetable oil 3 tablespoons sugar 3 large eggs, lightly beaten 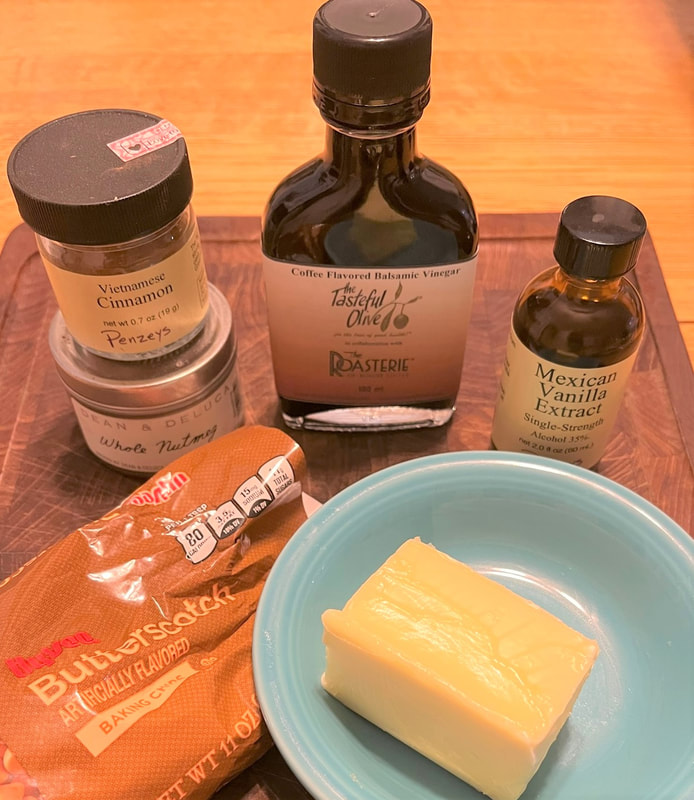 Sauce 6 tablespoons unsalted butter 4 medium-size bananas, peeled 1 ½ cups dark brown sugar and sliced, about 3 cups 1 teaspoon ground cinnamon (use bananas that still have a little ½ teaspoon ground nutmeg green on the tips) 1 tablespoon vanilla 1 ½ cups toasted pecans 1 cup heavy cream ¼ cup Kahlua (V.O.E. – I made a 2 ounces butterscotch chips non-alcoholic substitute by combining 1/8 cup heavy cream and 1/8 cup coffee balsamic vinegar) 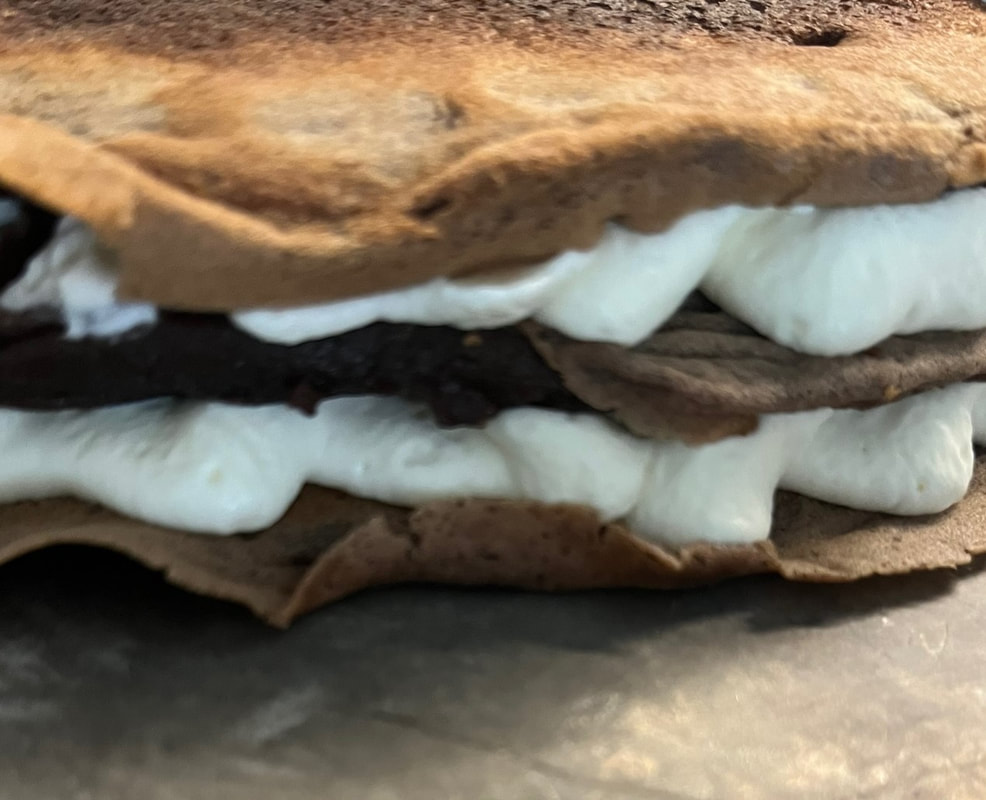 INSTRUCTIONS Toast the nuts (V.O.E.) Set the oven at 350 degrees. Cover the bottom of a small baking pan with parchment paper and spread the nuts evenly across the paper. Bake/toast for 7 to 10 minutes, watching the nuts closely so they don’t burn. Allow to cool. If desired, chop them coarsely in a food processor. Set aside. I substituted walnuts for pecans. Make the crêpes Combine the flours, cocoa, sugar, baking powder, and salt in a bowl and whisk together for about 1 minute until well blended (or use the paddle attachment for a standing mixer). Add the milk, oil, and eggs and whisk until the batter is well combined, about 5 minutes. Preheat an 8-inch non-stick skillet over medium heat for 4 minutes. Pour ¼ cup batter into the skillet, tilting the pan to distribute the batter evenly and come slightly up the sides of the pan. Cook until the edges of the crêpe become slightly crisp, about 2 minutes. Then with a plastic spatula or your fingers, turn the crêpe over and cook for 1 minutes. Transfer the cooked crêpe to a sheet pan (it’s ok to stack them) and set aside. Repeat the process, wiping or scraping the spatula clean between uses, until you have made 12 crêpes. (V.O.E. – These instructions are spot-on. Follow them closely!) Make the sauce In a 12-inch nonstick skillet, over high heat, combine the butter, brown sugar, cinnamon, nutmeg, and vanilla. Whisk constantly until the butter melts and combines with the brown sugar, then whisk in the cream. Bring to a boil, whisking constantly to avoid burning, then reduce the heat to medium and add the butterscotch chips. Whisk until the chips melt, then reduce the heat to low, add the bananas and stir gently for 2 minutes. Remove from the heat and stir in the toasted nuts and Kahlua. Set aside to cool, to room temperature. (V.O.E. – These instructions are also spot-on.) 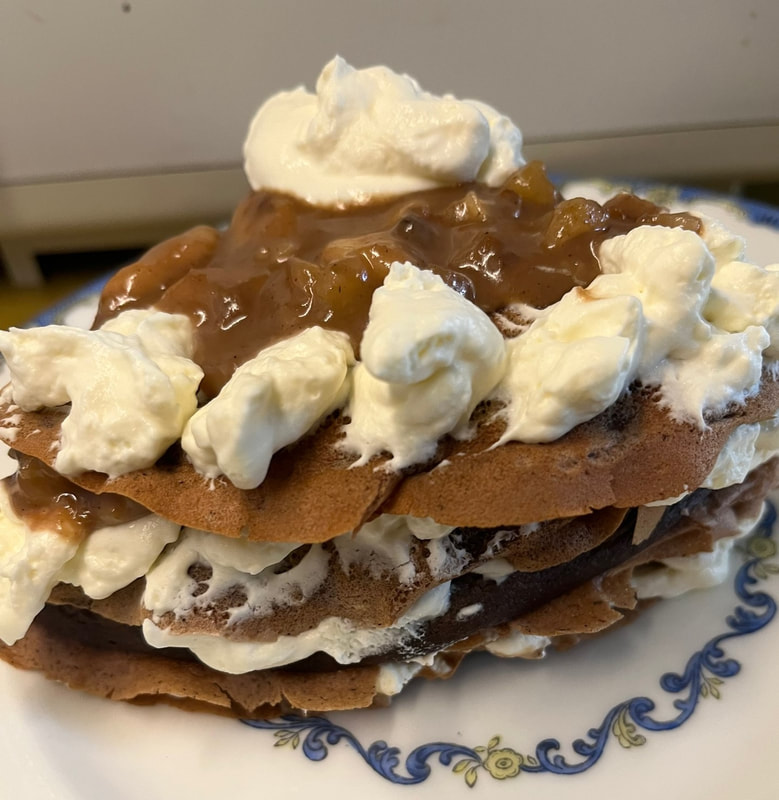 Assembly Whip the cream in an electric mixer at medium-high speed until it forms still peaks. Place the whipped cream in a pastry bag fitted with a medium-size star tip. Place one crêpe on a large serving plate. Pipe a circle of whipped cream around the edge of the crêpe and spread ¼ cup of sauce inside the whipped cream circle. Top with another crêpe and repeat the process until you have 6 layers. Repeat the process to create another 6-layer stack. Cut each stack into 4 quarters to make 8 desserts (V.O.E. This is a very rich dessert from which you can easily get at least 12 servings). Serve each quarter on a dessert plate and garnish with a rosette of whipped cream, if desired. **************************************************************************************************** Looking at this cookbook again reminded me of the day-a couple of decades ago-when Prudhomme gave me a signed copy as we sampled potential dishes for his new restaurant in a Kansas City casino. He was warm, welcoming and very personable. 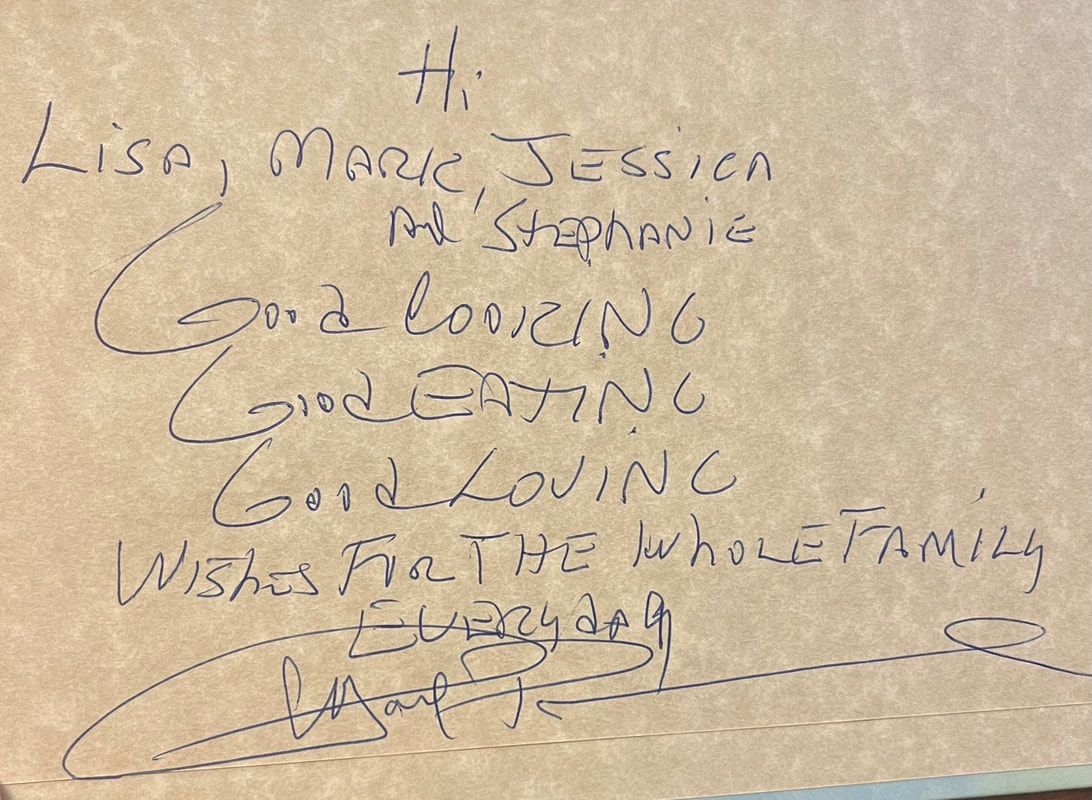
0 Comments
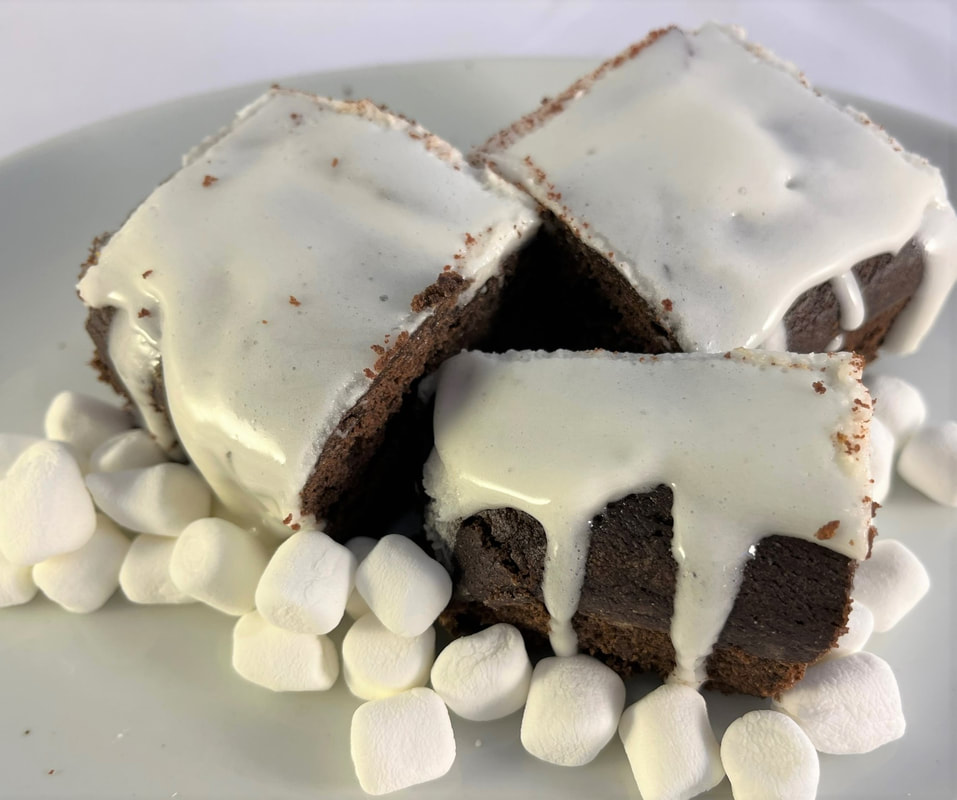 I had the pleasure of meeting Ruth Reichl around 2009, when she spoke during a gourmet meal in an upscale Kansas City, MO restaurant (which has since closed). Her massive Gourmet Today cookbook had recently published, as the beloved Gourmet magazine-where she was editor for a decade-prepared to shut down after nearly 70 years of operation. As I sought recipes for this year's chocolate blog, I found Reichl's Devil's Food Cake with Marshmallow Frosting, inside Gourmet Today. Full of butter and brown sugar, this dense cake topped the edge of the 8" x 8" pan in which I baked it.  Although I've long known that bringing eggs to room temperature before using them in a recipe is good practice, I appreciated Reichl specifically noting these eggs should stand out for a full half hour. I also appreciated her note that the recipe should not incorporate Dutch-process cocoa powder, especially after I recently completed a story on cocoa powder differences, for The Chocolate Professor (stay tuned for the specific story URL). 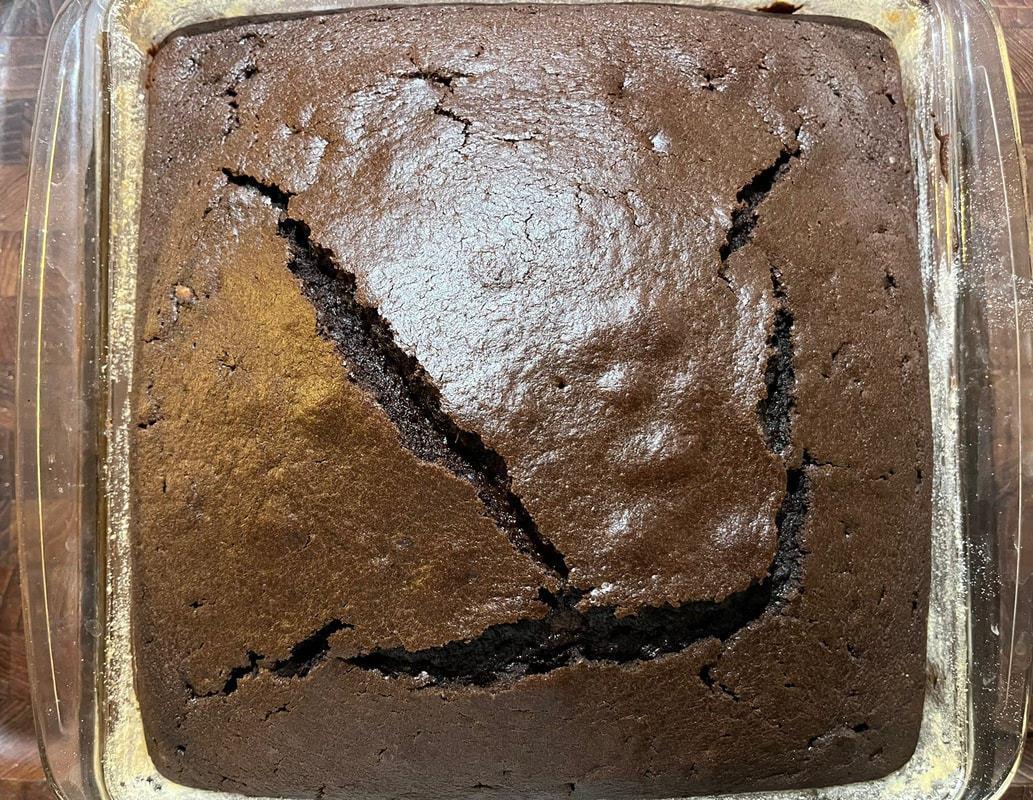 I baked the cake just over 45 minutes and the top cracked open a bit, so I would definitely watch the baking process closely, from about 35 minutes. 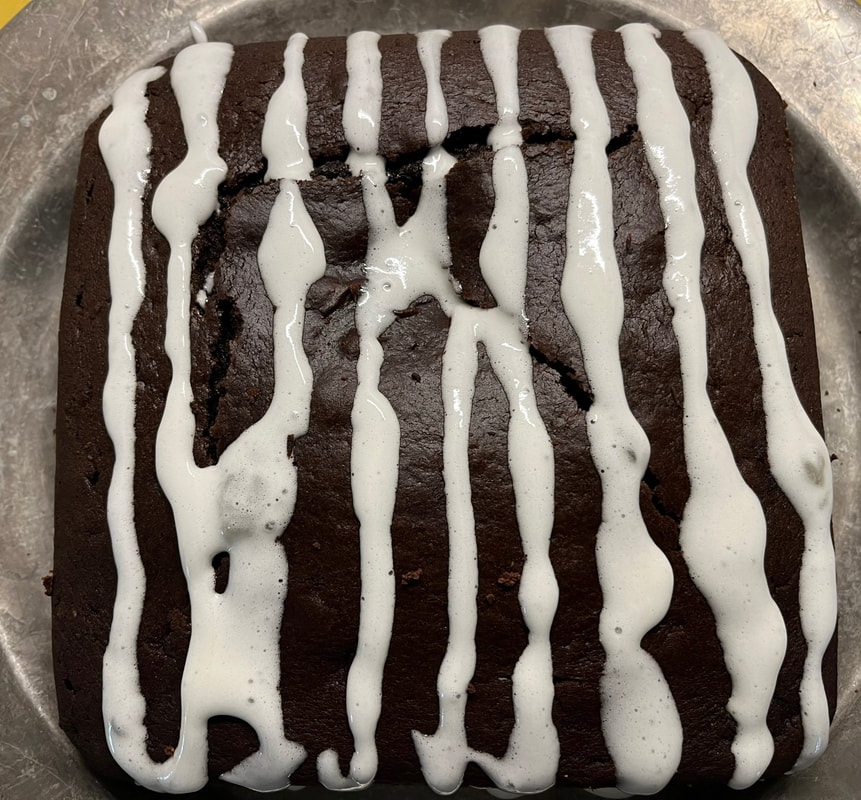 But when it came time to make the frosting, I diverged from Reichl's recipe. Not a fan of corn syrup, I didn't want to purchase a bottle of this stuff that I otherwise never use. Instead, I bought some mini marshmallows whose leftovers my toddler grandsons will appreciate. I greased a spatula, and a small bowl that would serve as my double boiler, threw in several cups of marshmallows and several tablespoons of water and watched the melting process. I turned off the heat and then drizzled this mixture across the top and sides of the cooled cake. But with plenty of mixture remaining, I eventually covered the entire top surface while leaving the side drizzles in place. 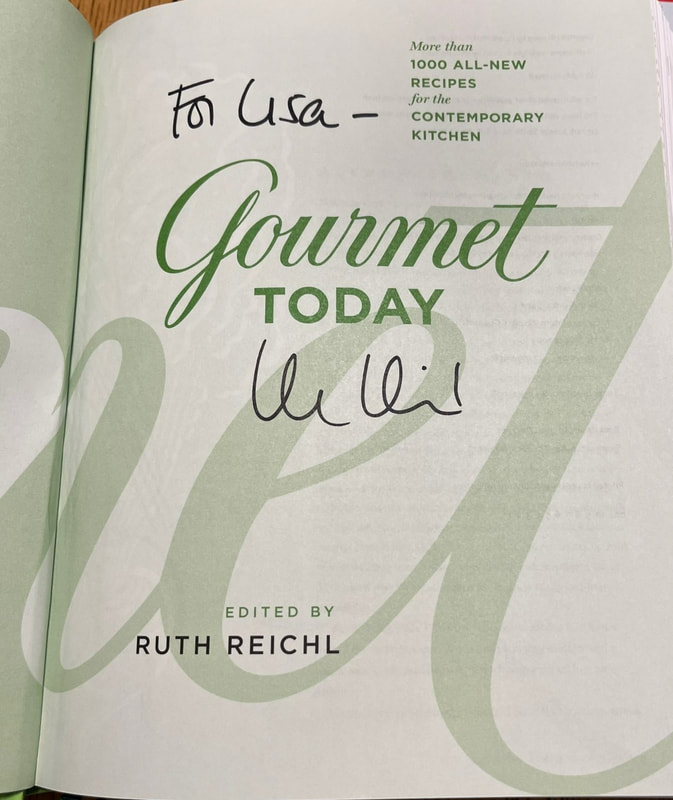 This wasn't anything close to a whipped frosting. Would I have preferred Reichl's recipe? Perhaps. But, in the meantime, we're thoroughly enjoying the flavors of this decadent dessert.
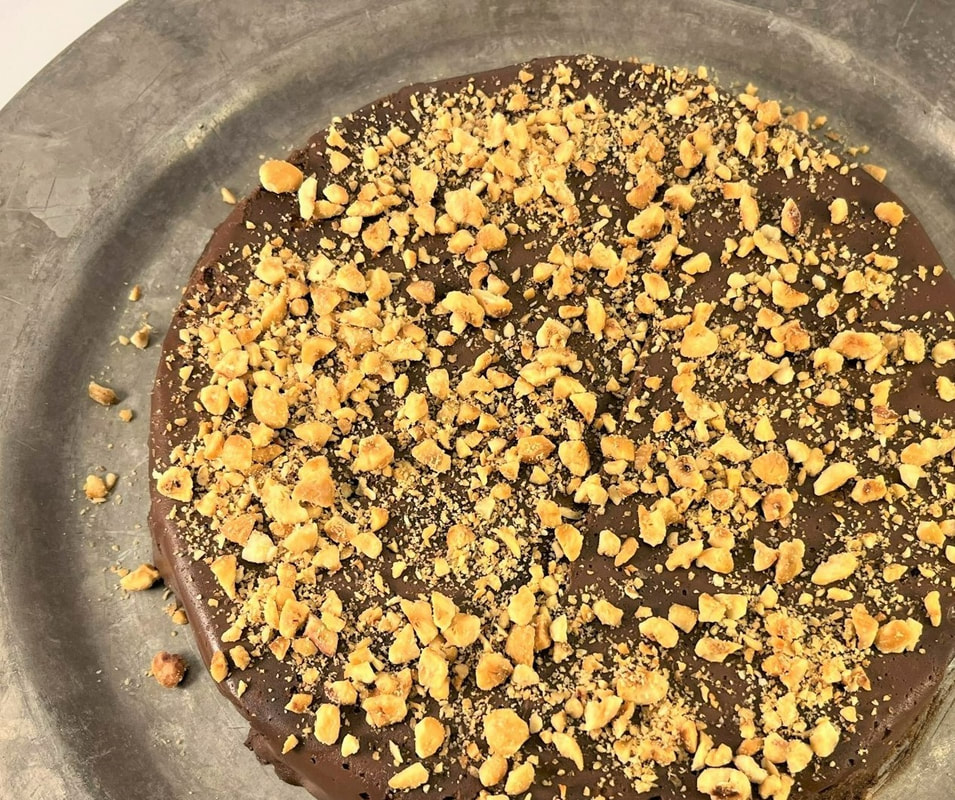 Over many years of food writing, I’ve had the pleasure of spending time with several well-known chefs. I met the gracious and friendly Lidia while dining at one of her New York restaurants, during the 1990s. I also had the pleasure of ‘introducing’ her to the larger Kansas City community via my news article for a local alternative newspaper-before she opened her first non-NYC restaurant, Lidia’s Kansas City. Since then, I’ve met Lidia and dined at her Kansas City restaurant a number of times. For my first chocolate recipe of 2022, I chose her delicious Chocolate Biscotti Pudding/Budino di Gianduia. It appears in my autographed copy of the cookbook, Lidia’s Favorite Recipes, written with her daughter, Tanya Bastianich Manuali. Now, I’m thrilled to share my experiences making this creamy, decadent dessert, with you. Buon appetito! 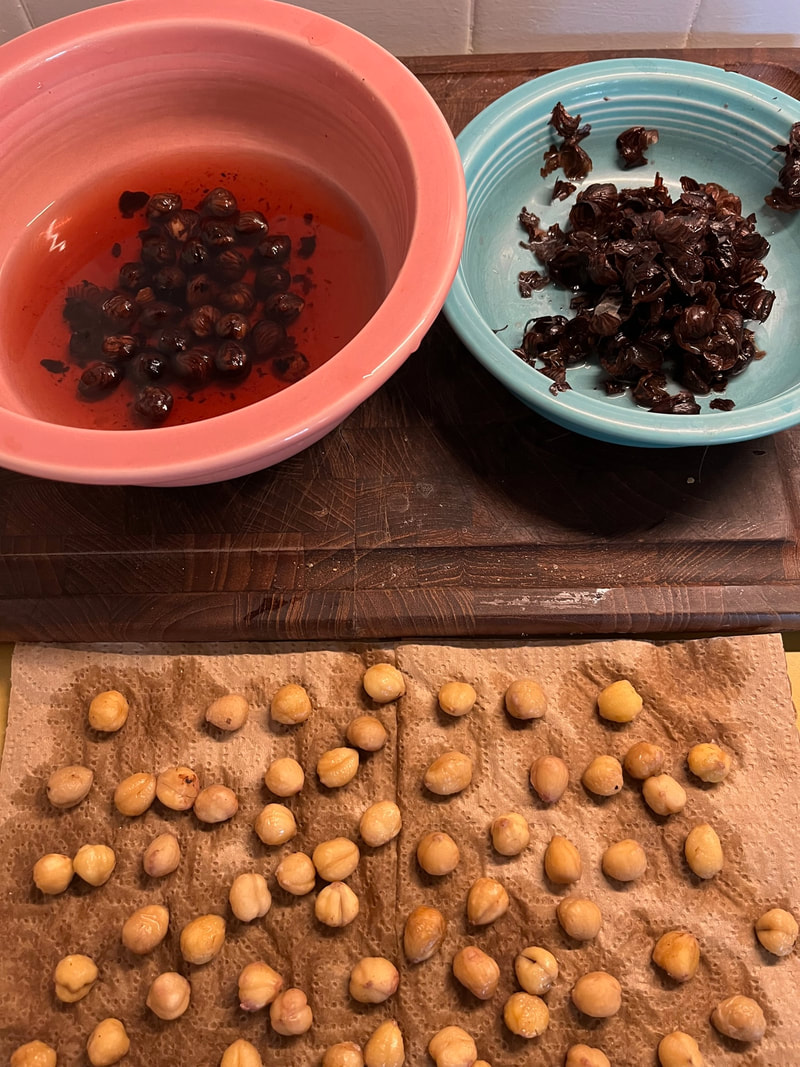 Hazelnuts are an integral part of both the texture and flavor in this recipe, and I highly recommend preparing them before you assemble other ingredients for the dessert. Though time consuming, removing the skin from hazelnuts is quite easy if you follow these instructions, that originally came from five-time James Beard award-winning chef, Alice Medrich. You'll feel like you're doing a chemistry experiment as baking soda meets boiling water meets unpeeled nuts, creating a pinkish black liquid in the pan. But it's really amazing how readily the skins come off when you follow this method. Now you're ready for the rest of the recipe (see link above). Allow plenty of time! 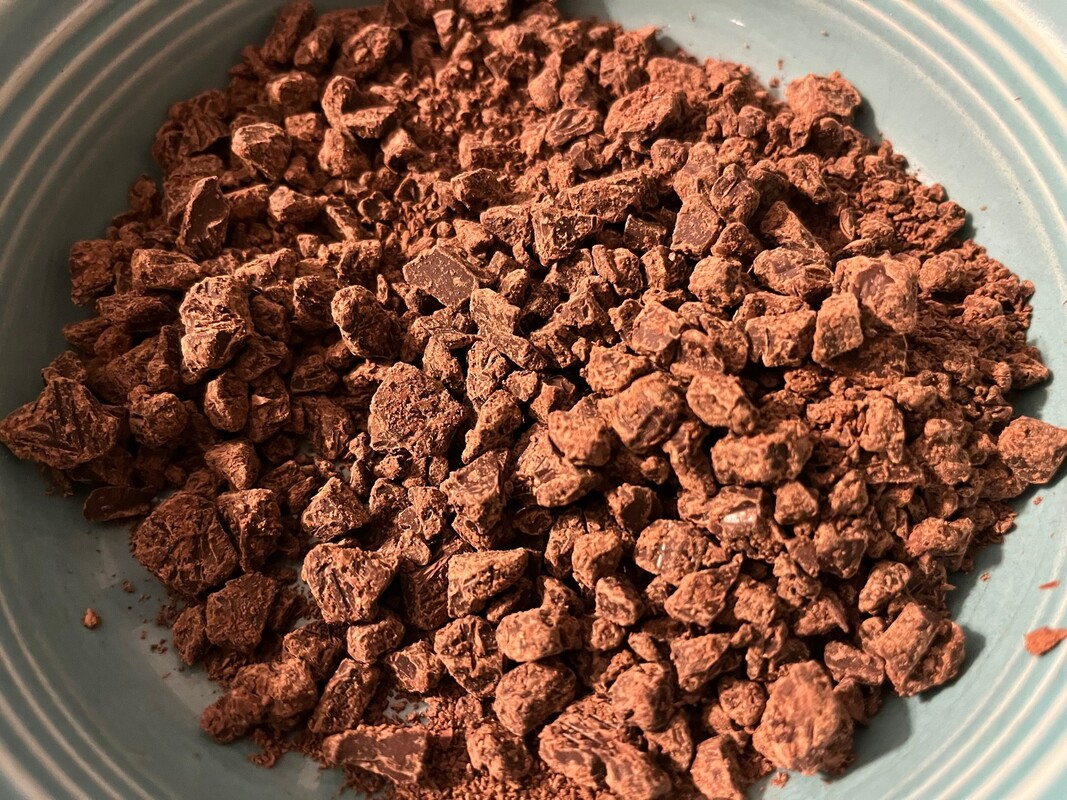 Lidia suggests that you finely chop the bittersweet chocolate for this pudding. But with a food processor on hand, I used it instead. I also crunched up biscotti and hazelnuts in the processor. And when it came time to sift the cocoa powder, I used a sieve because i don't own a sifter. 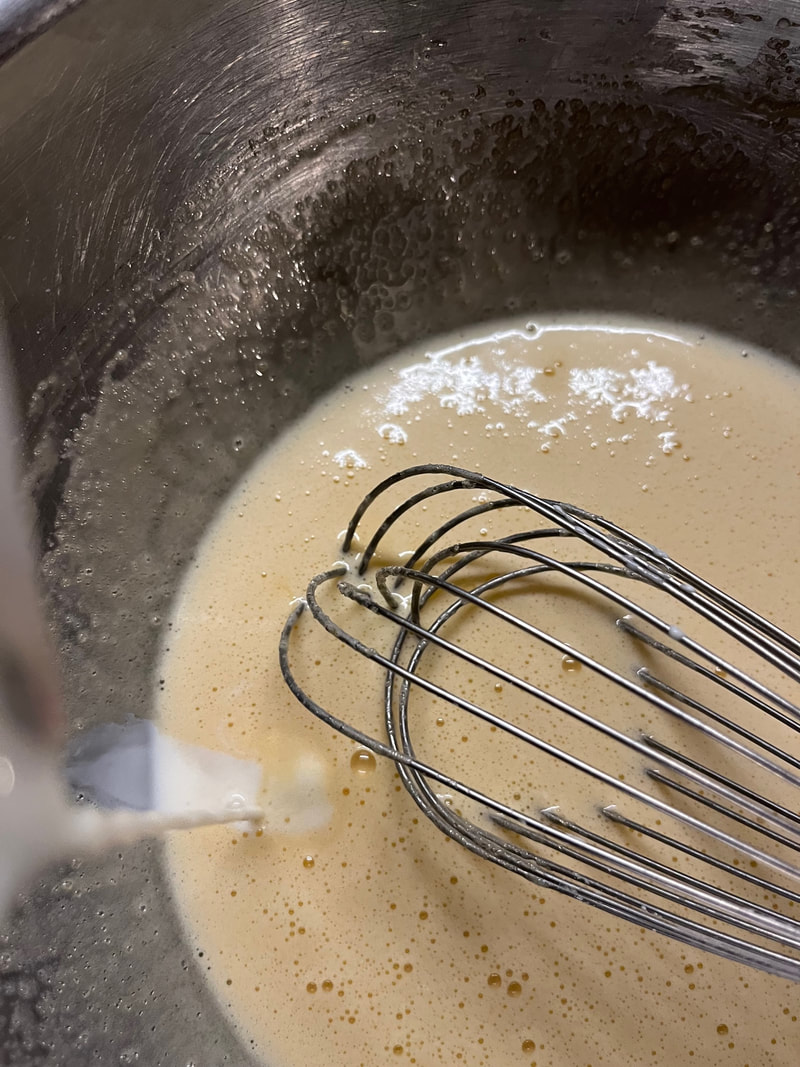 This was the moment when I added hot milk and cream to my egg and sugar mixture, before stirring the entire combination together and then adding other ingredients. 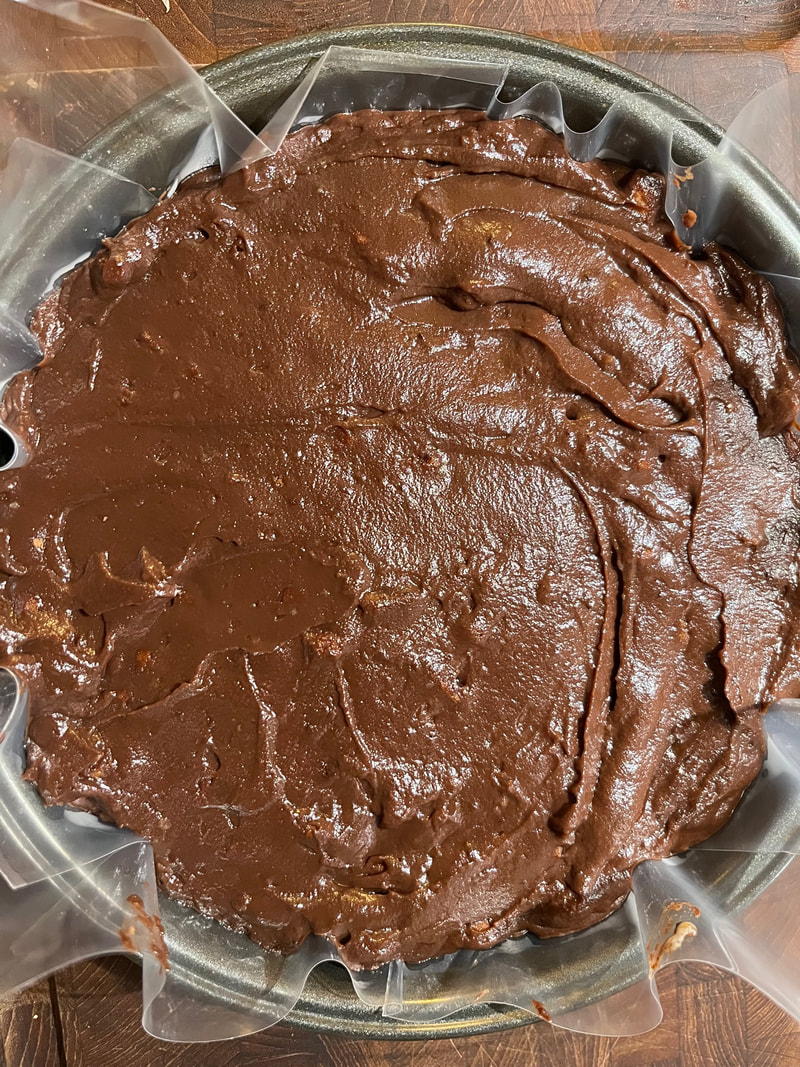 With no plastic wrap in the house, I cut open several eco-friendly plastic bags to place beneath and atop the completed pudding mixture, and then placed it in the refrigerator. 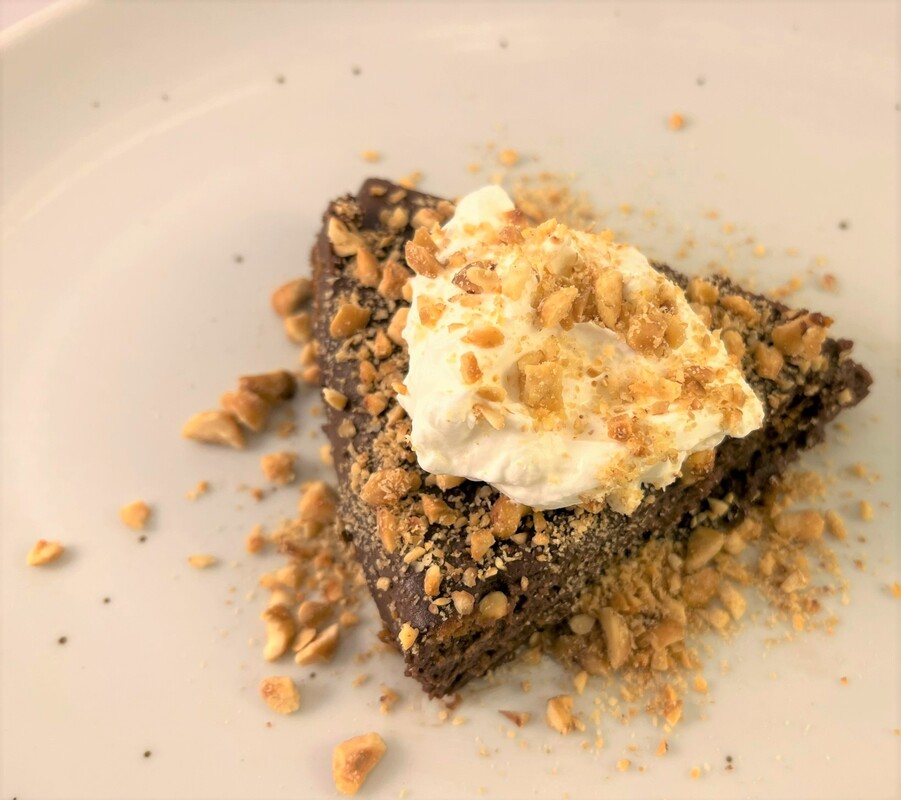 We savored this mouthwatering treat with large dollops of whipped cream that I slightly sweetened. Because, despite Lidia's suggestion that the cream didn't need sugar, that isn't how we roll in our house. Enjoy, to the max.
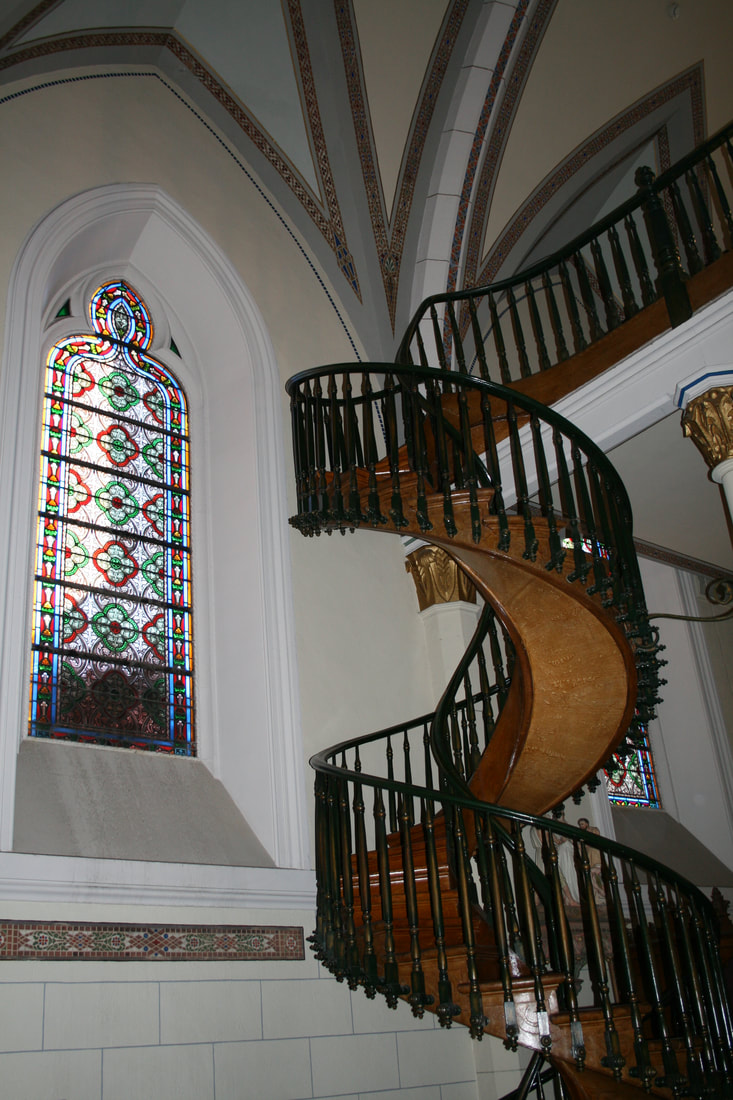 Wherever you go in Santa Fe, evidence of creativity abounds. Although this photo doesn't reflect my first visit to Loretto Chapel, I was mesmerized by the signature staircase from the moment I saw it. If you've never visited there, you must see this 'miraculous staircase' that provides access to the choir loft. Built in the late 1800s, it represents the work of an unnamed carpenter who supposedly arrived at the moment of need and then disappeared afterwards, with no request for payment. 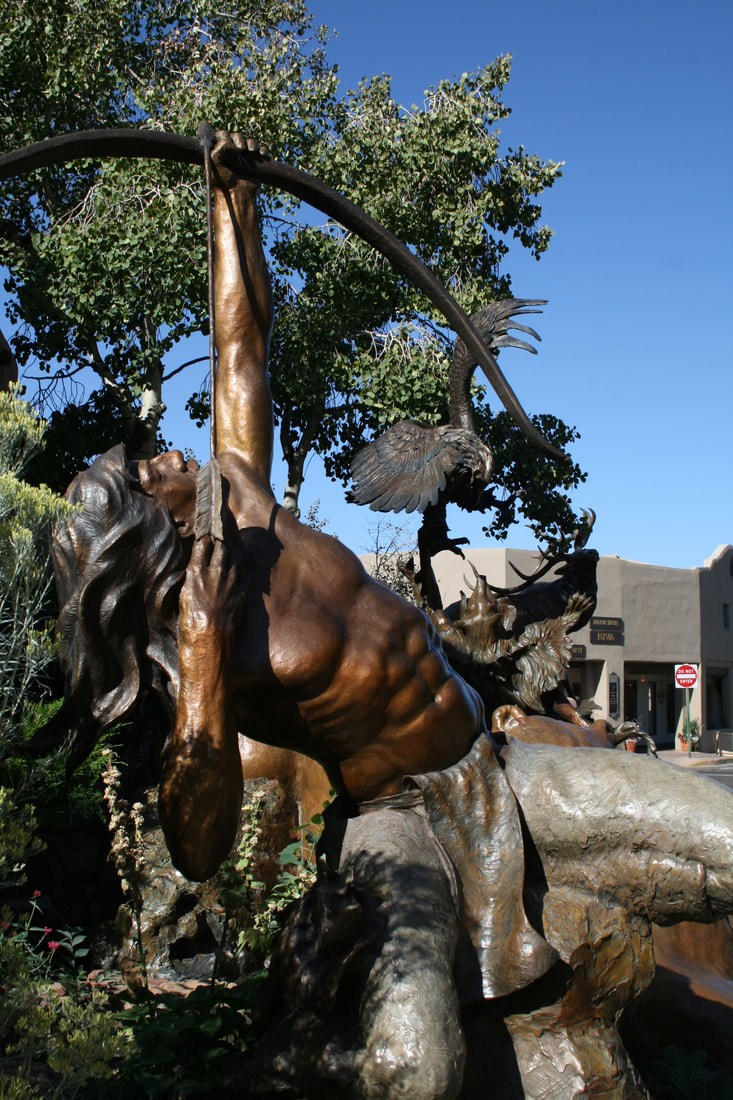 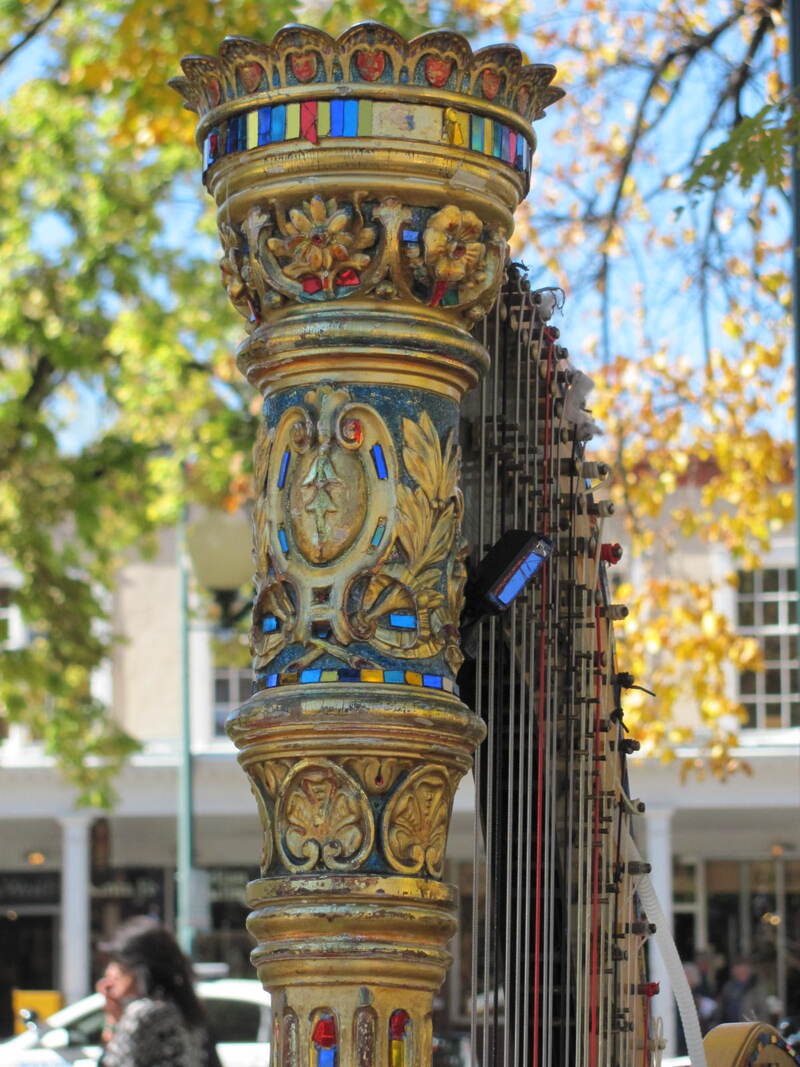 Plenty of cars clog Santa Fe's narrow streets, but walk on and near the Plaza to find amazing art in unexpected places, such as this sculpture of an indigenous man using a bow and arrow; or a stunning harp played beneath the trees, creating equally stunning music.  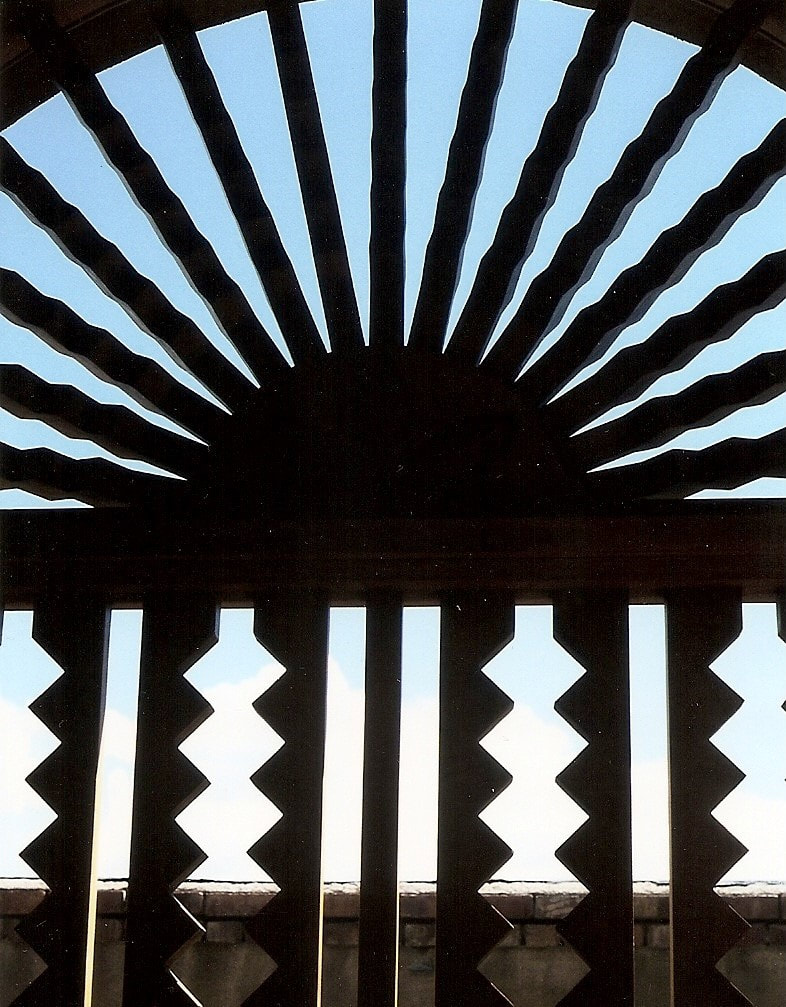 Was Santa Fe where I learned to also look above me, for views of artistic work? I wouldn't be surprised. Inside one of more than 100 galleries, throughout the city's Canyon Road neighborhood, gorgeous art covered the skylight along one ceiling too. Elsewhere, handcrafted woodwork decorated a small balcony on a vintage building.   For a Midwestern girl, dining in The City Different provides even more artistic experiences, from pillow and rustic shutter designs, to rows of handcrafted pottery along a bar wall. 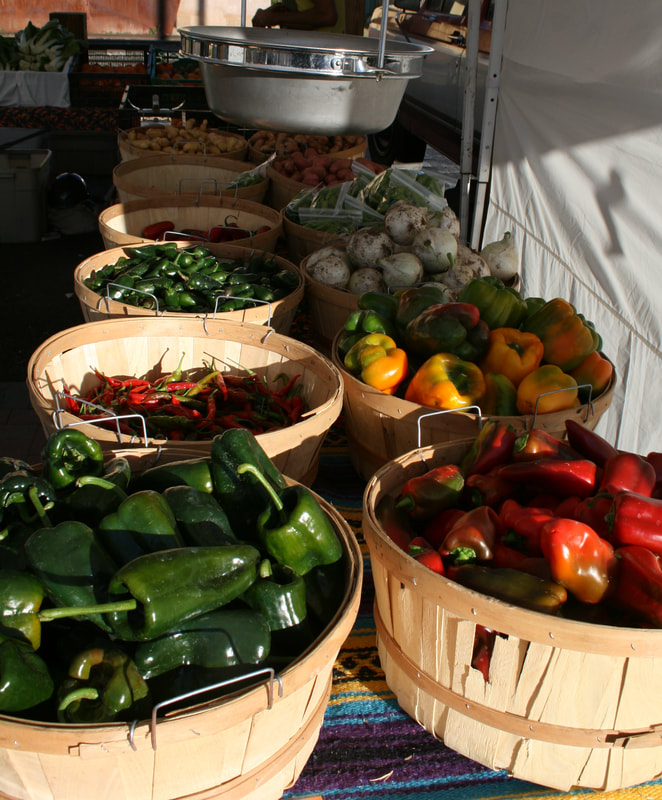 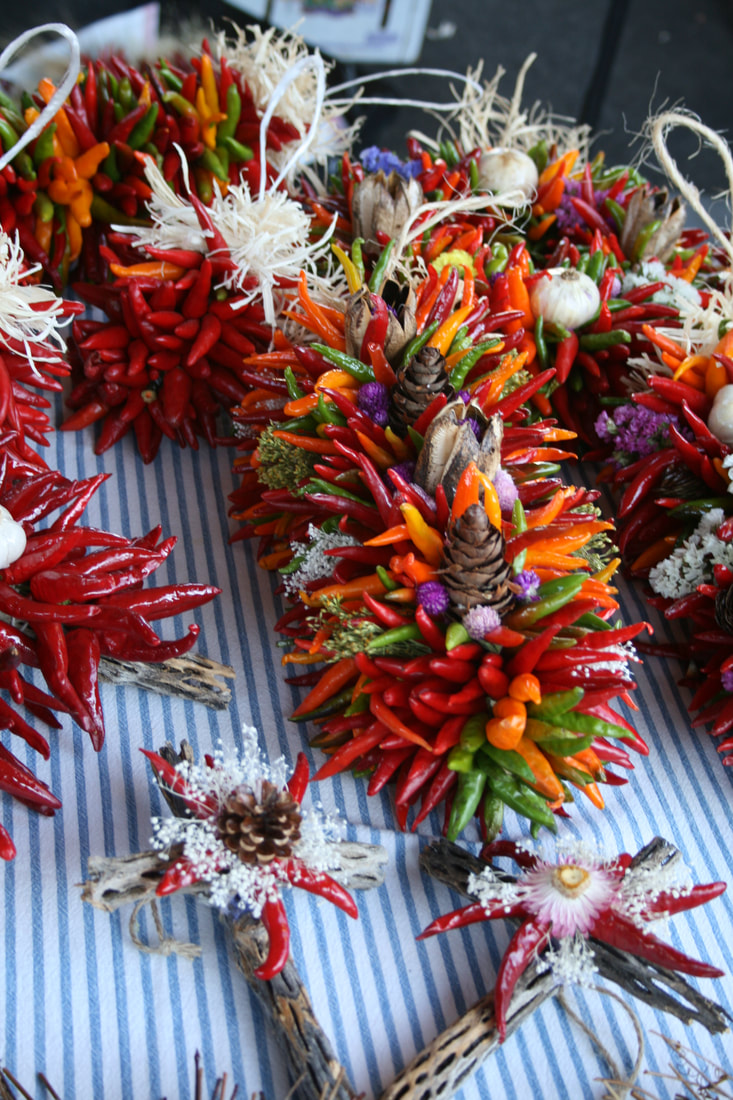 During the fall, local chiles also create a different kind of art at the Santa Fe Farmers Market. Whether you're a green chile fan or prefer the flavor of deep red chiles, the aroma of roasting fruit complements this huge and gorgeous array of seasonal, artful edibles.
Please note: As is common in the travel industry, I may have received accommodations and other compensation for the purpose of review. While it has not influenced this post, the writer believes in full disclosure of all potential conflicts of interest.  I took my first hot air balloon ride in Albuquerque, with Rainbow Ryders. From the moment we arrived members of our tour group were an integral part of the action. We held the pulling and straining balloon as it filled with cold air, and then stepped back as small flames pushed heat waves towards its bulging crown.  Once aloft we crossed the Rio Grande, skirted treetops, and observed cars the size of ants. In the next hour we traveled three ground miles and up to 1,700 feet in elevation. After we landed and the balloon was deflated and packed away, our guide read The Balloonist's Prayer aloud as we enjoyed a late-morning champagne toast: The winds have welcomed you with softness. The sun has blessed you with his warm hands. You have flown so high and so well that God has joined us together in laughter and set us gently back into the loving arms of Mother Earth.  I became hooked on the experience within minutes and attended the decades-old Albuquerque International Balloon Fiesta® with my husband, several years later. VIP credentials even allowed us to visit the launch field just after sunrise, as balloons gradually filled and rose from the ground in an ever-changing kaleidoscope of neon patchwork, patriotic, pig-shaped, and saguaro-decorated designs.   The cobalt sky framed two more hours of magic. Balloons rose like popcorn on a stove, clustering closely and then drifting apart. Some flew low enough for passengers to converse with us, while others were only colorful blips on the horizon. Balloons finally landed again and shrank onto the grass, until the afternoon event began. After dark, lit balloons created a gorgeous, ghostly panorama.  A private birthday party with hot air balloons provided the impetus for the first Albuquerque Balloon Festival. Today, this city is considered ‘the ballooning capital of the world,’ drawing nearly one million people annually to Albuquerque's largest party. Balloonists harness a natural phenomenon in the Sandia Valley, known as ‘The Box’ - a cycle of wind currents that facilitates ballooning.
For other magnificent views of this singular, nine-day event, check out multi-story windows at the Anderson-Abruzzo Albuquerque International Balloon Museum. The 52,000-square-foot structure-which resembles a hot air balloon lying on its side-depicts ballooning history while honoring early Albuquerque balloonists, Ben Abruzzo, and Maxie Anderson. There's no place like Albuquerque to enjoy the magic of hot air ballooning. Please note: As is common in the travel industry, I may have received accommodations and other compensation for the purpose of review. While it has not influenced this post, the writer believes in full disclosure of all potential conflicts of interest. My Northern New Mexico Love Affair: The Artisan Behind Albuquerque's Golden Crown Panaderia5/25/2022 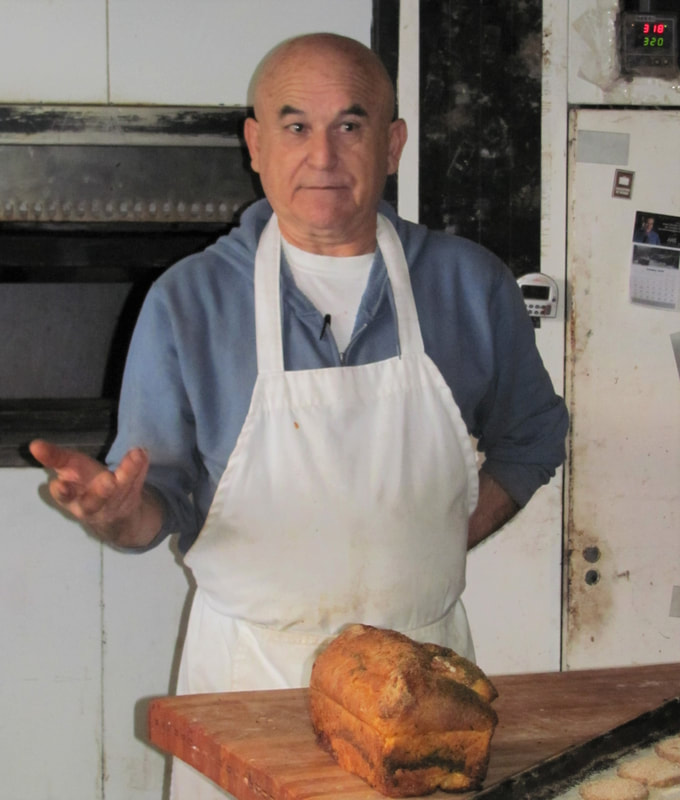 Just as food reflects an area’s culture, so do passionate food artisans. It’s been a decade since I met the irrepressible Pratt Morales, at his Golden Crown Panaderia, in Albuquerque's Old Town. Rising dough, sweet cinnamon, and pungent green chiles perfumed the air inside, where the wiry Morales removed freshly baked cookies, sugar-dusted cherry empanadas, and rustic signature green chile bread. During our early morning visit Pratt’s adult son, Christopher, shared samples of the bakery's legendary freshly baked biscochitos - New Mexico's state cookie. Please join me as I recall our visit and celebrate the founder of this now-50-year-old bakery: 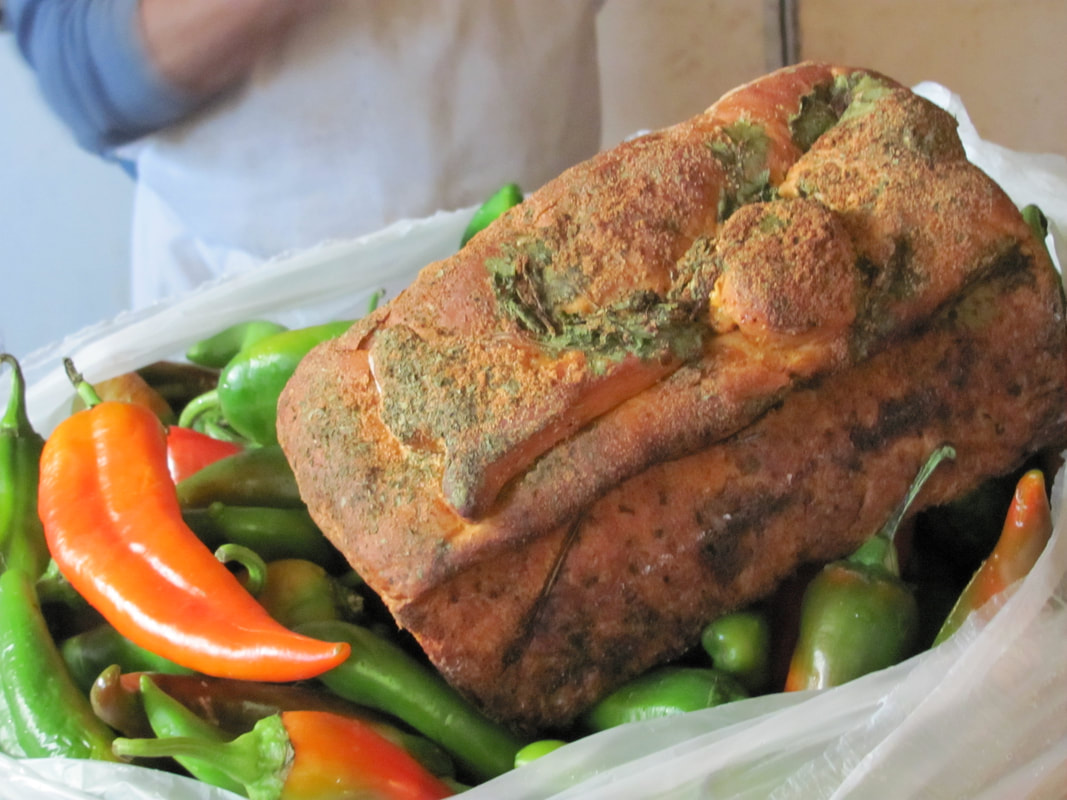 Inside an adobe building painted with bright pastel flowers and the names of baked goods such as 'empañadas' and 'pan dulce,' Pratt Morales rarely stops moving while he talks with curious customers. "We focus on nutritious, delicious, and beautiful products," he says, as he lays a cooled green chile loaf in a basket of brilliant hued chiles. Pratt says his bread is fit for a king, which is why Golden Crown became part of the bakery's name. Born and raised in San Antonio, baking captured Morales’ heart while he worked with the Air Force and the New Mexico Air National Guard. He then studied bread baking all over the world before opening Golden Crown Panaderia Neighborhood Bakery. Since 1972, he has inhabited a world full of rising dough, sweet cinnamon, and pungent green chiles. 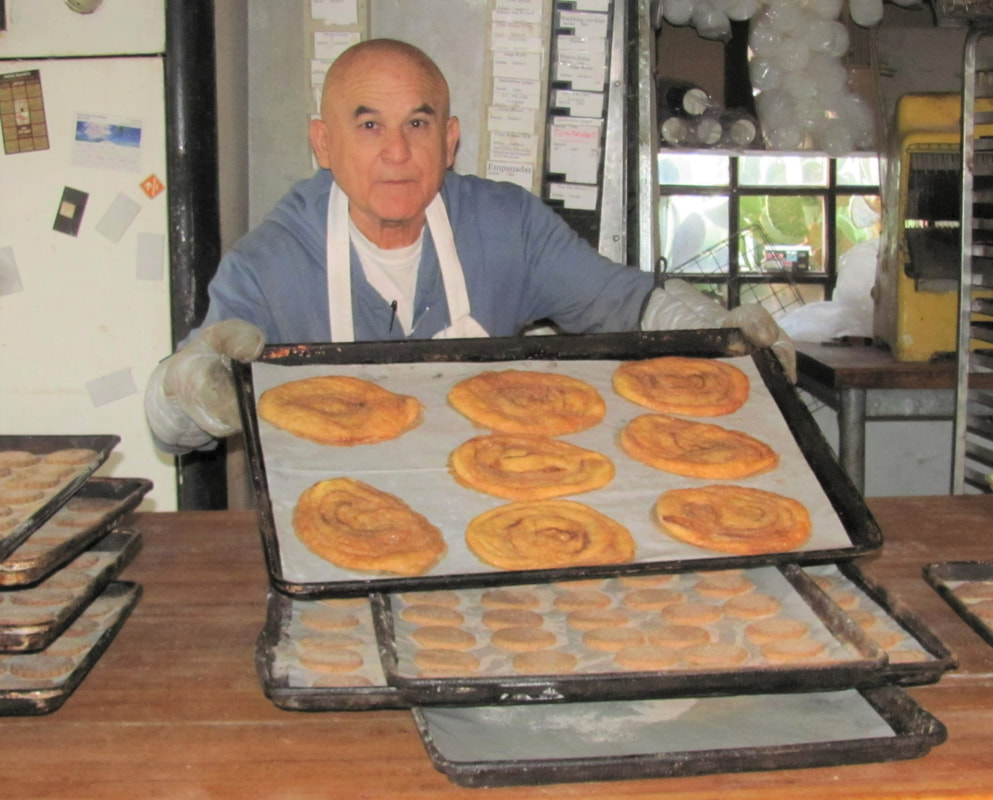 Pratt has created bread dough horse-drawn carriages, and full-sized turkeys that bear an uncanny resemblance to real birds, and his sculpted bread was featured on Food Network's Food Finds show. The bakery has also supplied local businesses with biscochitos, pastries, sculpted bread, and pizza, for decades, including the Hyatt Hotel and Albuquerque Convention Center, "A little bakery like this is an art that should be preserved and shared with future generations," Pratt says.
A single father, Pratt sometimes allowed four-year-old Christopher to sleep on massive flour sacks. By age five or six, the boy greeted customers and helped to fill cookie bags. Today, Christopher is Golden Crown's general manager and architect of the bakery's thriving Internet business, with customers from as far away as Beijing, Buenos Aires, and Moscow. At the bakery, daily, Pratt attributes his boundless energy to his love of sports, and passion for his work. He runs for exercise, snowshoes, paddles a kayak, rides his bicycle, and walks wherever he can. 'I believe the mind controls the body," Pratt says. "Find your passion and you won't grow old." Please note: As is common in the travel industry, I may have received accommodations and other compensation for the purpose of review. While it has not influenced this post, the writer believes in full disclosure of all potential conflicts of interest. 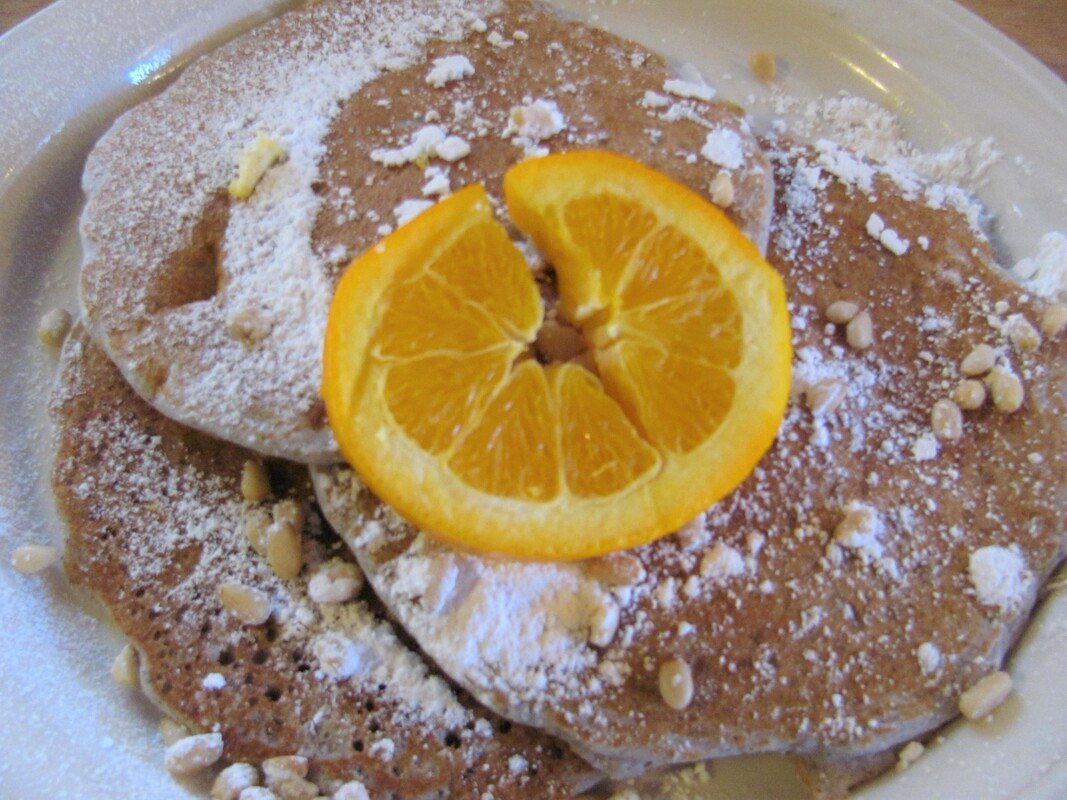 There's nothing like sampling local food & drink to get a true 'taste' of a destination. Layer on the influence of cuisines that reflect multiple cultures and I'm especially excited. Such has always been the case, during my Northern New Mexico travels. I stumbled upon Michael’s Kitchen, Restaurant & Bakery during my first Taos visit, in 1982. At that time, the restaurant had only been open for about eight years. But it has been a ‘must-do’ for me, through many additional visits. I love the restaurant's old-school vibe, with its creaking floors and handcarved, wood sun 'mural,' almost as much as I love the Atole (blue corn)-Piñon Pancakes and drooling over their enormous bakery case. 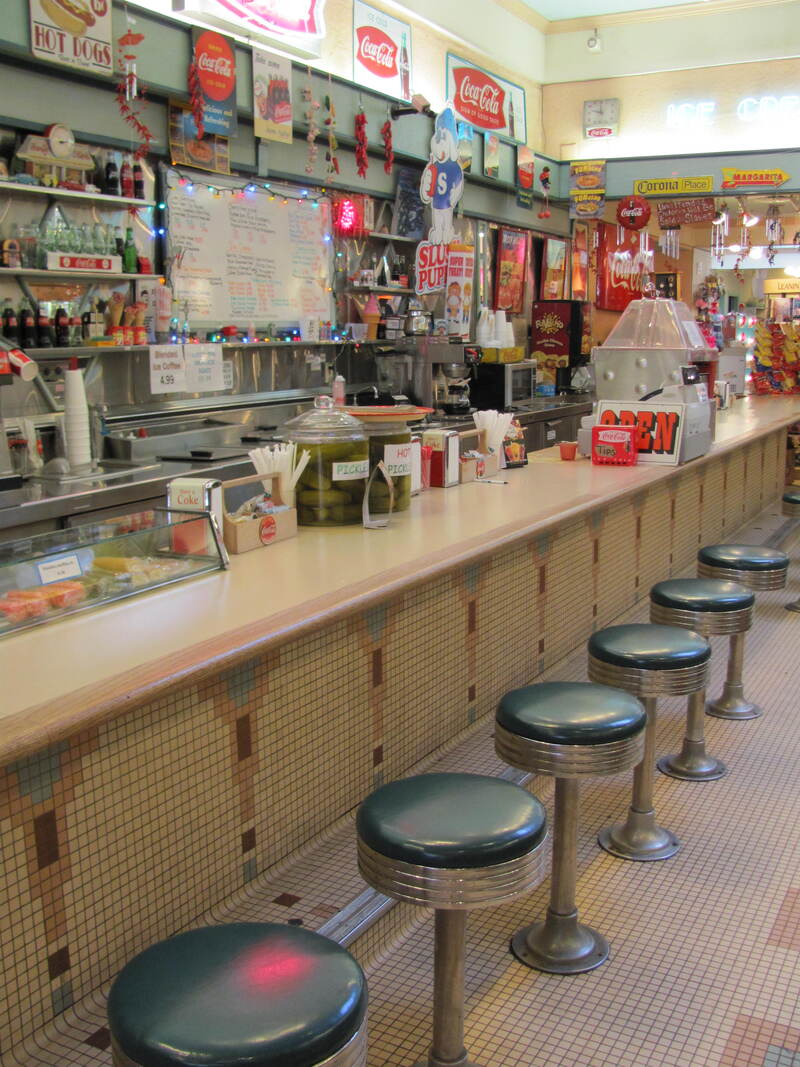 I've always been a sucker for an authentic soda fountain too. Taos Mercantile Co.'s soda fountain was another welcome surprise when I stumbled upon it. Yum! The funny thing is I had shopped in the retail area of this business multiple times, over the years, but hadn't previously zeroed in on this classic counter.  But perhaps my favorite Taos dining spot is Orlando’s New Mexican Café. Not far from Taos Pueblo, it's a world away from the pueblo's serene vibe (the Pueblo is not currently open). The restaurant is tiny and bright on the inside, with a comfortable patio full of tables with umbrellas and a wait list. We saw a gorgeous sunset on one evening, while toasting our recent arrival over big margaritas and tasty plates.
What are your favorite dining spots in Taos? I need to update my list, for my next visit! 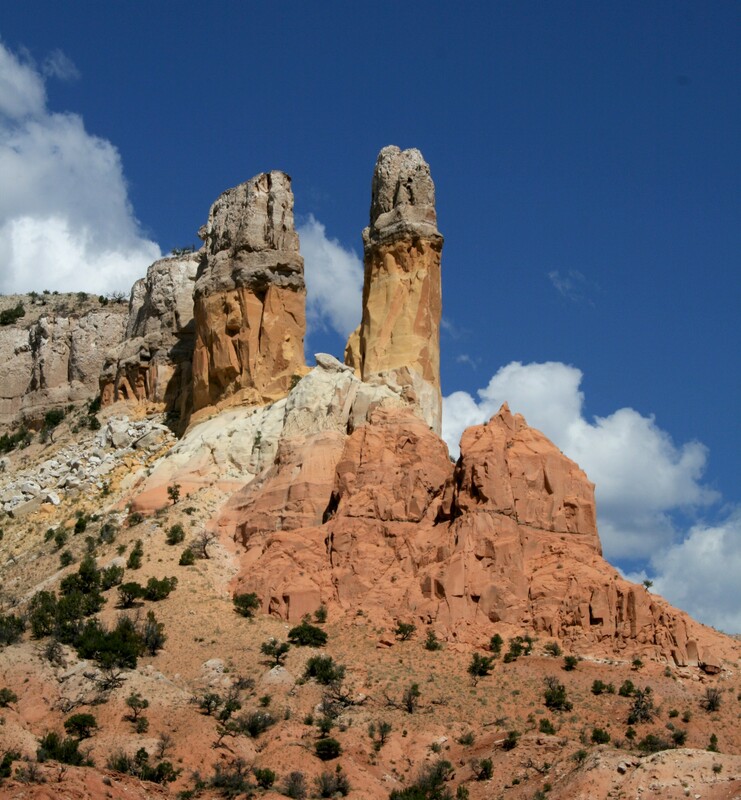 From her first visit to New Mexico the natural landscape, with its blend of indigenous and Hispanic cultures, captivated renowned artist, Georgia O'Keeffe. By 1929, she called northern New Mexico home, each summer. Twenty years later, upon her husband's death in New York, O'Keeffe became a permanent resident of the state. There is haunting natural beauty at O'Keeffe's Ghost Ranch property. Sixty-five miles northwest of Santa Fe, it functioned as her summer home. Rock spires thrust into the brilliant blue sky atop massive rock walls colored with wide mineral striations. 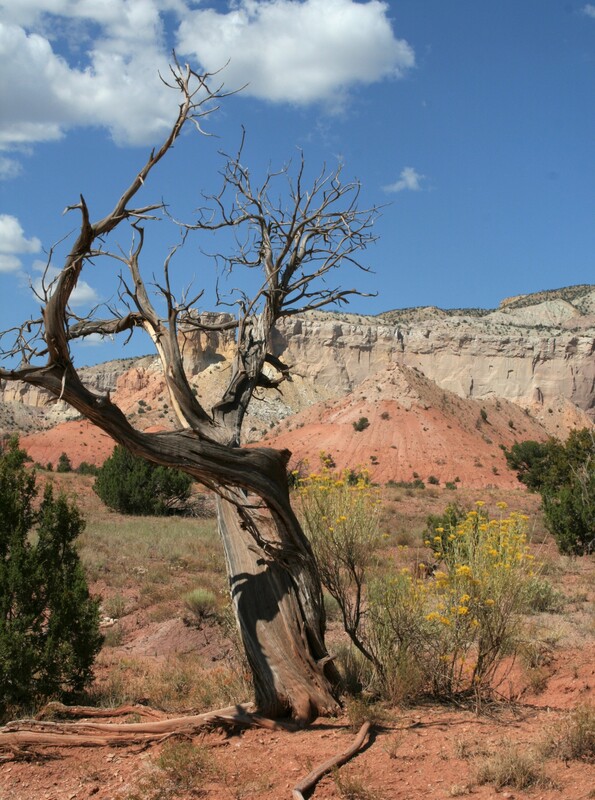 O'Keeffe bought this house and surrounding acreage, and then occupied the property for decades. She painted many of her landscapes at the west end of the ranch, including numerous, naturally twisted juniper trees. 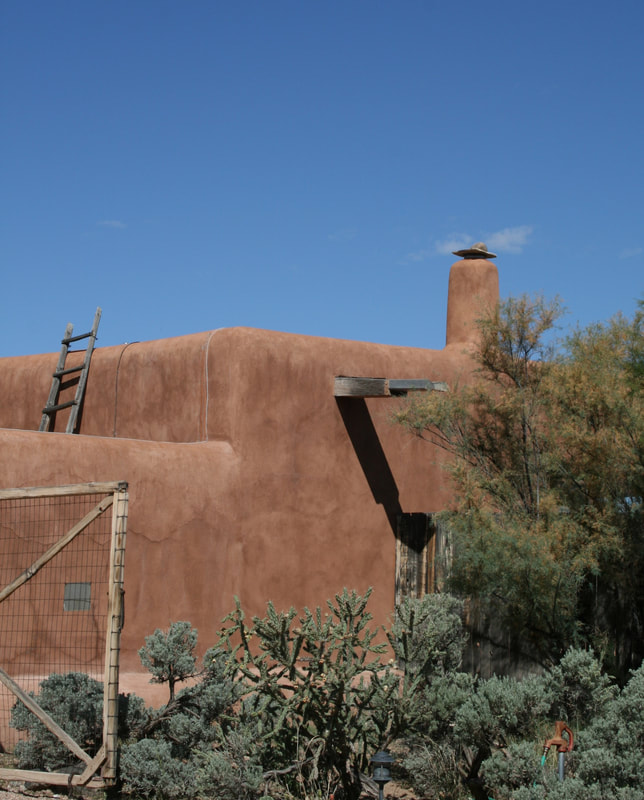 O’Keeffe’s other New Mexico property, in Abiquiú, is only 12 miles from Ghost Ranch, and more suitable for year-round occupancy. Here she looked out massive picture windows onto quiet mesas, mountain vistas, and wide fields from her simple, unadorned white bedroom, where stones and bones lined the windowsill. 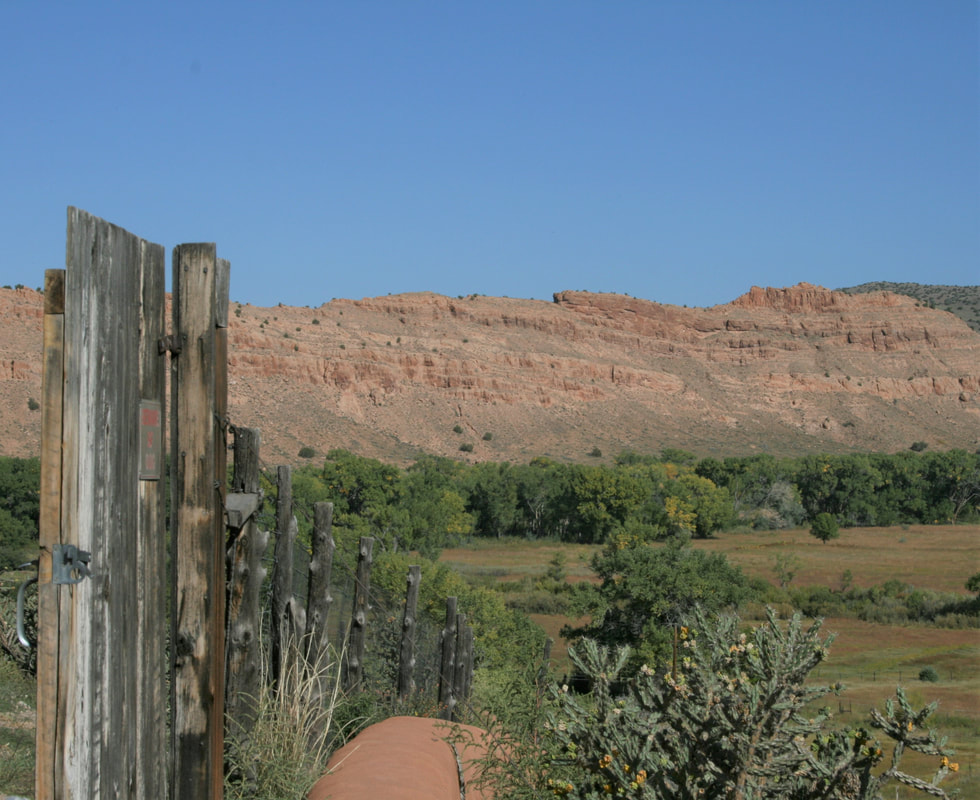 With construction of some rooms likely dating to the 1700s, the property combines indigenous and Spanish Colonial architecture influences. After a four-year renovation of the 5,000-square-foot buildings and courtyards, O’Keeffe adopted the Abiquiú property as her primary home.
Since 1998, the artist’s O’Keeffe Home and Studio has been a designated National Historic Landmark. Please note: As is common in the travel industry, I may have received accommodations and other compensation for the purpose of review. While it has not influenced this post, the writer believes in full disclosure of all potential conflicts of interest. 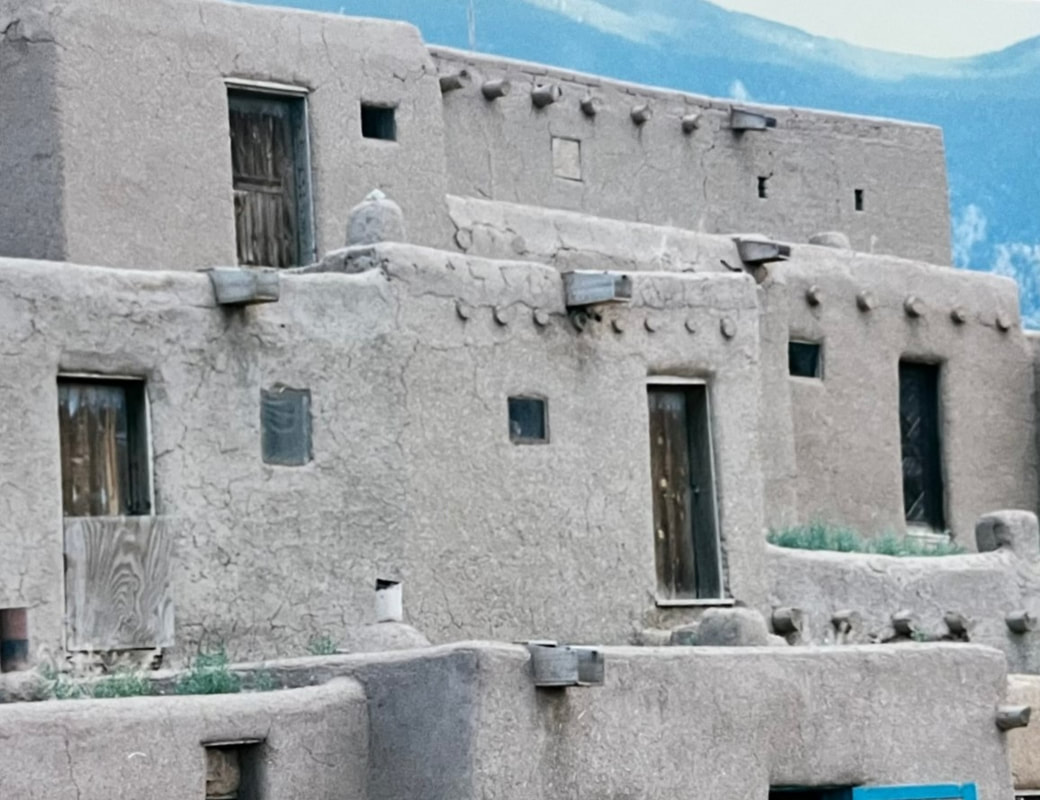 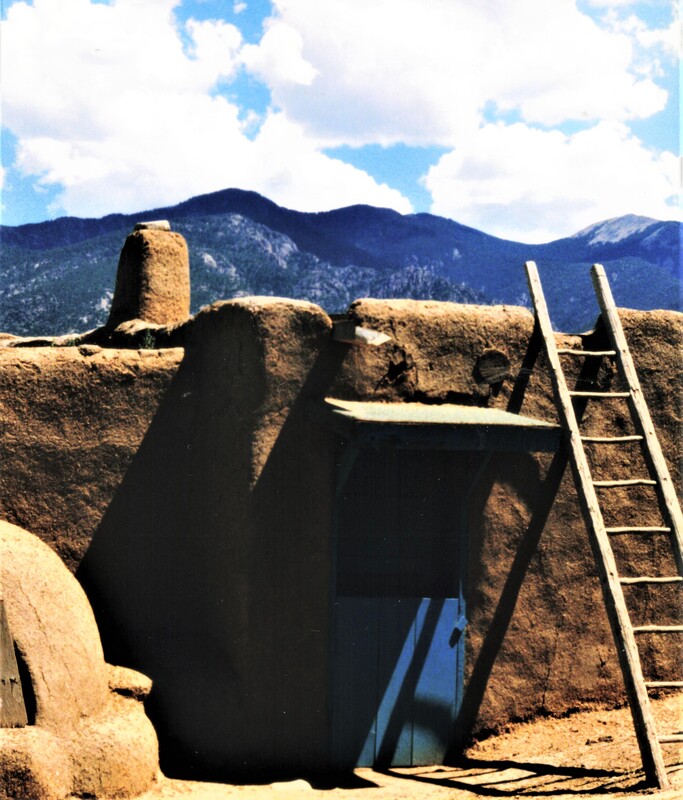 Whether I have traveled through Taos, Santa Fe, or Ojo Caliente Mineral Springs Resort & Spa, rustic wood and painted doors in this area have always captivated me. If you have followed this series of New Mexico-focused blog posts, you already know I have a very special affinity for Taos Pueblo (not currently open to the public, due to COVID concerns). The above photos come from several visits I had the privilege of making in the past. 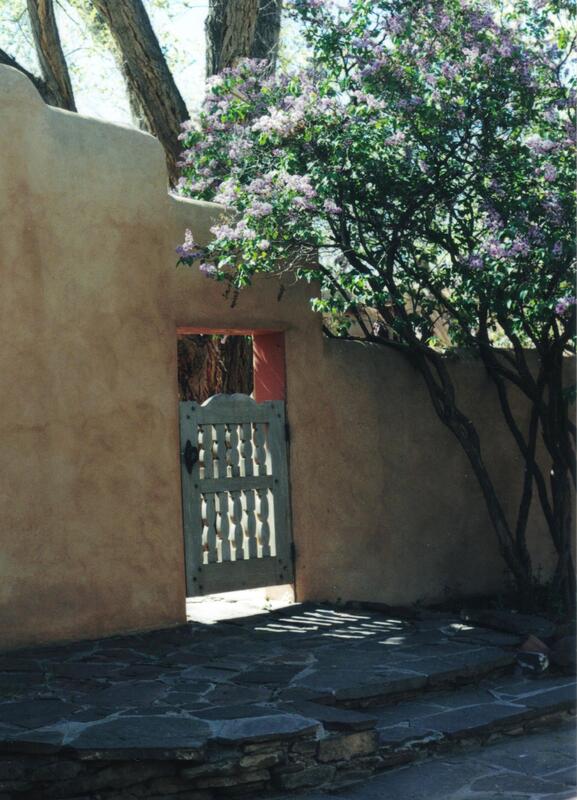 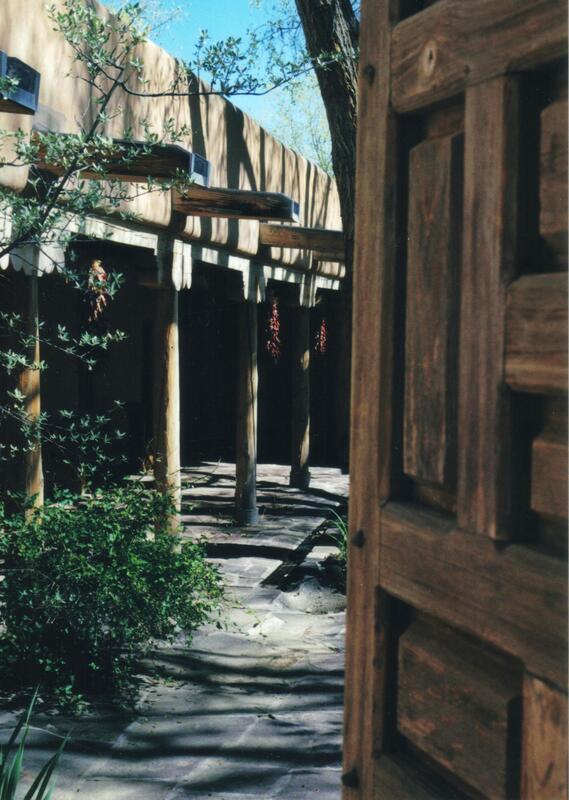 In Taos, I visited a private home, several times. A garden gate, and a carved door, welcomed guests through a tall adobe wall, which surrounded the entire property. The carved door opened onto a broad courtyard where numerous chile ristras hung. 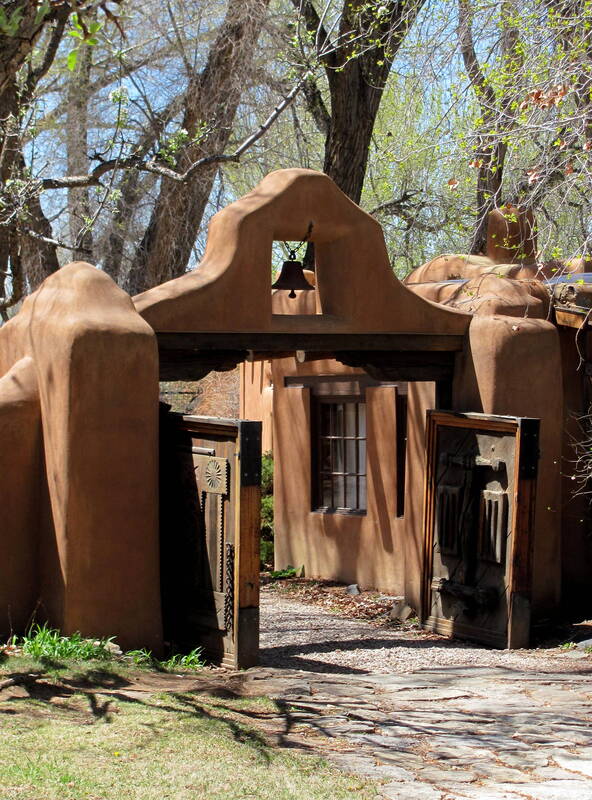 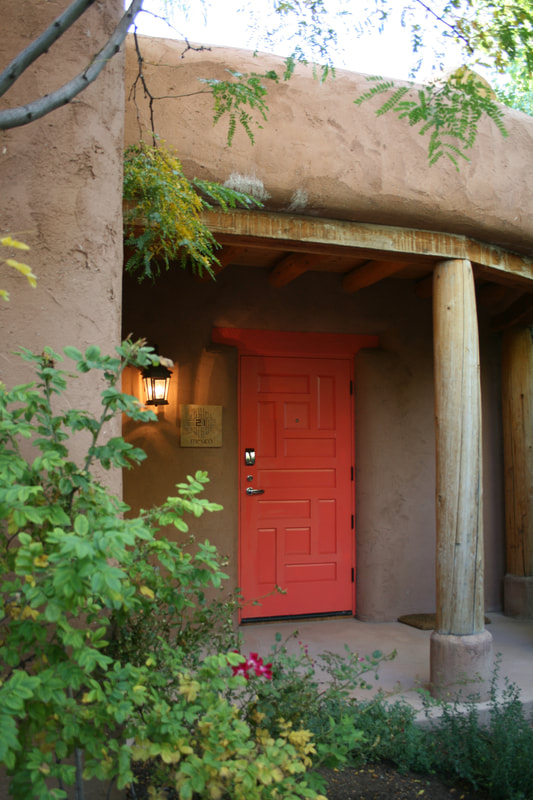 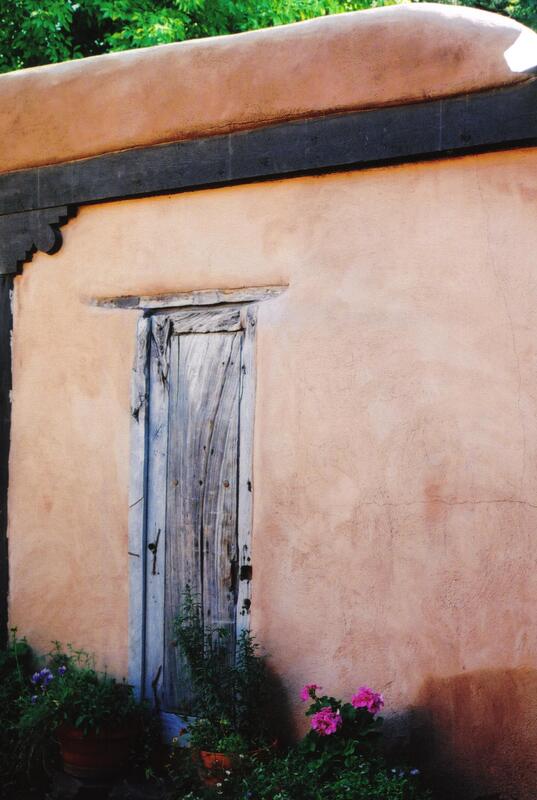 While traveling with an artist friend, we toured The Mabel Dodge Luhan House, at the end of a quiet Taos country road. Once home to a renowned patron of the arts, it also served as a magnet for artistic luminaries that included Georgia O’Keeffe, D.H. Lawrence, Ansel Adams and Martha Graham, to name a few. During a different visit, our press group had the pleasure of spending several nights at Taos' El Monte Sagrado, a luxury hotel that sits only blocks from the city's historic plaza-full of shops and restaurants, where individual casitas had brightly painted doors. Almost everywhere there's a patio, in Taos, you'll find another one-of-a-kind door, too. 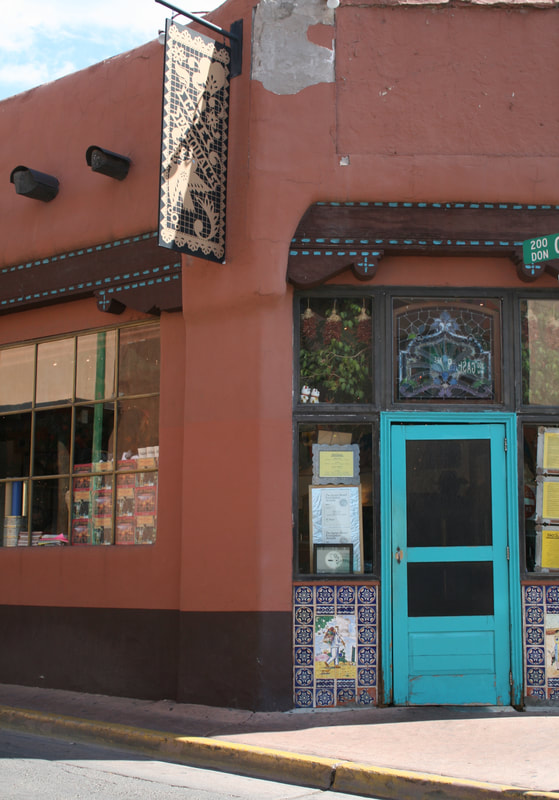 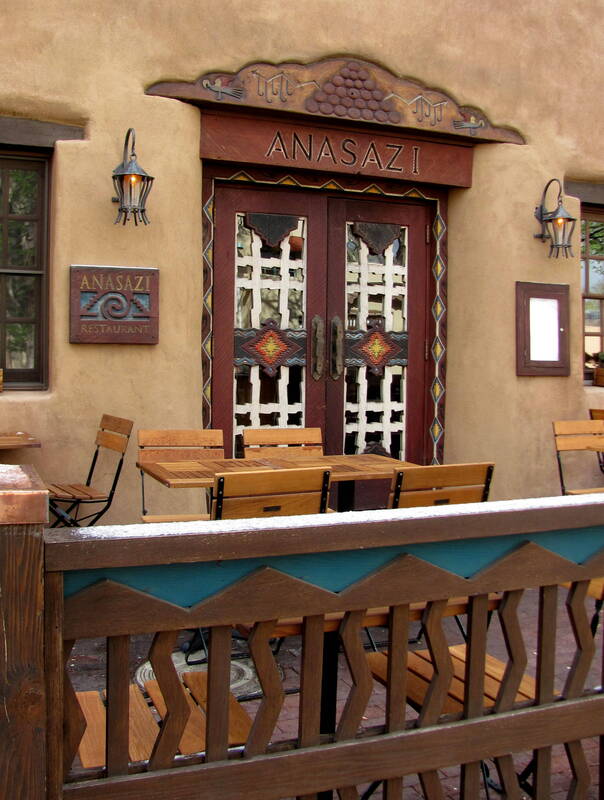 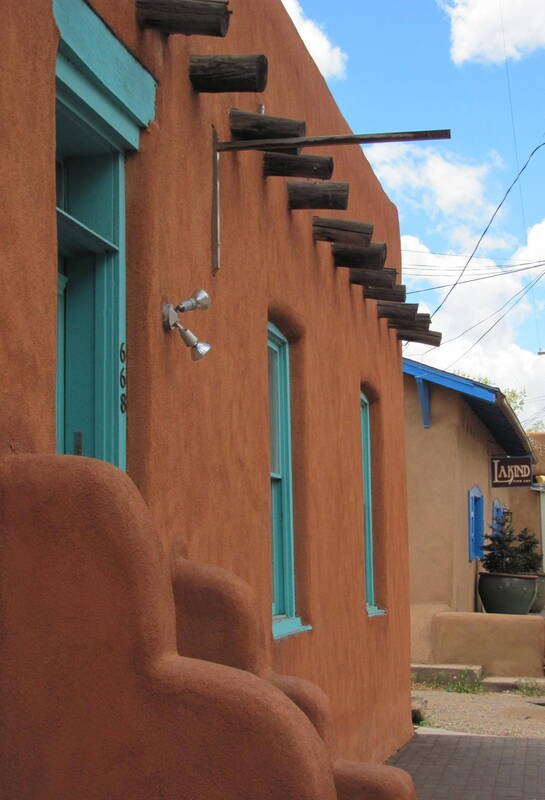 For classic New Mexico and other inventive cuisine, a meal at Cafe Pasquale's is a must. Opened in 1979, the bustling restaurant, shop, and gallery offers breakfast, lunch or dinner favorites, from green chile-flecked griddled polenta to a Oaxacan tamale or Mole Enchiladas. There's more great food inside the cozy dining room at Rosewood Inn of the Anasazi, where an unexpected dusting of snow greeted us on a chilly spring morning. And arts lovers can indulge their passion while visiting more than 100 galleries in the Canyon Road neighborhood. Jewelry outposts and restaurants also dot this vibrant area. 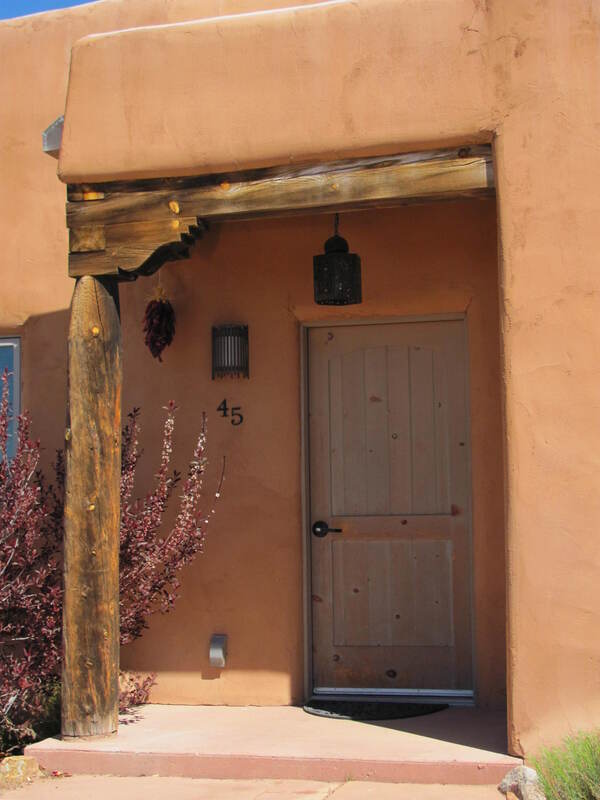 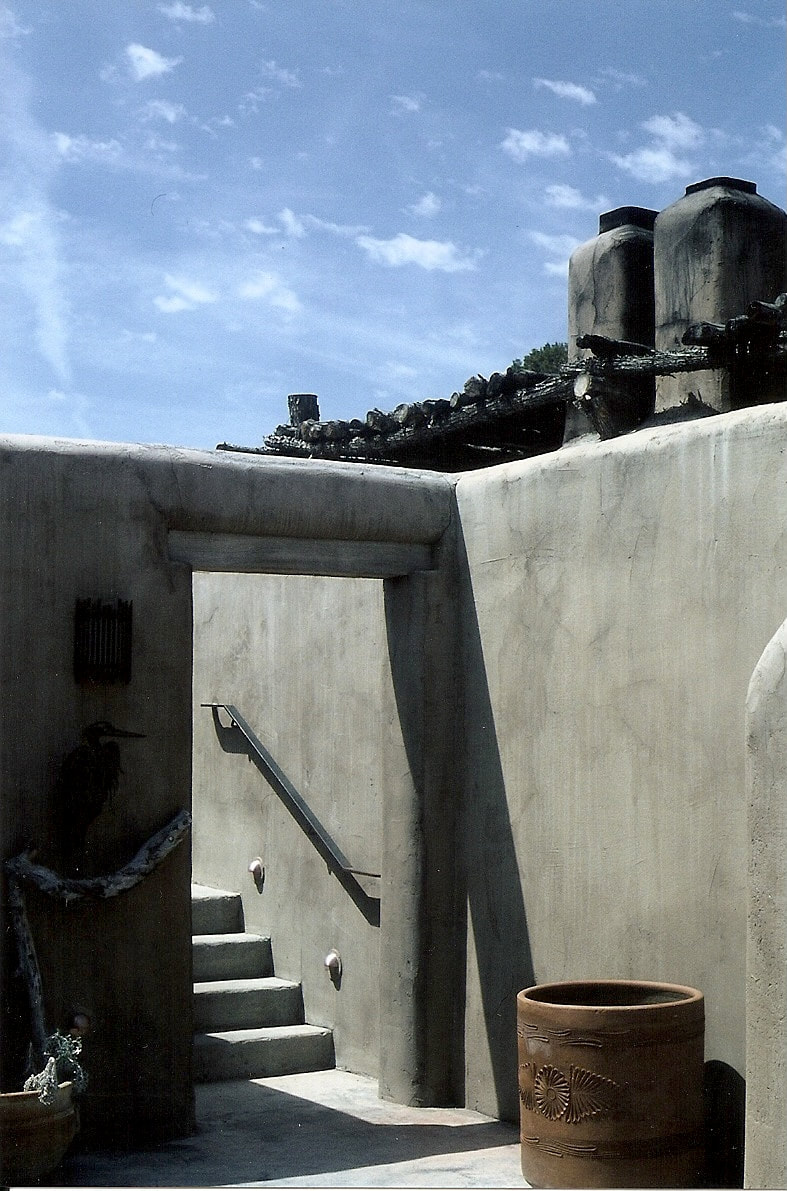 There are many lodging choices at Ojo Caliente Mineral Springs Resort & Spa but a gorgeous door leads inside, no matter where you stay. And when it comes to using one of Ojo's private pools this entryway-though not a door-is especially inviting.
Please note: As is common in the travel industry, I may have received accommodations and other compensation for the purpose of review. While it has not influenced this post, the writer believes in full disclosure of all potential conflicts of interest. 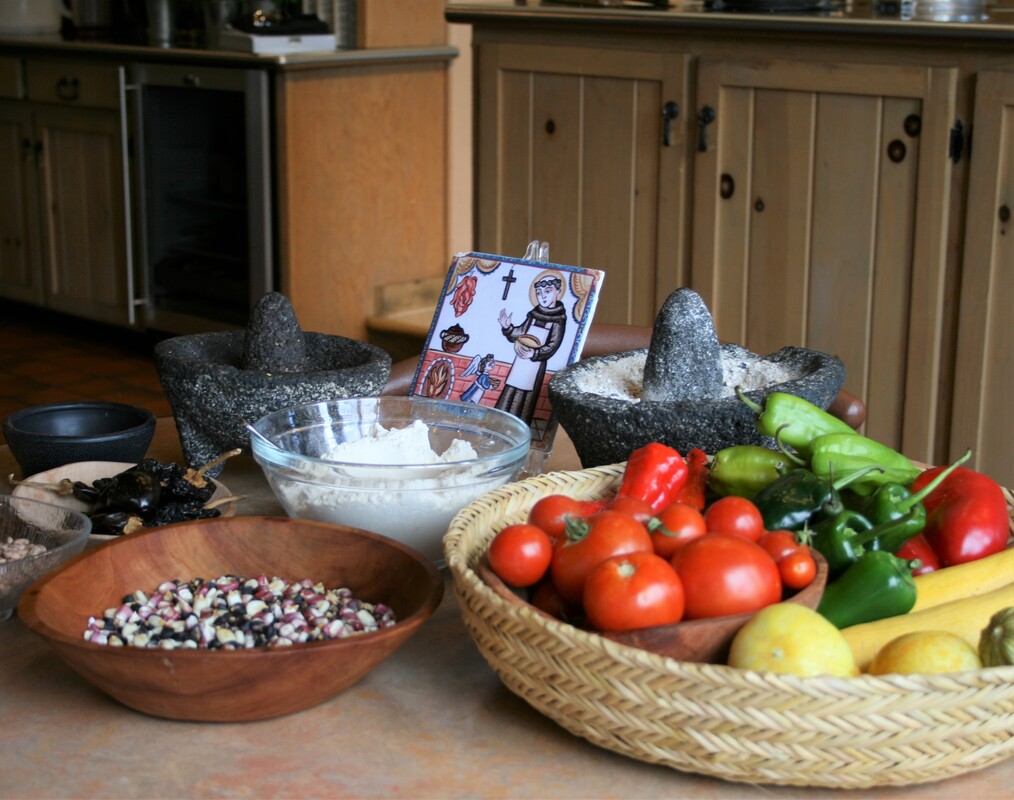 Sunlight filled the dining room at the Santa Fe School of Cooking, where tiny bouquets of red- and coral-colored chiles filled small metal buckets on each table. Chile ristras decorated kitchen doors and walls, while a broad mirror above the prep counter assured that our class of 15 travel writers and p.r. staff could clearly see meal preparations. A grey stone mocajete (‘the world’s first Cuisinart’) full of ground corn meal sat beside a woven bowl brimming with tomatoes, chiles and squash, and a wooden bowl full of multi-colored dry beans. From a handmade ceramic tile San Pasqual, the patron saint of kitchens, ‘oversaw’ a bowl of blackened, roasted chiles. Our chef host shared culinary history as he assembled ingredients. 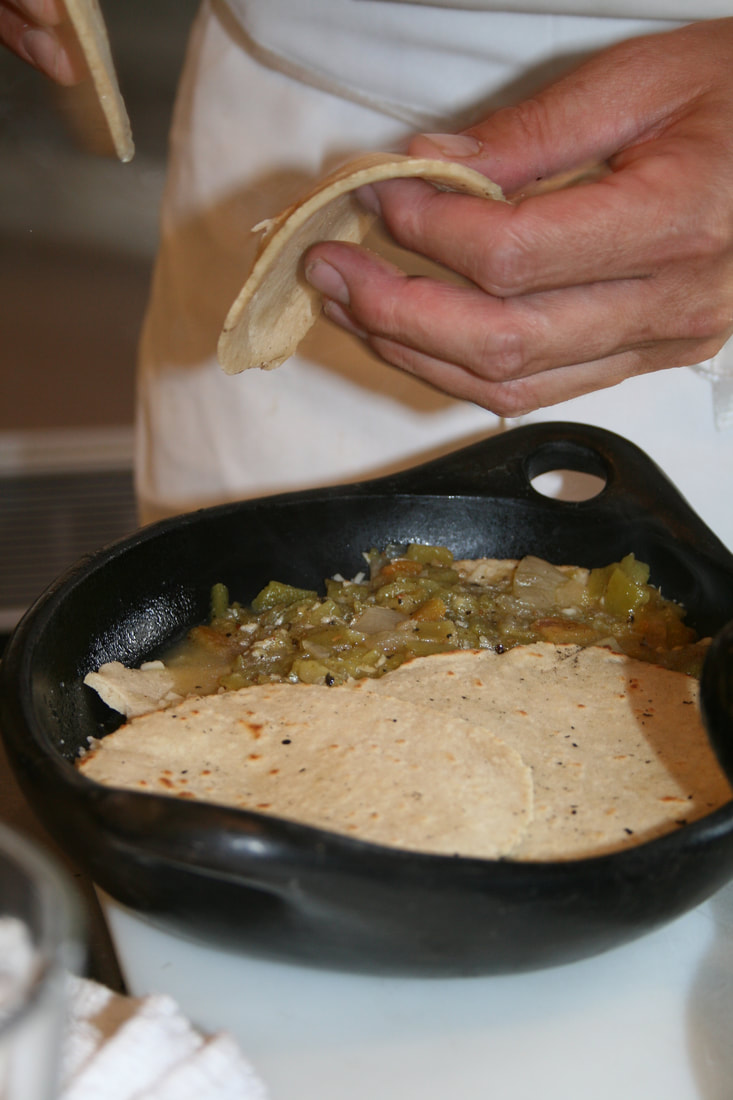 We learned American Indians long ago believed the gods gave them corn, and corn tortillas are among the world’s oldest prepared food. Beans, squash, tomatoes, potatoes and chiles were other building blocks of this indigenous cuisine. The chef helped us to create savory layered enchiladas in small well-seasoned cast iron skillets, with freshly made chile sauce and bite-sized chicken pieces. 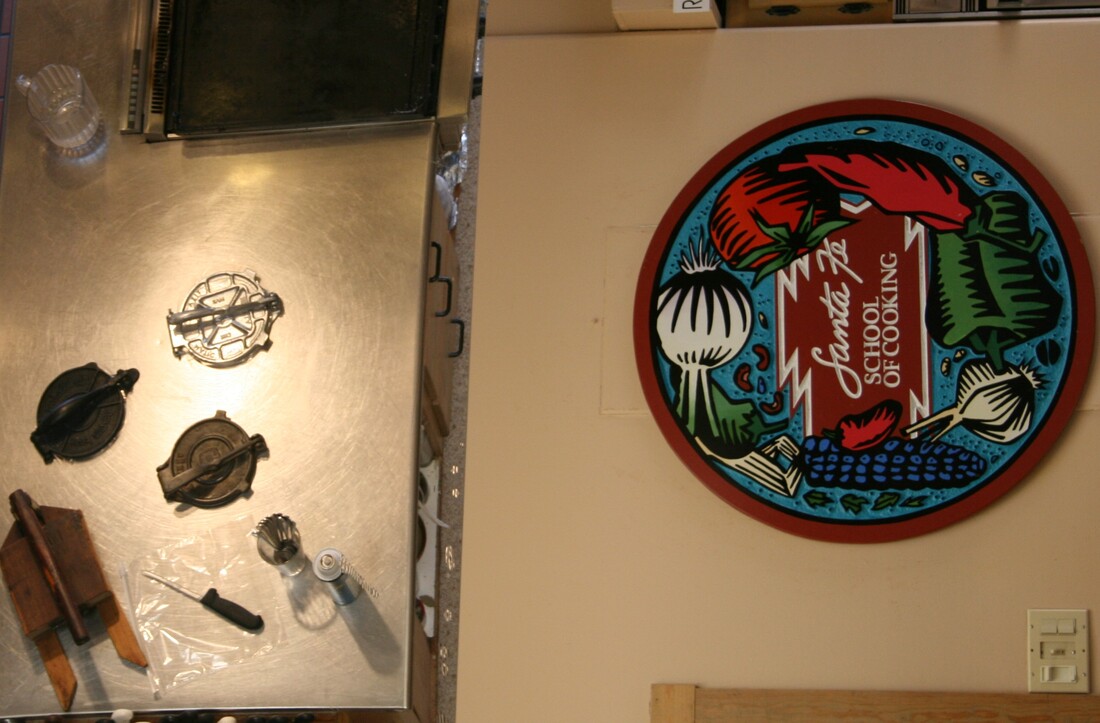 That was more than a decade ago, and the Santa Fe School of Cooking has been going strong since 1989. Multiple chefs, with many decades of culinary experience, offer a wide range of classes. With a PhD in culinary culture, James Beard award-winning author, Lois Ellen Frank, teaches about American Indian cuisine. Fiery food fans may enjoy the Santa Fe School of Cooking’s Green Chile Workshop, while participants in the SW (Southwest) Culinary Bootcamp savor multi-day hands-on, intensive culinary training. But it’s not all about New Mexico cuisine. From Middle Eastern dishes to culinary wisdom shared by a test kitchen chef, plus High-Altitude Baking, or a Farmer’s Mkt (Market) Class, there are loads of tasty choices. 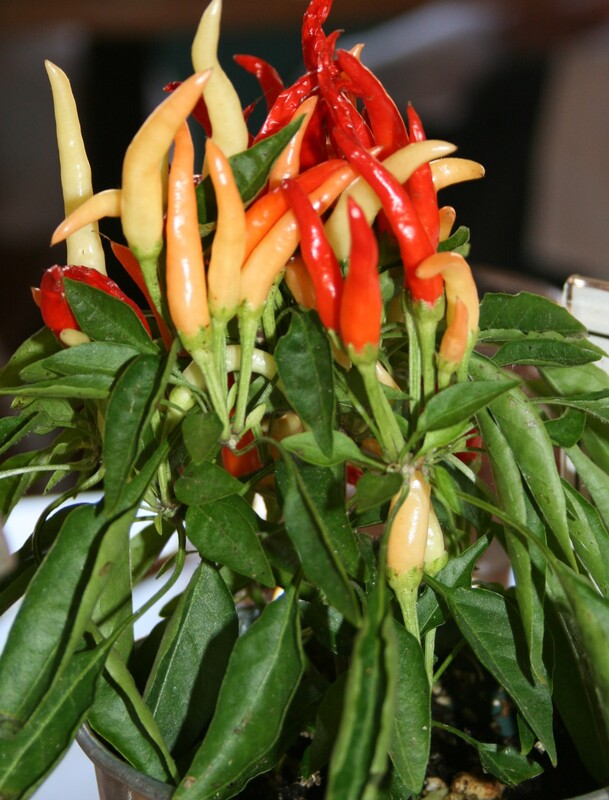 The popular cooking school also offers three distinct Fodor’s Travel Recommended Restaurant Walking Tours, with four stops, each. There’s a chef intro with food samples at the school, and then the tour begins. Varied cuisine includes regional favorites to modern classics, paired with private tastings involving restaurant chefs and owners, plus sommeliers.
Register for a class or a Restaurant Walking Tour, to enjoy a delicious taste of The City Different. Please note: As is common in the travel industry, I may have received accommodations and other compensation for the purpose of review. While it has not influenced this post, the writer believes in full disclosure of all potential conflicts of interest. 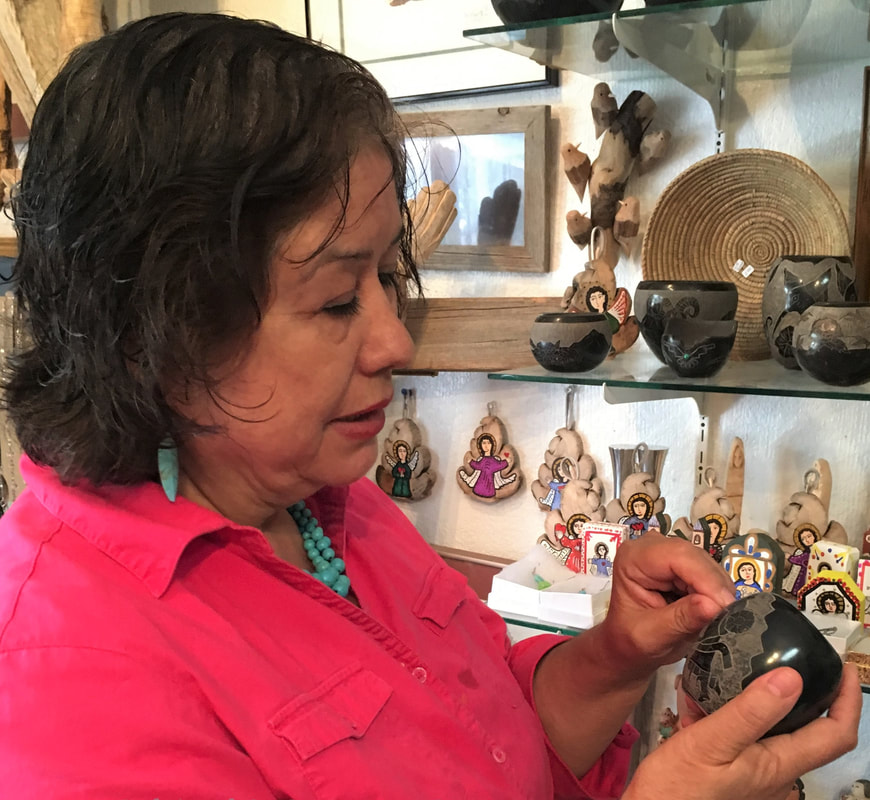 The High Road to Taos, and the town of Chimayo, burst at the seams with artistic beauty. On the trip between Santa Fe and Taos, we made our first stop at Theresa’s Art Gallery & Studio, which I had stumbled upon during my earliest visit to the area. What an unexpected treasure! Theresa Montoya warmly welcomed us to her brightly lit, art-filled space (temporarily closed, as of May 2022), wearing a brilliant pink shirt and a chunky turquoise necklace. She curates and showcases exquisite work, from carvings and weaving to tin pieces and pottery. They reflect Spanish Colonial, Native American and Jewish folk art. Over the years, the family’s own creativity has become well-respected and collected, with displays in numerous churches, museums, and galleries, including the Smithsonian in Washington D.C. and the Los Angeles Folk Art Museum. Montoya paints with oils, while her husband, Richard, has crafted modern takes on traditional retablos (small, colorful oil paintings, often made on tin, which historically depicted saints, Jesus, or the Virgin Mary), for many years. A big Beatles fan, he has immortalized them on numerous retablos, snapped up by enthusiastic collectors. Montoya knows the background of every piece she displays, such as when lines on pottery indicate the ups and downs of life. International customers are especially interested in the highly coveted polished black pieces that she carries, from Santa Clara Pueblo. Each pot is coiled and pinched by hand. It’s typically the nation’s most collectable, yet most expensive pottery. “I don’t have overhead and I'm a small businesswoman so Native Americans sell me pieces for less than half of what they sell for in Santa Fe,” says Montoya. 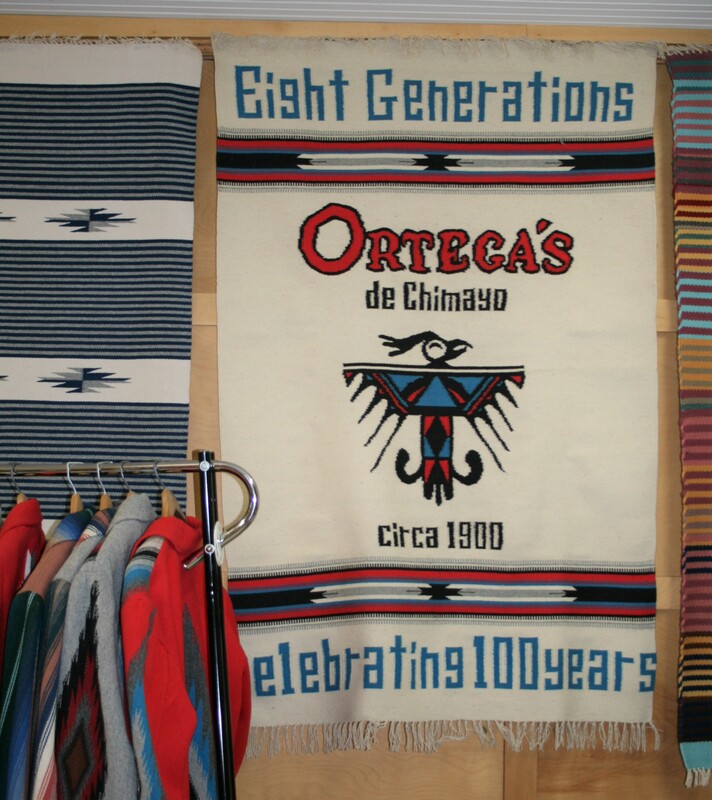 In the heart of Chimayo we stopped, briefly, at Ortega’s Weaving Shop, where the inventory of woven art has grown enormously since my first visit. I recalled the first rug that I bought here, more than 30 years earlier. A little larger than the size of a placemat, but with a much heavier ‘feel,’ it had a smoky gray background with black, white, and magenta designs that included a small bird. 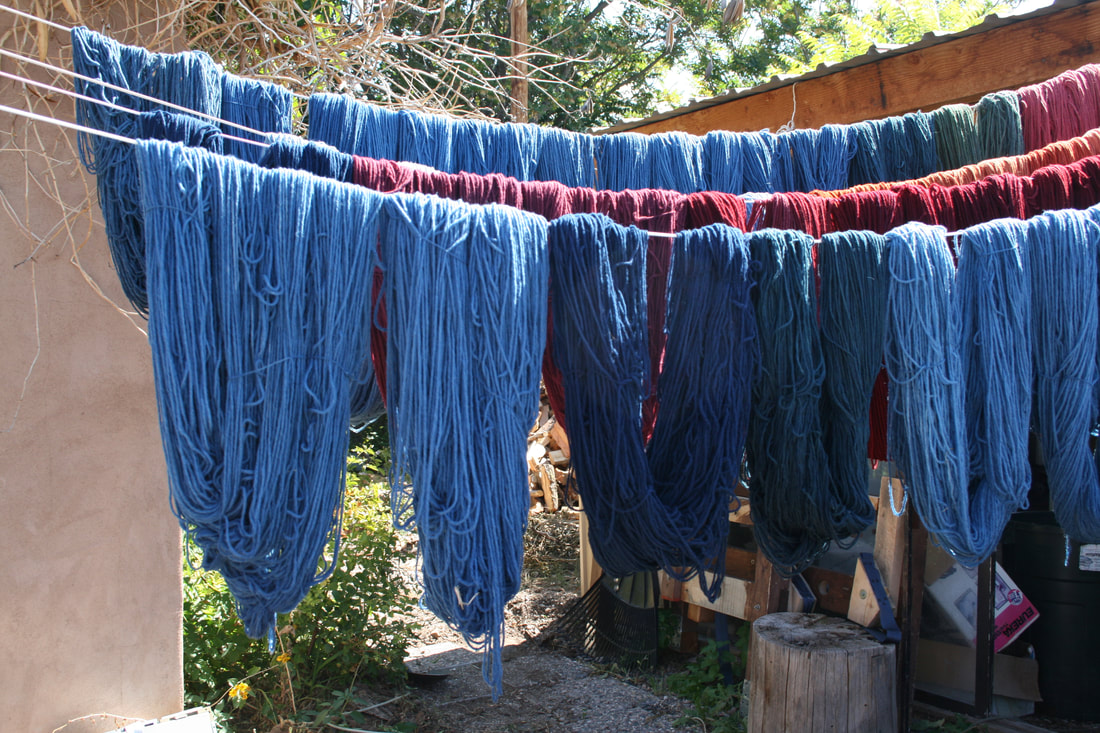 Our next stop was Centinela Traditional Arts, where we encountered large skeins of freshly dyed yarn, drying on a clothesline, in the sun. During my first visit, with a travel writer group, we met co-owners and spouses, Irvin, and Lisa Trujillo. Irvin bounded into the room and greeted us with all the enthusiasm of a kid in a candy store. Centinela is simultaneously his playground and workspace – a place where he shares the art that has infused his spirit with joy and satisfaction for more than 50 years. His wife, Lisa’s quiet yet welcoming presence provides calm counterpoint to Irvin’s ebullient spirit. 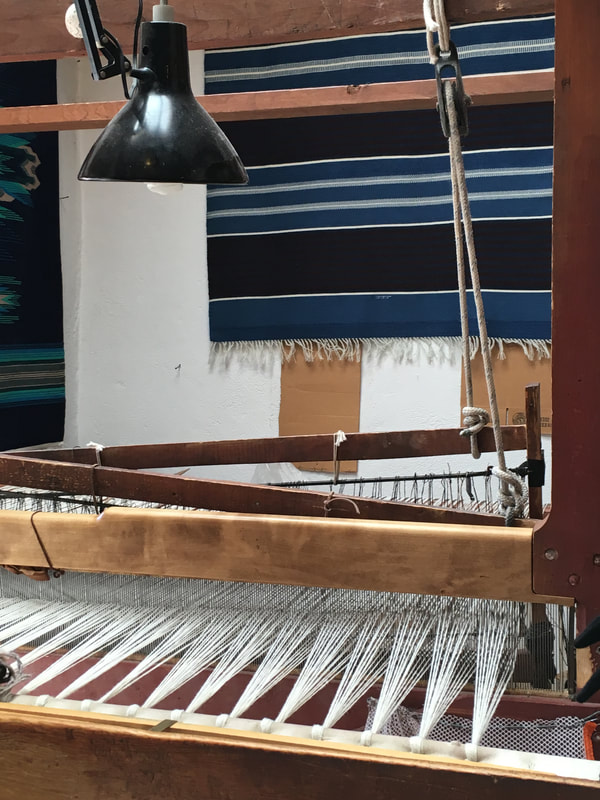 Continuing a seven-generation family tradition of weaving Chimayo blankets, Irvin has fulfilled commissions for Japanese clients, to Ralph Lauren. He was also a National Endowment for the Arts National Heritage Fellow 2007 and held a 2009 show at the Museum of International Folk Art in Santa Fe. Lisa is expert in the art of Colca – Spanish regional embroidery – and her saltillos, which take three months to complete, sell for more than $15,000. Since 1982, the Trujillos have showcased their craftsmanship and that of several dozen additional cottage and consignment New Mexico and Rio Grande weavers. Most of these artisans create their one-of-a-kind fiber art on homemade looms. You’ll find rugs and blankets with striped designs influenced by Mexican serapes, and modern styles with bands of peach, rose, and aqua. 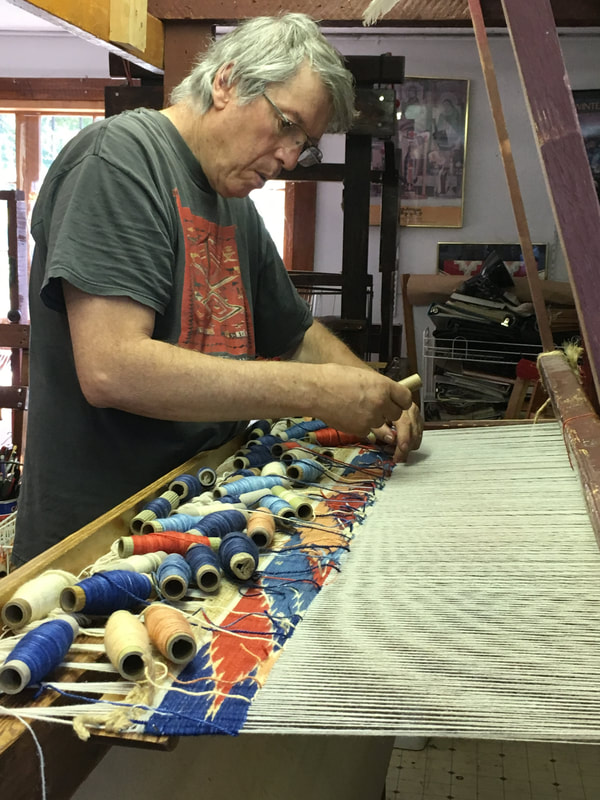 During our most recent visit, we were the only travelers at Centinela Traditional Arts. Lisa wasn’t in, but Irvin allowed us to briefly watch him work on a loom in the back room. We could easily see that he was ‘in the flow,’ while creating his singular art.
Please note: As is common in the travel industry, I may have received accommodations and other compensation for the purpose of review. While it has not influenced this post, the writer believes in full disclosure of all potential conflicts of interest. 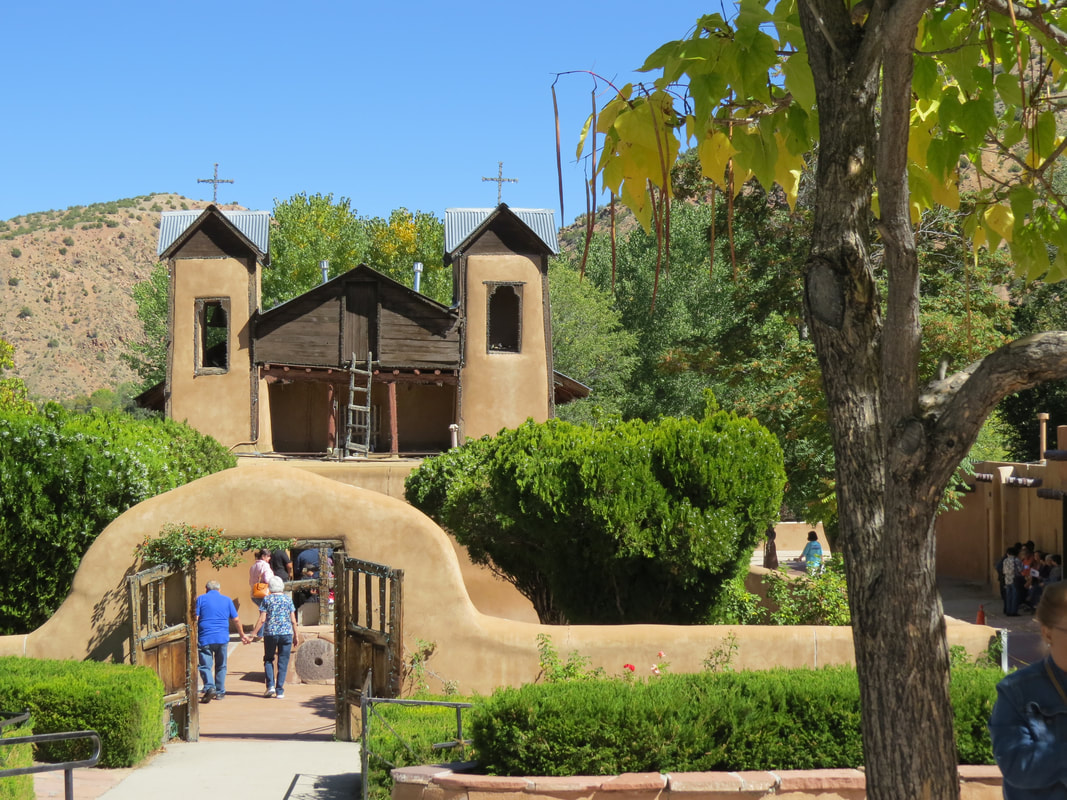 I have already used the term ‘magic’ in several previous posts. But, once again, the term seems appropriate. My best friend, Ellen, wasn’t feeling well as we toured northern New Mexico together. We, of course, spent time in Santa Fe and Taos. We also visited tiny Chimayo, along the ‘High Road to Taos’ when driving from Santa Fe. The town is full of amazing weaving, paintings, pottery, and jewelry, which artist Ellen appreciated despite her illness. Chimayo is also the home of legendary El Santuario de Chimayo. Nestled among the Sangre de Cristo mountains, El Santuario de Chimayo has been a place of worship since the early 1800s, drawing American Indians, Hispanics, and other people of faith. Today, this ‘Lourdes of America’ attracts more than 300,000 visitors, annually. 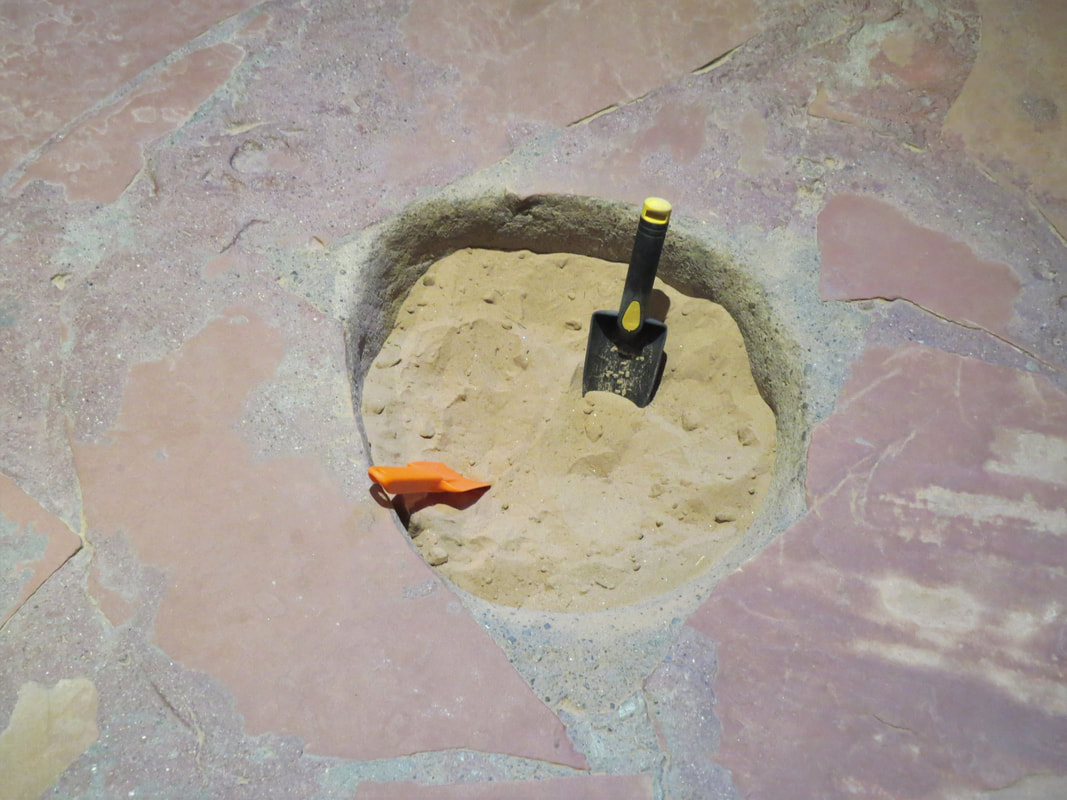 The compact adobe sanctuary, with its resplendent altar, invites private worship and attendance at services, while many visitors also ask for healing. In fact, numerous discarded crutches, canes and even wheelchairs filled a small room off one side of the sanctuary. There is also a small circular pit of dirt – or el pocito – in the anteroom floor, which many people believe has amazing curative powers. 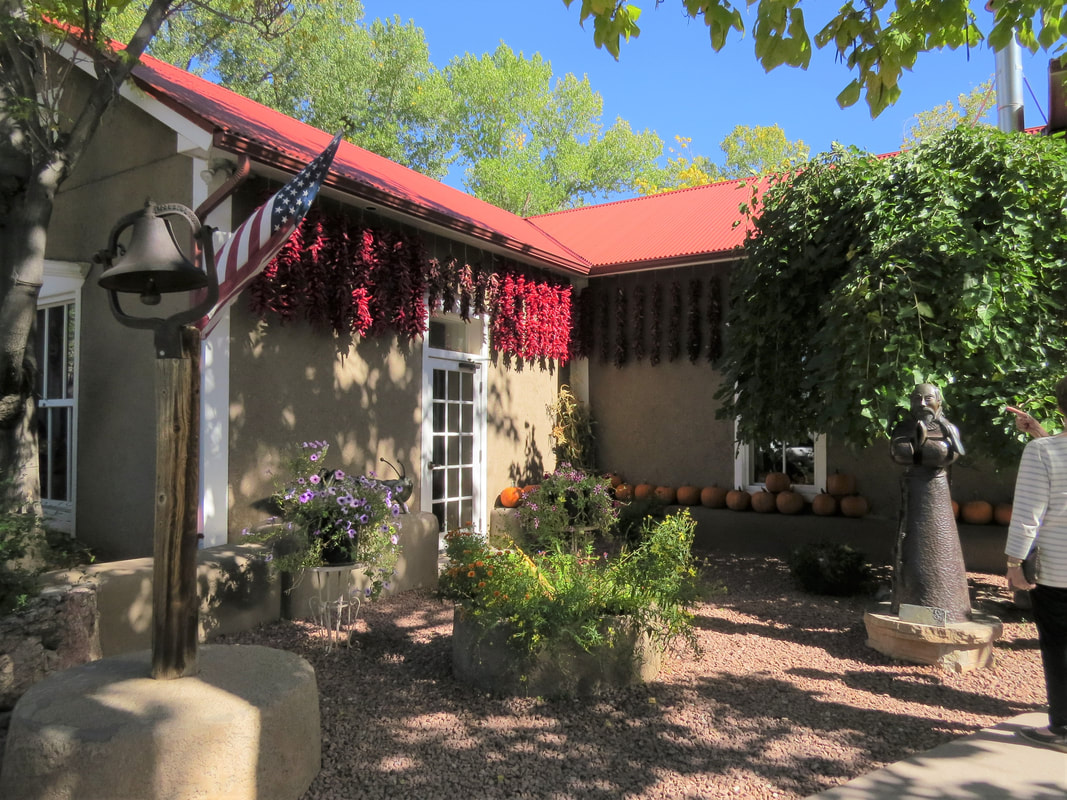 After about an hour at El Santuario, we decided to dine at the nearby, iconic Rancho de Chimayo. It had been decades since my first visit there. After a devastating 2008 fire, the restaurant underwent a massive restoration that preserved original adobe walls, structural elements, and authentic building features. Dozens of red chile ‘ristras’ decorated the restaurant’s exterior and large old trees provided shade.  The family-owned restaurant celebrated 50 years of operation during 2014. By 2016, Rancho de Chimayo achieved rockstar status as it received the James Beard Foundation America’s Classics Award. Changing seasonally, the menu may feature anything from shrimp blue corn enchiladas, and prickly pear margaritas, to delicate flan, and Carne Adovado Burrito.
I couldn’t wait for Ellen to taste this delicious food, while hoping that it might also help her feel better. Over the years, one thing that had bonded the two of us was a shared awareness of energy changes in the environment, largely through practicing energy healing. But neither of us was prepared for what happened immediately after we placed our orders. I noticed that Ellen’s table setting was vibrating near her hands, and she said, “I feel like a million bucks.” That’s when she realized her foot had inadvertently dipped into el pocito during our visit to Santuario de Chimayo. And she remained healthy for the rest of our trip. Please note: As is common in the travel industry, I may have received accommodations and other compensation for the purpose of review. While it has not influenced this post, the writer believes in full disclosure of all potential conflicts of interest. 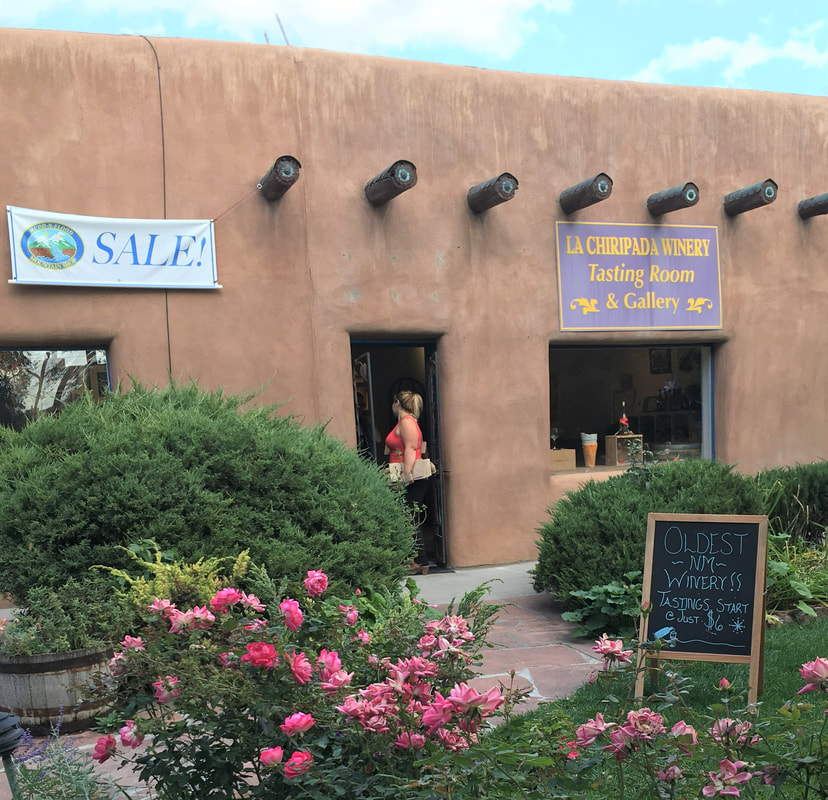 I remember driving towards La Chiripada Winery, between Santa Fe and Taos, during my first trip to the area. I also remember carefully driving across dirt and gravel, only to find the winery wasn't open. Imagine my delight when I bumped into a winery tasting room, in the heart of Taos. A confirmed white wine drinker, at the time, I sampled several reds too. Much to my amazement, La Chiripada's port captivated me so thoroughly that I purchased a bottle to enjoy at home. 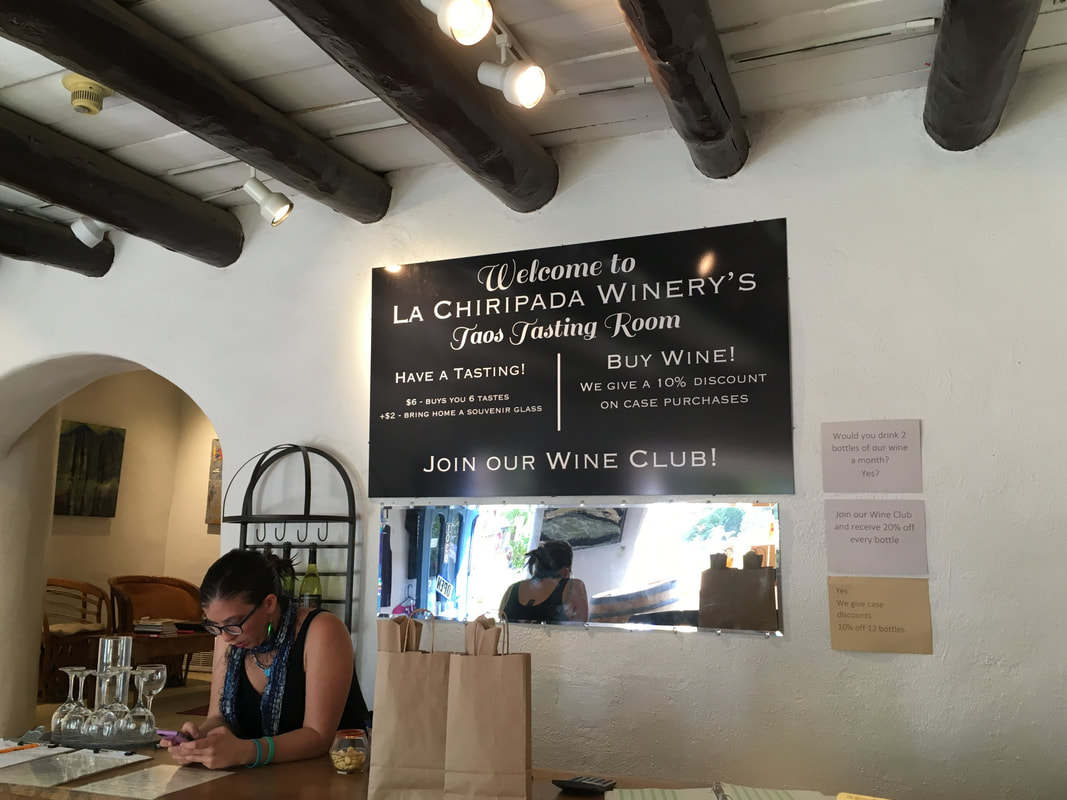 Established in 1981, New Mexico's oldest winery still has a Taos tasting room, although it has long since moved from the original location. The winery's name, “La Chiripada” means, “a stroke of luck” or “a lucky fluke”. Now a confirmed red wine lover, I always look forward to my tasting room visits, which I have enjoyed during trips with several different female friends. Rio Embudo Red was another favorite on my next visit, which occurred many years later, after our daughters became young teens. 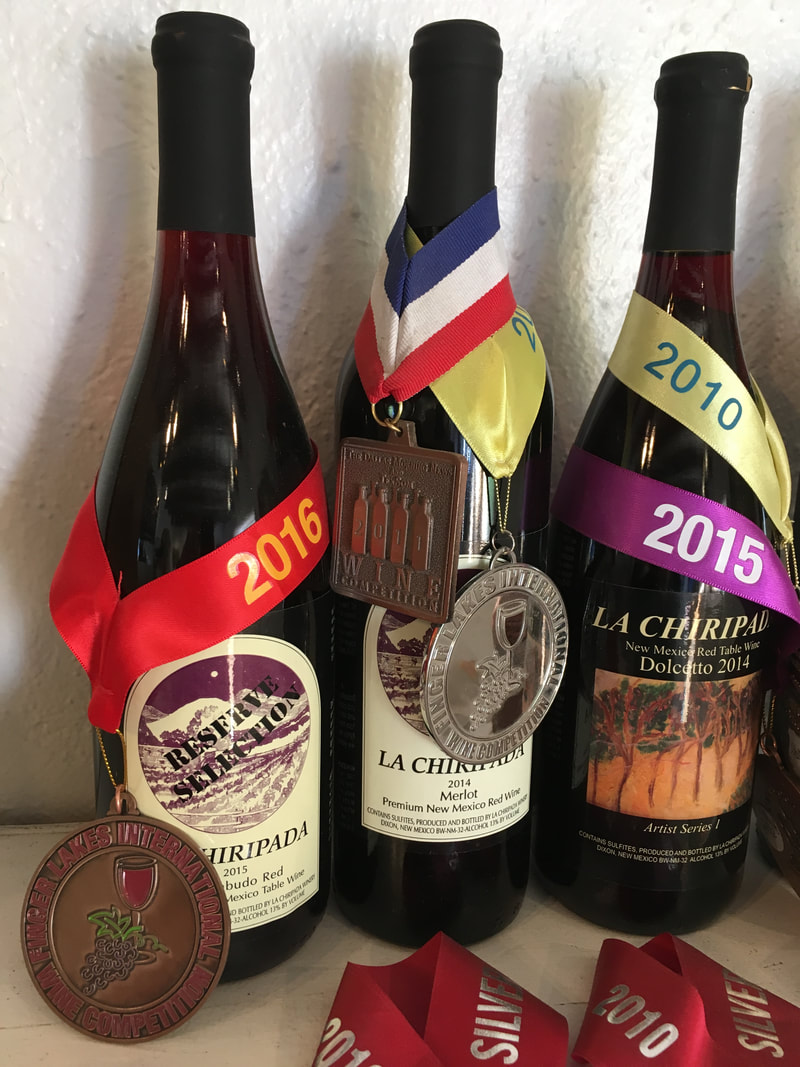 Often voted New Mexico's best winery, La Chiripada creates its multi-award-winning wines using regional grapes that can withstand the area's severe climate, while complimenting the state's signature cuisine. In fact, at 6,100 feet, La Chiripada remains one of the world's highest commercial grape growing entities.
Whether you visit the winery or sample La Chirapada wines in their Taos, Santa Fe, Albuquerque, Embudo, or Pojoaque tasting room, the delicious results will speak for themselves. My Northern New Mexico Love Affair: Relaxing at Ojo Caliente Mineral Springs Resort and Spa5/3/2022 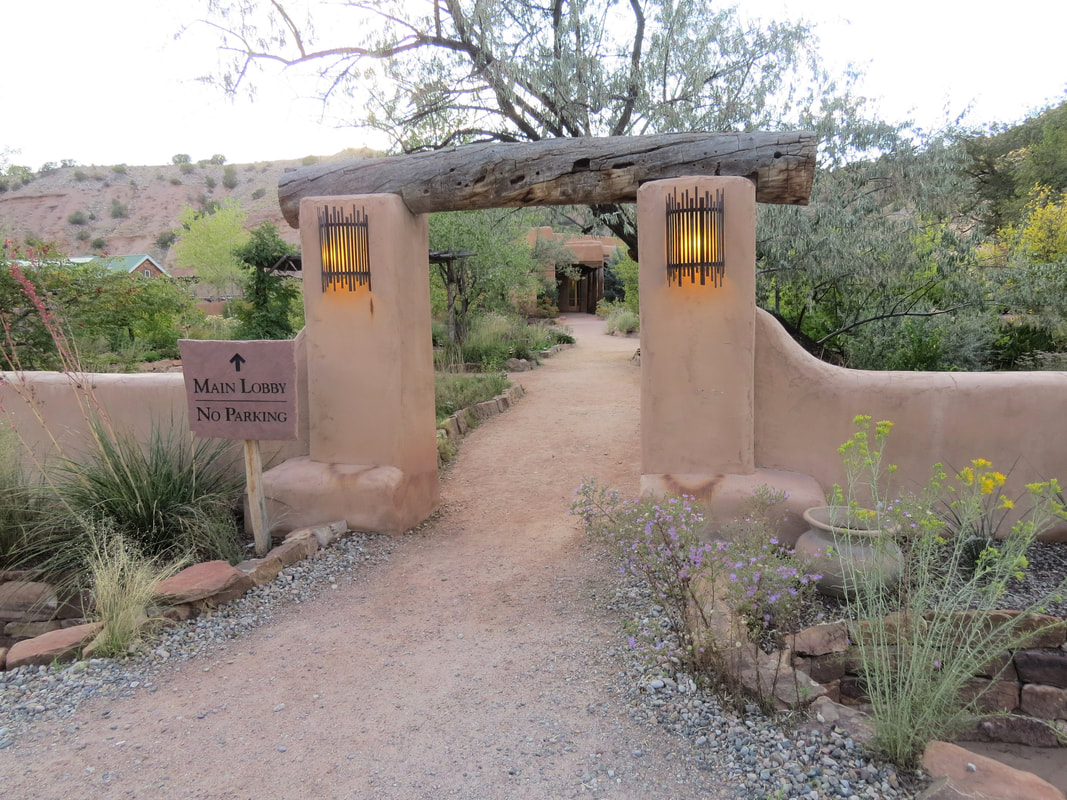 A two-lane road flanked the gurgling, tumbling Rio Grande. The road began a measured and then steep ascent through a spectacular valley of plunging inclines and breathtaking, massive rock formations, as pavement gave way to gravel. After climbing for 20 minutes, we wondered why we hadn’t seen any signs for Ojo Caliente Mineral Springs Resort and Spa, or whether we would ever see a paved road again. We stopped for snacks and directions at a tidy little roadside store. The owner said there were no signs along our cliffside drive because most people take a longer highway route to Ojo Caliente, and the pavement on our route would soon reappear. We arrived half an hour later. One copper circle inside another decorated a gushing stone-faced fountain at the entrance. Mirroring a petroglyph found in nearby ruins, the logo springs to life at night in ethereal spot lighting. This is the ‘hot eye’ and the springs’ namesake. The magic here begins with the unique collection of four geothermal mineral springs in a single location. And traveling through endless acres at Ojo Caliente was like driving through a Cezanne painting. Weathered and pock-marked rock walls in muted shades of brown and rust shielded the springs, while pale lavender and buttery yellow flowers, and olive green multi-branched cacti dotted the late-summer landscape. Near the adobe Round Barn, micaceous clay dust that remained from pottery classes painted headlight-illuminated windshields gold. During the winter season, Mother Nature drops sparkling snowflakes into the steamy pools. At Christmastime, Ojo Caliente’s staff has been known to provide hot chocolate for guests, and then ring tiny bells through the frosty air of each New Year’s Eve. 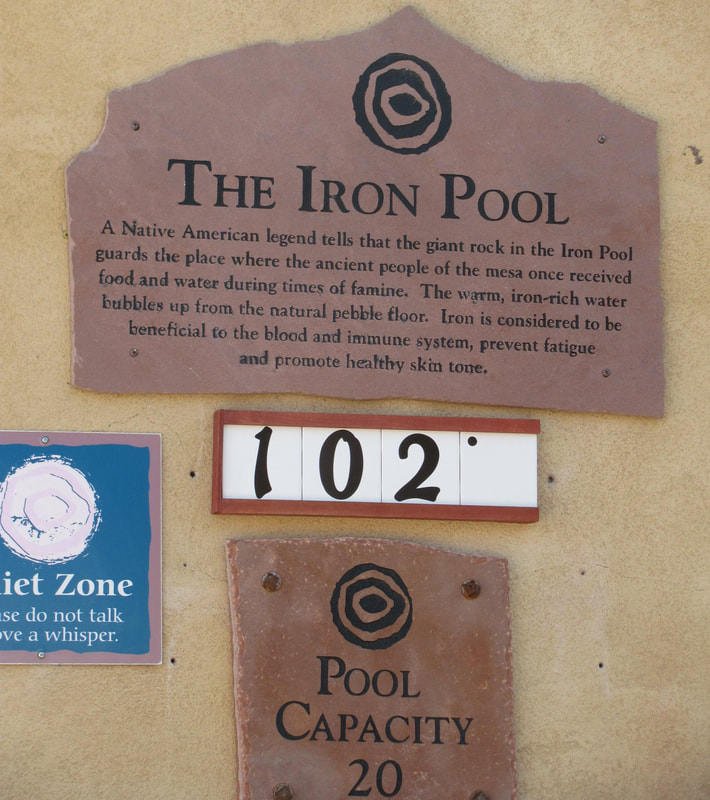 Although Ojo Caliente offers complete spa services, from massages to pedicures, it is the natural springs that draw many visitors. At 105 degrees, the arsenic pool is reputed to heal a variety of skin conditions and decrease arthritis and stomach ulcers. With a temperature of 109 degrees, the iron pool is said to benefit the blood, while the Lithia spring is considered a digestive aid and reliever of depression. Bathers whispered their conversations as they enjoyed the steamy waters. A spout between two pools ran warm and soothing against my neck and we floated almost effortlessly in the soda pool. 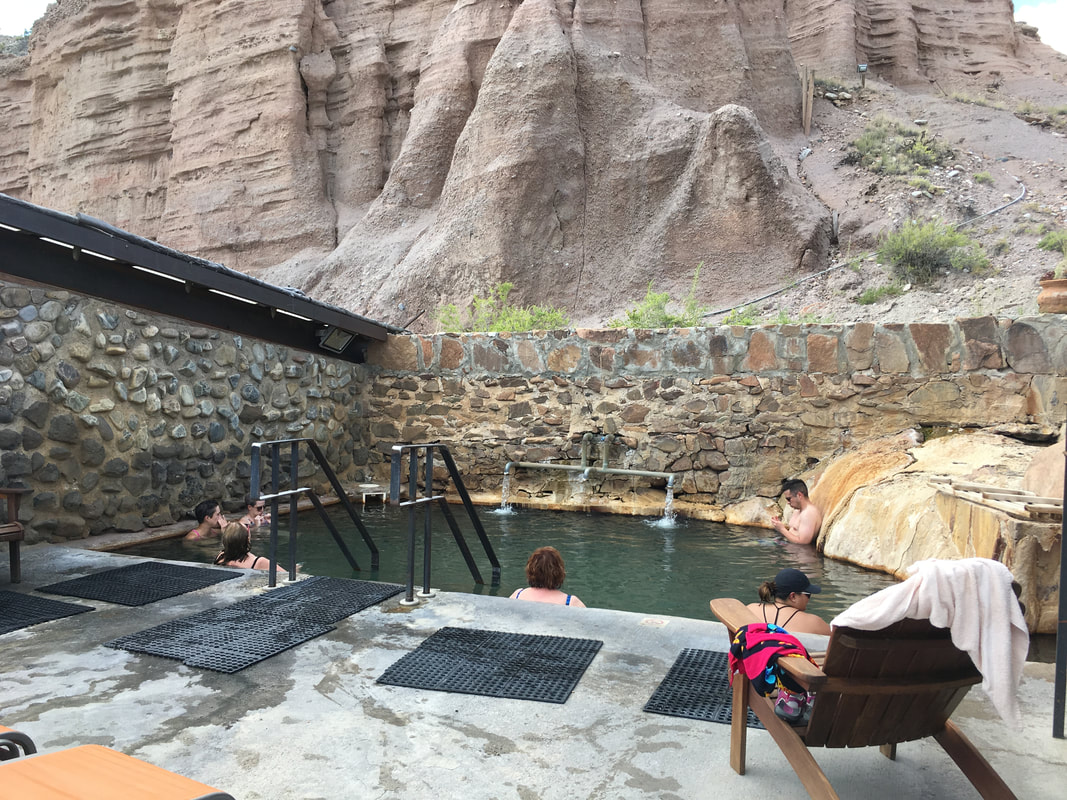 One of many available spa treatments, preparation for the detoxifying Milagro Relaxation Wrap required a dip in a mineral pool to help raise our body temperature. In a therapy room, minimal light and soothing music greeted us as we laid quietly on massage tables, tightly wrapped us in blankets. My toes become immobile, and I could barely wiggle my fingers. But I drifted into meditation and felt surprised when an attendant loosened my blankets, 25 minutes later. 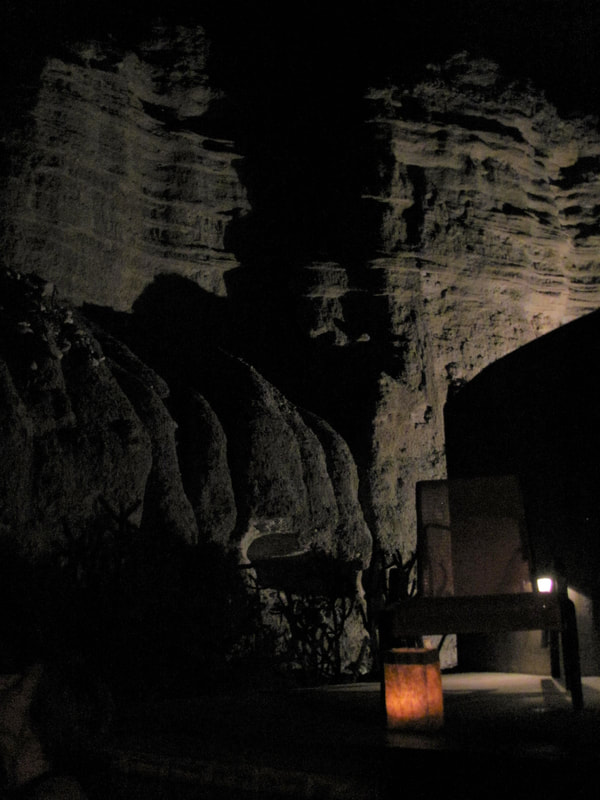 After dark, Ojo’s pools became private grottos with an otherworldly quality. As we slid into the warm individual pool we had rented, a dense blanket of stars filled the sky and a blazing piñon-wood fire burned in our small horno (fireplace). Backlit cliffs sent shimmers across the water.
It was the perfect end to a day of rest and relaxation. Please note that eco-friendly Ojo Caliente offers multiple lodging options and a full-service restaurant. In addition, these are older photos that may not accurately reflect the resort's current appearance. Finally, Ojo Caliente has completed a major reconstruction project following a massive fire that took place there, in August 2020. Also, as is common in the travel industry, I may have received accommodations and other compensation for the purpose of review. While it has not influenced this post, the writer believes in full disclosure of all potential conflicts of interest. 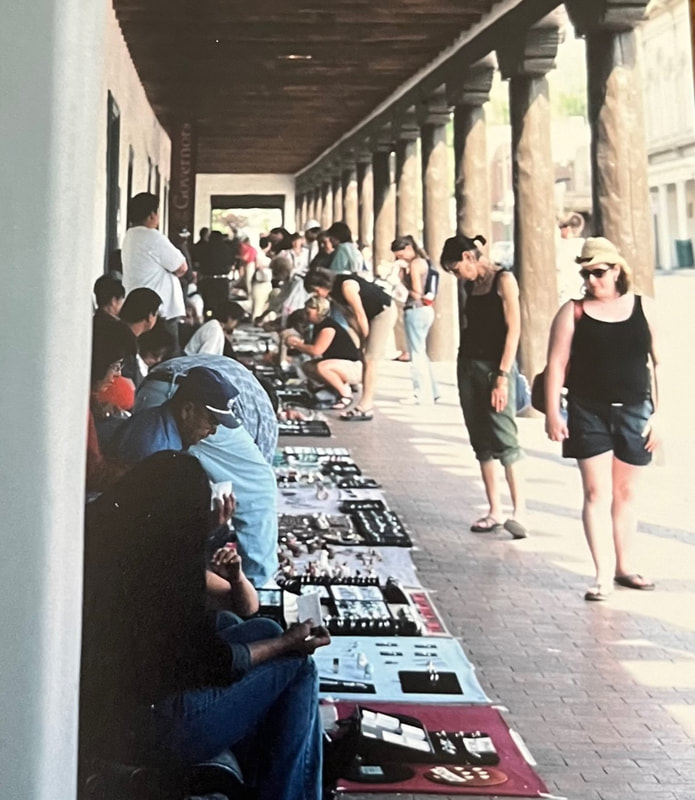 The ring I bought during my first visit to Santa Fe remains a fixture on my right hand, though the bird tracks have long since disappeared after decades of wear. But this isn't the only jewelry I bought from a vendor with the Native American Artisans Portal Program, at the Palace of the Governors. During a later visit, I purchased a pair of hammered silver earrings. I happily wore them numerous times, in the next several months, until one disappeared. Another few months passed as I retraced all of my steps in search of the missing earring, with no luck. That's when a bit of New Mexico magic kicked in again. A business card told me the name of the jewelry vendor, but provided no contact information. On a whim, I got in touch with the Portal Program office, provided the name of the vendor and sent them a photo of my remaining earring. Within a few weeks, Miriam contacted me, and sent a matching earring alongside a small bill. I was thrilled! Open daily, most vendors sell at the portal from 8:30 a.m. to 5 p.m. Customers can purchase Native American items here, handcrafted by dozens of artisans or their family members. 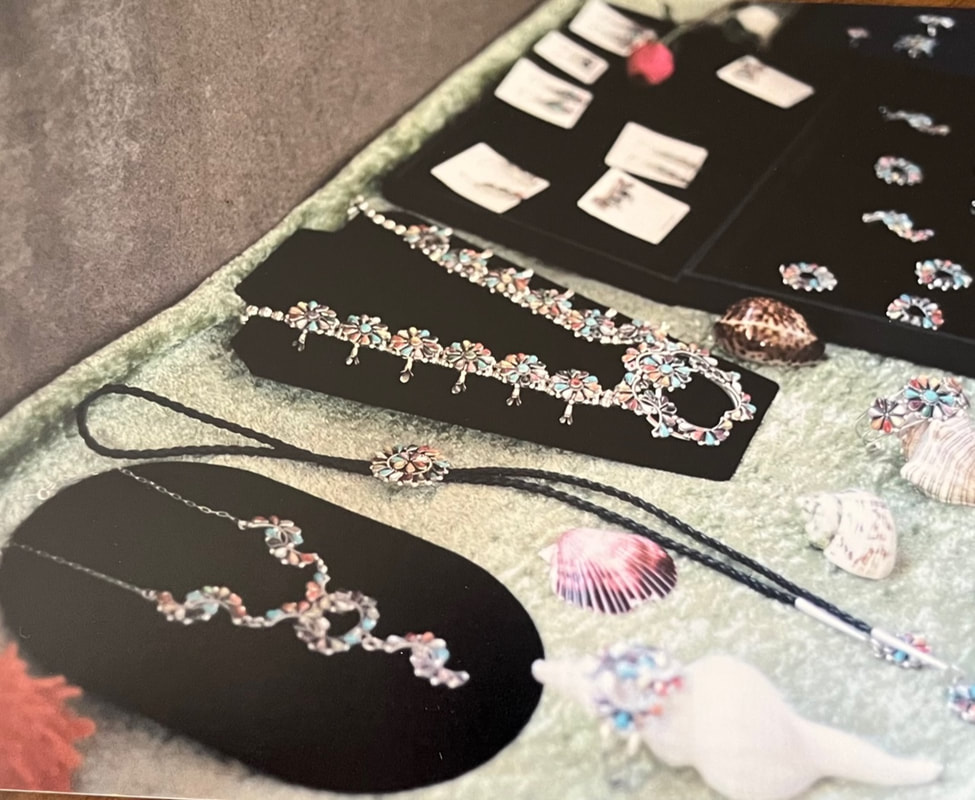 Items for sale include pottery to textiles, and silver jewelry decorated with turquoise to coral. Prices are good and there's no tax. Portal artists must also sign every piece of work. Although many vendors now take credit cards, others still do not. Somewhat shy, Gloria Goldtooth, of the Navajo/Diné tribe, began coming to the portal in the early 1980s. When we met, she sold at the portal once or twice a month. Selling the jewelry and beading that she and her mother made supplemented her full-time job. "We must use natural stones – not stabilized – and no plastic beads, just glass," she said. "We have to label our work to inform people what they are buying. Most vendors talk about their artwork and say, ‘Hello. If you have questions, ask us.’ It’s interesting to meet people from all over the world. Some people buy again and you develop a friendship." 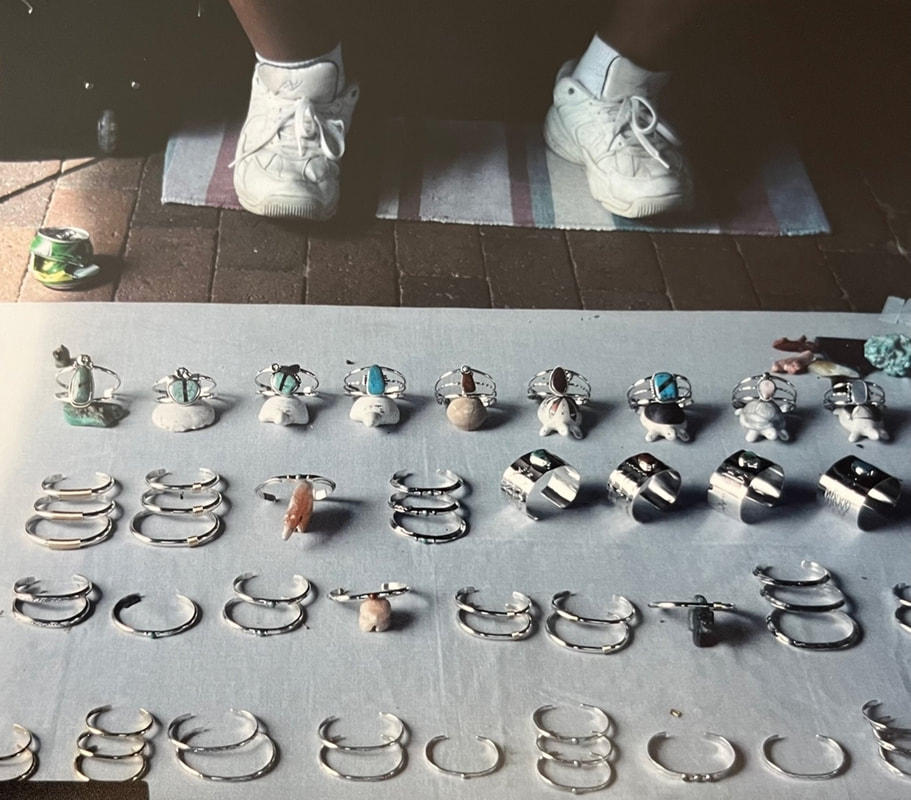 From the Zuni tribe, Phyllis Coonsis sold sterling jewelry with multiple stones and colors, under the business name, Swirl of Colors. "My grandmother taught me and my brother is a master jeweler. I joined the program about one year ago. This is my primary income and I can make $500 on some days. I also do major art shows. I help my mother financially and support my son." A Pueblo of Laguna tribe member, Edward Platero started coming to the portal in 1990, at age 18. On the day we met, he was selling jewelry with his girlfriend. His sole source of income, Platero typically sold items at the portal 3-4 times per week. ‘It can be difficult because we don’t take credit cards," he said. "But some people make as much as $1,000 on a good day. Summertime is better for sales." Fran Loretto had brought her pottery, sculpture, drawings and paintings to the portal for decades, from Jemez Pueblo. "I helped my grandmother when I was very young, and sold drums for my grandfather on the portal." Loretto also studied traditional pottery making and two-dimensional drawing at the Institute of American Indian Arts, a local four-year fine arts college. A 9-inch-tall female sculpture took two days to sculpt, 1-1/2 weeks to dry, a day to sand, and an hour to fire, over wood; kiln firing was forbidden for sales at the portal. 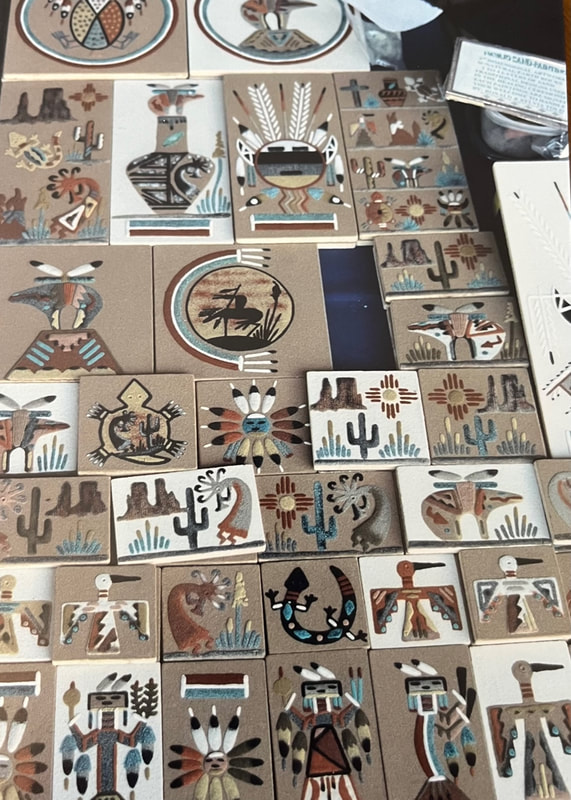 A member of the Navajo tribe, Ronald Toledo had learned sand painting from his parents, selling at the portal for more than 20 years and two to three days per week. Toledo often described the sand painting process to customers.
"Each item has two to four layers of sand and all of the sand color is natural," he said. "For instance turquoise stone is ground down to make the sand. The only non-natural feature allowed is a clear acrylic spray to help maintain set of the sand. We can create 6, 8 x 8 tiles or 20-30 magnets per day." For anyone who wants an exquisite artistic souvenir of their Santa Fe visit, the Native American Artisans Portal Program is a must do. Just be sure to carry plenty of cash! Please note: Photos in this story do not necessarily reflect artist profiles offered immediately before or after an image. They provide a general look at the variety of artistic expression available.  This week marks 40 years since my first visit to New Mexico (other than pass-throughs, during childhood). How do I know that? The life-changing trip took place several months after I met my now-husband. A friend and I had also planned our visit to coincide with Cinco de Mayo. It would be my first long-distance road trip in nearly a decade. But plans changed about two weeks before departure. My friend cancelled and my then-boyfriend couldn't reschedule his life on such short notice, to go with me. I wasn't ready to drive that far by myself so I booked trips to and from the state with Amtrak, and then rented a car in Santa Fe. For the next week, I explored the area near Santa Fe and Taos, from Bandelier National Monument (currently closed due to the Cerro Pelado fire) and El Rancho de las Golindrinas (closed, until June 2022) to Philmont Scout Ranch BSA and Santa Fe's Plaza. 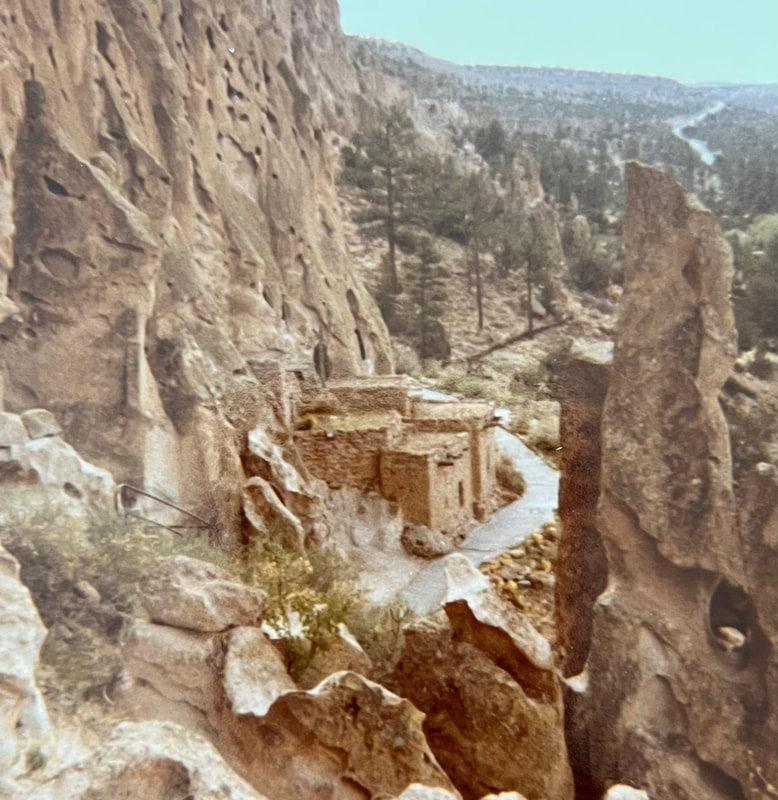 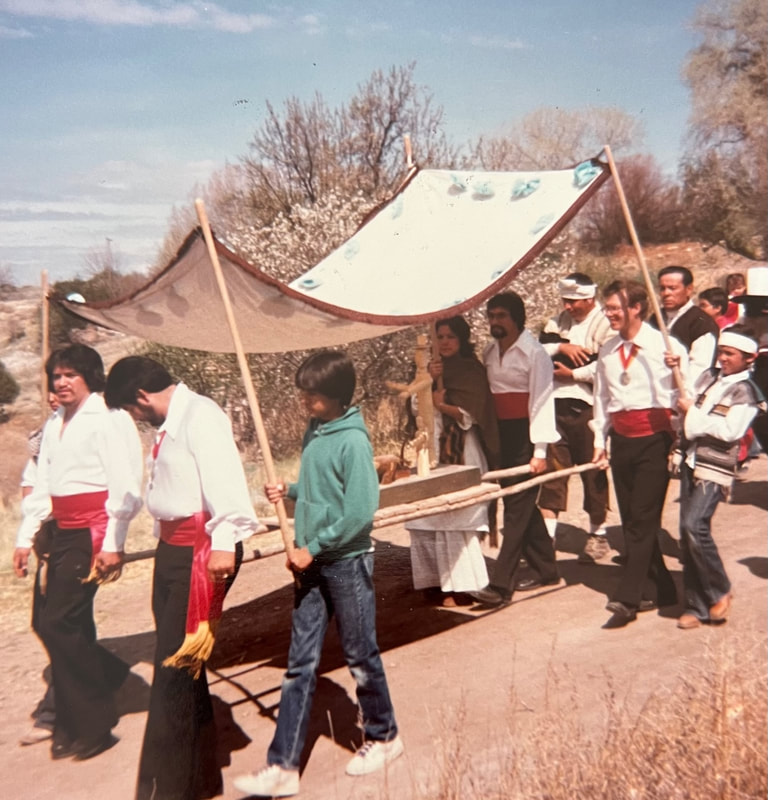 I gritted my teeth and gripped the steering wheel as snow fell during my descent from Philmont. I marveled at ancient homes built in formidable rock walls, at Bandelier. An unexpected festival and parade met me, at El Rancho de las Golindrinas. I bought a small rug from Ortega's Weaving Shop, in tiny Chimayo, before visiting the holy site of Santuario de Chimayo. In Santa Fe, I purchased a delicate silver ring, decorated with three-pronged bird 'tracks,' from a Native American vendor at the Palace of the Governors, before visiting the remarkable 'floating' staircase inside the Loretto Chapel. And I savored New Mexico flavors in what was then the open hotel courtyard and restaurant at La Fonda on the Plaza. 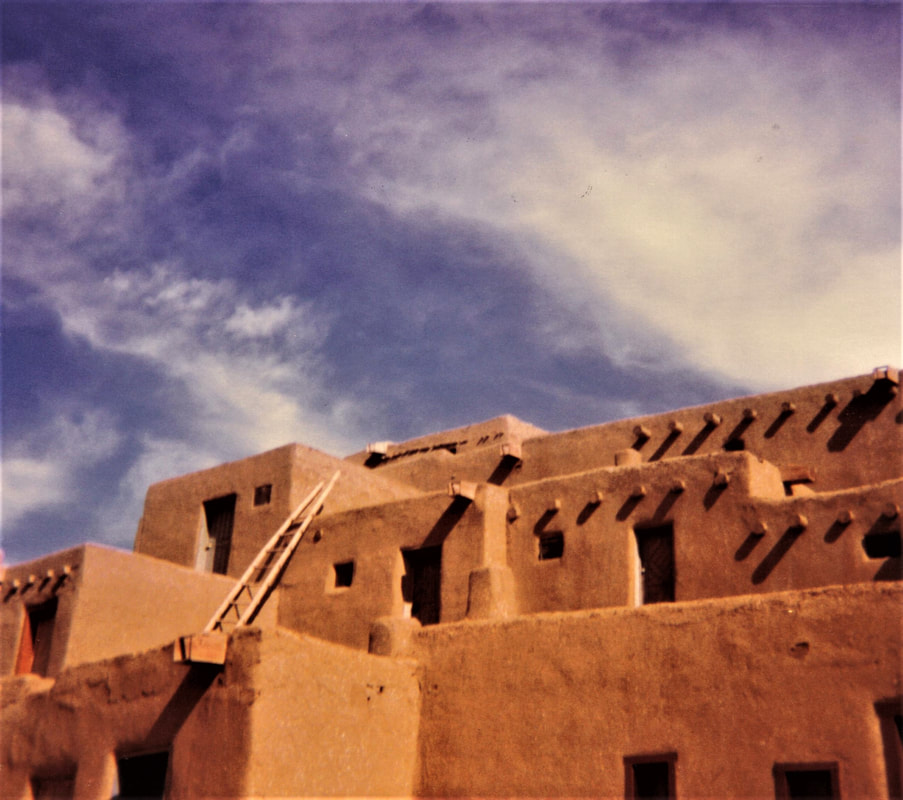 The Rio Grande rushed by, to my left, as I drove from Santa Fe to Taos, where a massive breakfast awaited, at Michael's Kitchen Restaurant and Bakery. My next stop was Taos Pueblo (closed until further notice, per COVID concerns).
Four decades ago, visiting the Pueblo was a completely different experience from my later visits. There was no ticket to buy or entry gate and no photography fee. No doors opened to individual craftspeople and their wares. And I saw no other visitors on that chilly spring weekday morning. But as I set foot onto Taos Pueblo land for the first time, an odd thing happened. From somewhere deep inside, I had the sense that I had literally lived here, in another life. On May 5, I raised a glass to northern New Mexico in a local restaurant, declaring, "I'll be back." And I have - at least eight times. Stay tuned to Visual Traveler throughout May, for more stories about this place that has thoroughly touched my heart. Please note: As is common in the travel industry, I may have received accommodations and other compensation for the purpose of review. While it has not influenced this post, the writer believes in full disclosure of all potential conflicts of interest. 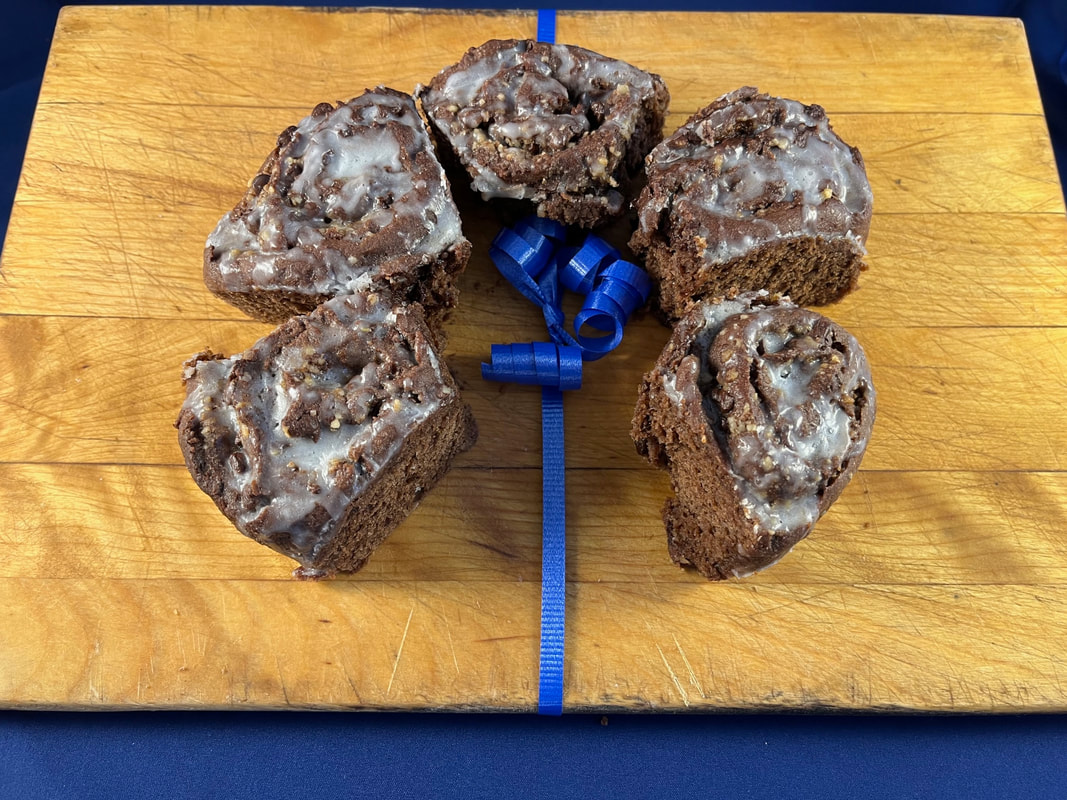 Here’s another early recipe with the holidays in mind – and the final post in this October-December series. I’ve had a blast making, photographing, and writing about chocolate and can’t wait to do it again next year. This luscious breakfast item languished in my files forever and I felt daunted-over and over again-by how much work was involved. But with fond memories of baking bread weekly for 2 ½ years after I moved to Kansas City (several decades ago), and the urge to make a chocolate recipe that isn’t about dessert (Hello, New Year's Day Breakfast!), I gave it a shot earlier today. Boy, was this recipe worth the effort! These rolls are surprisingly light in texture and chocolaty without being overpowering. The glaze doesn’t overpower the finished rolls, either. I fell right back into kneading the dough as I had in the 1980s and this dough responded well to my touch. Perhaps my only complaint with prep was when the buttered foil tried to skitter across the counter as I rolled out the risen dough. I had to anchor each end, to get the job done. One other thought. Because I generally prefer to use bittersweet chocolate chips and could only find semisweet minis, I might chop and use regular chips for a deeper flavor, next time. Wishing all of you a wonderful (remaining) holiday season and the very best for 2022! GRAM’S CHOCOLATE CINNAMON ROLLS Makes 10 rolls Dough 1 package active dry yeast 1 egg ½ stick butter ½ teaspoon salt ¼ cup cocoa powder 2 cups regular flour (or 1 ¾ cups whole wheat pastry flour) ¼ cup sugar Filling 3 tablespoons softened butter ¾ cup miniature chocolate chips 2 heaping tablespoons crumbled brown sugar 1/2 cup finely chopped walnuts 2-3 teaspoons cinnamon (because our family loves cinnamon I used more) Glaze 2 tablespoons soft butter ½ cup powdered sugar Cream or whole milk 1. Butter a 9-inch round cake pan. Stir the yeast into ¾ cup warm water and set aside. 2. In a large bowl and using an electric mixer, beat together butter, cocoa powder, sugar, egg, salt and 1 cup of flour. Stir in the yeast mixture and continue beating 2 minutes at medium speed. 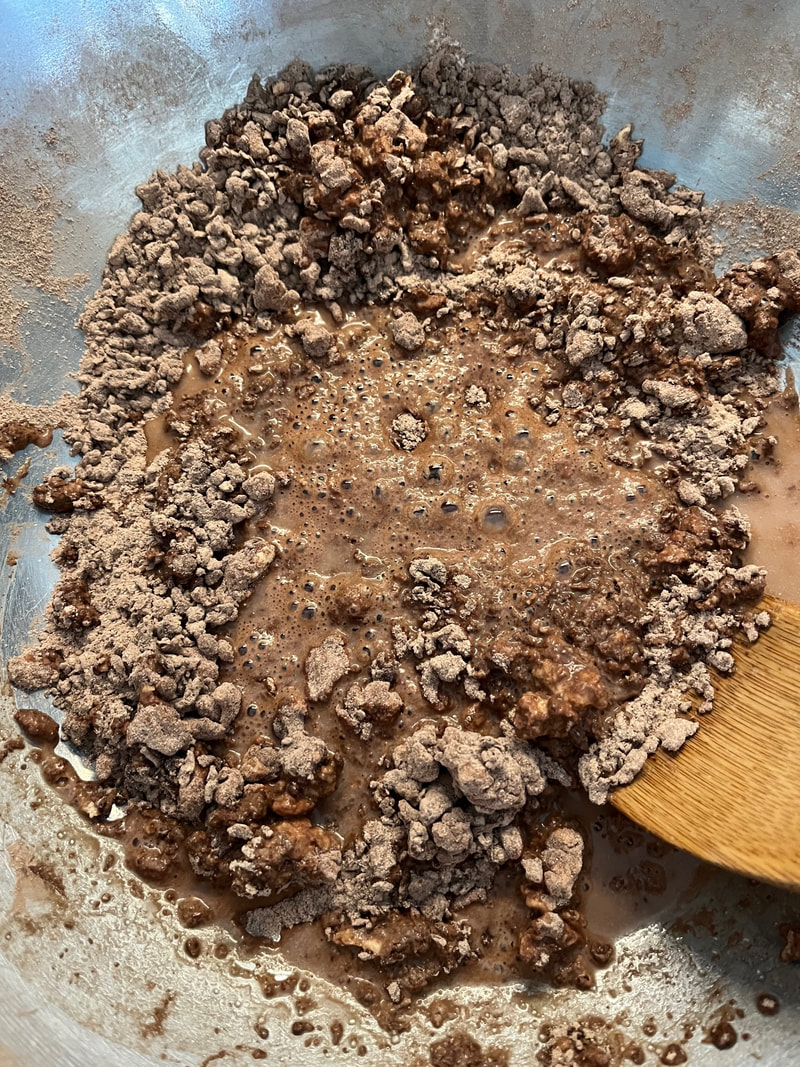 3. Remove the beaters and mix in 1 ¼ cups more flour with a wooden spoon or your hands. Turn out onto a floured surface and knead for a few minutes until smooth. Return to bowl, cover with a damp towel, and let rise in a warm spot for 1 hour or until doubled in size. 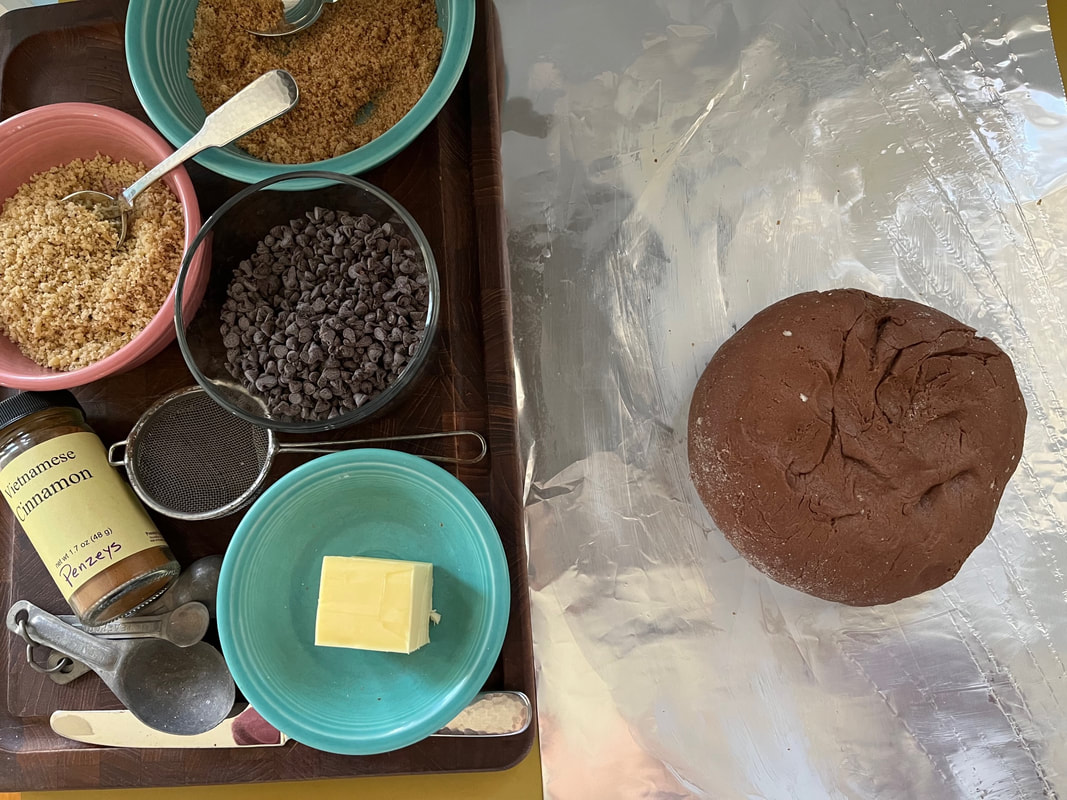 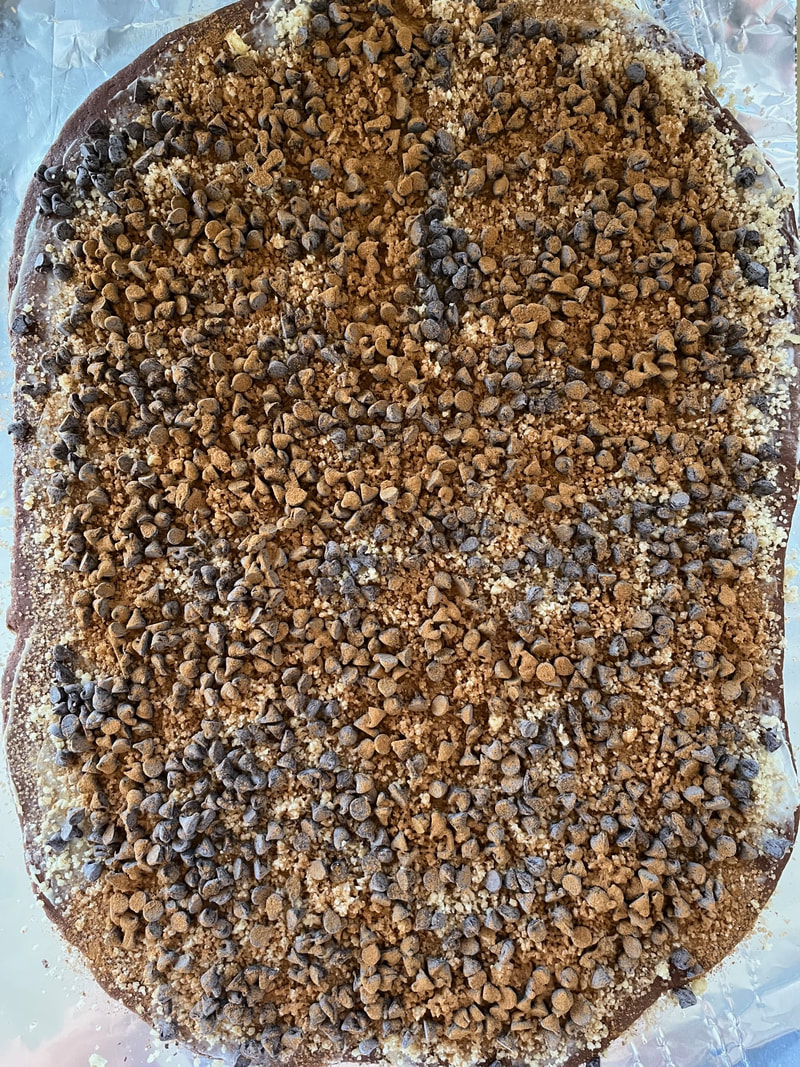 4. Punch the air out of the dough and place on buttered foil. Roll into a 12x9 inch rectangle. Spread softened butter over the dough, sprinkle with brown sugar, cinnamon, chocolate chips and nuts. 5. Roll up lengthwise. Cut into 10 equal slices and arrange, cut side down and sides touching, in prepared pan. Again, cover with a damp towel and allow to rise in a warm place for about 30 minutes until doubled in size again. In the meantime, preheat oven to 375 degrees. 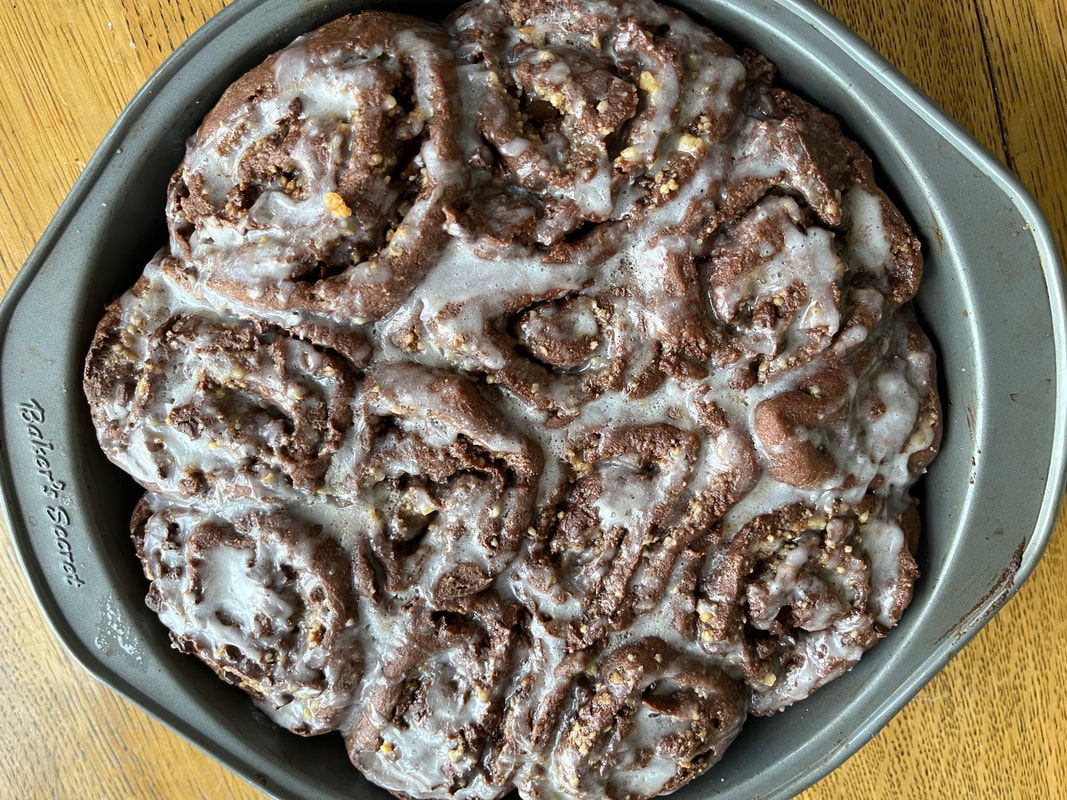 6. Bake rolls for 25 minutes or until lightly browned. Remove from oven and spread tops with 2 tablespoons soft butter. Combine powdered sugar and enough cream or milk to make a glaze; spread over the rolls. Serve warm.
Adapted from Celebrations, A Menu Cookbook for Informal Entertaining, by Diana and Paul von Welanetz 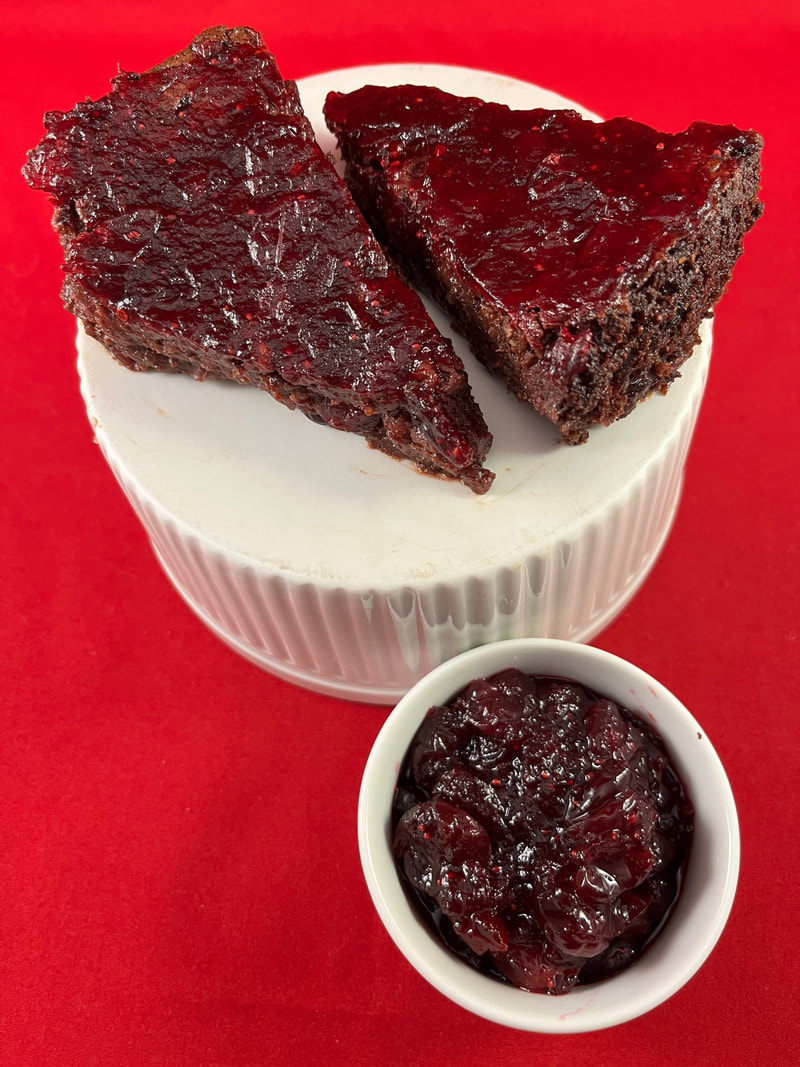 I decided to ‘run’ this post a little earlier than usual, so you have plenty of time to make the dessert for Christmas, if you like. My original recipe for Cranberry Chocolate Torte is another tried-and-true flavor sensation, printed on yellowed newsprint. The original recipe calls for whole cranberry sauce. But this year, supply chain issues resulted in no remaining cans on my favorite grocery store’s shelves. What I did have was two bags of fresh cranberries in my freezer and a dynamite Cranberry Orange Sauce recipe that has become a holiday staple for our family. But since the original torte recipe does not feature orange, I left out orange zest and substituted water for fresh-squeezed orange juice. The resulting torte flavor is very similar to the original, while my homemade cranberry sauce introduced extra texture to what is typically a smoother dessert. I also tinkered with the glaze this time. Using currant jelly results in a smooth and tasty glaze. However, I don’t otherwise use currant jelly so went a different route this time. Again, the results aren’t as smooth, but the taste is dynamite. Whichever versions of this torte and glaze you choose I think you’ll love this decadent dessert. And I hope it brings you much joy during the remaining holiday season. 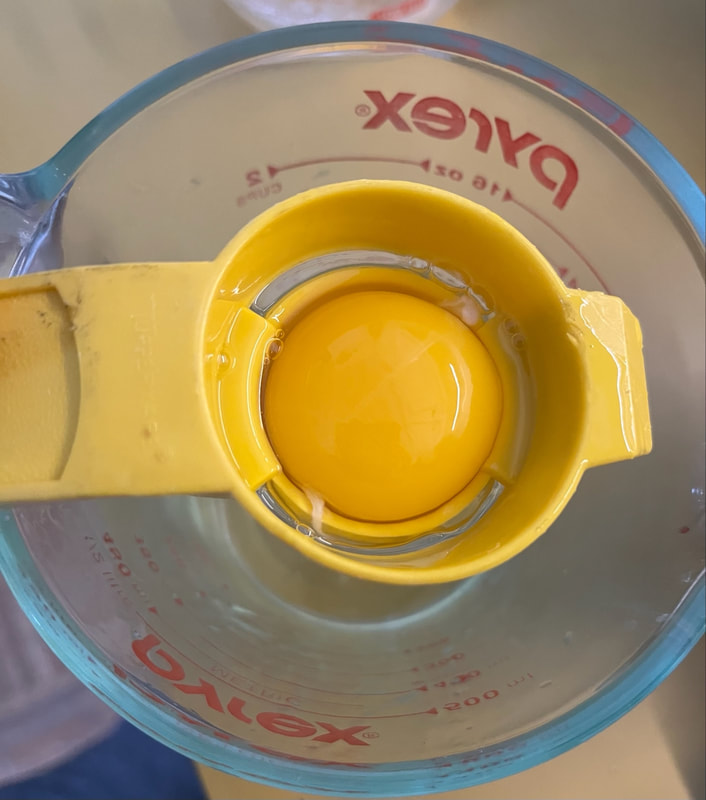 BTW, I absolutely love the convenience of this little device, when working with eggs. Mine is ancient, but you can find your own, easily, when you search for an egg separator. CRANBERRY CHOCOLATE TORTE Makes 10 servings INGREDIENTS 16-ounce can of cranberry sauce with whole cranberries OR make your own Homemade Cranberry Sauce (see below) 1/2 cup ground walnuts or almonds 1/4 cup sifted flour 7 ounces dark sweet chocolate, chopped 1/2 cup butter 3 large eggs, separated 1/2 to 3/4 cup sugar 1/4 teaspoon almond extract, optional GLAZE INGREDIENTS 1/2 cup currant jelly (if you can’t find this, you may substitute fruit jelly without seeds) 2 tablespoons cranberry juice cocktail or red wine Ground almonds, optional 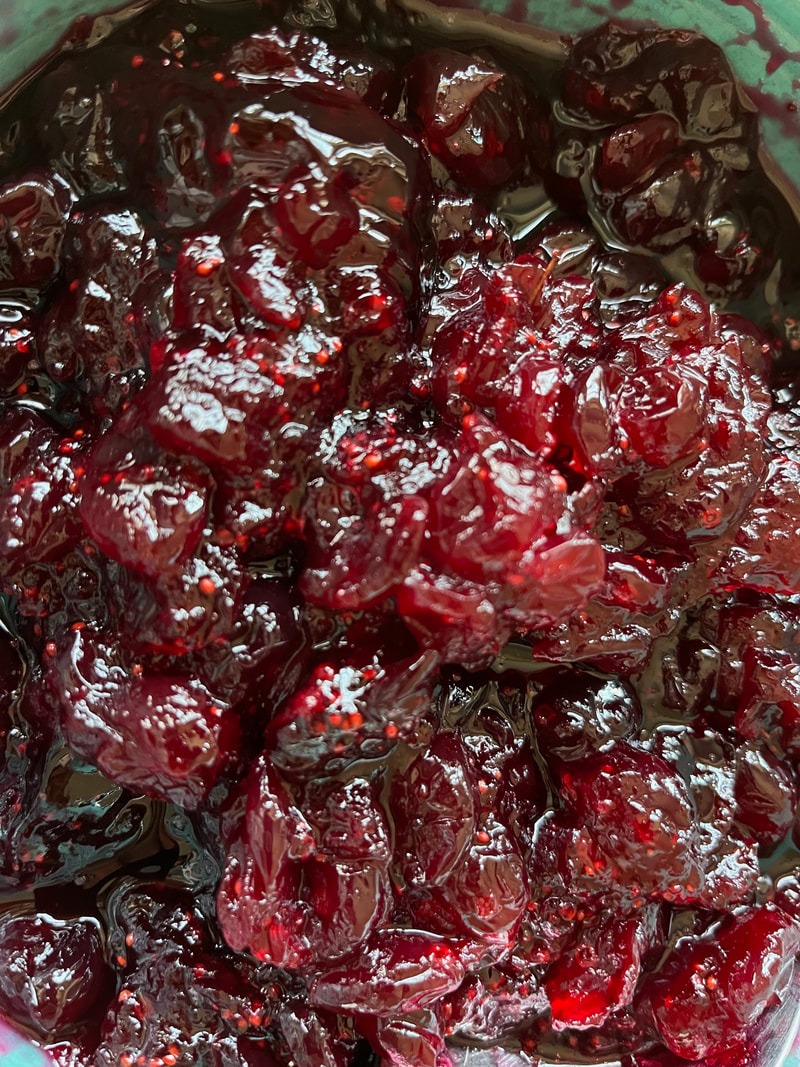 (OR use ½ cup of a second cranberry sauce recipe + 2 tablespoons red wine. To any leftover sauce add 3-4 tablespoons of orange zest and serve as a side for your holiday meal) 1. Place canned cranberries or homemade cranberry sauce in a small bowl and stir gently until slightly liquid. In another small bowl, combine almonds and flour. Melt chocolate and butter in a double boiler over simmering water, stirring occasionally to blend. Remove from heat and set aside. 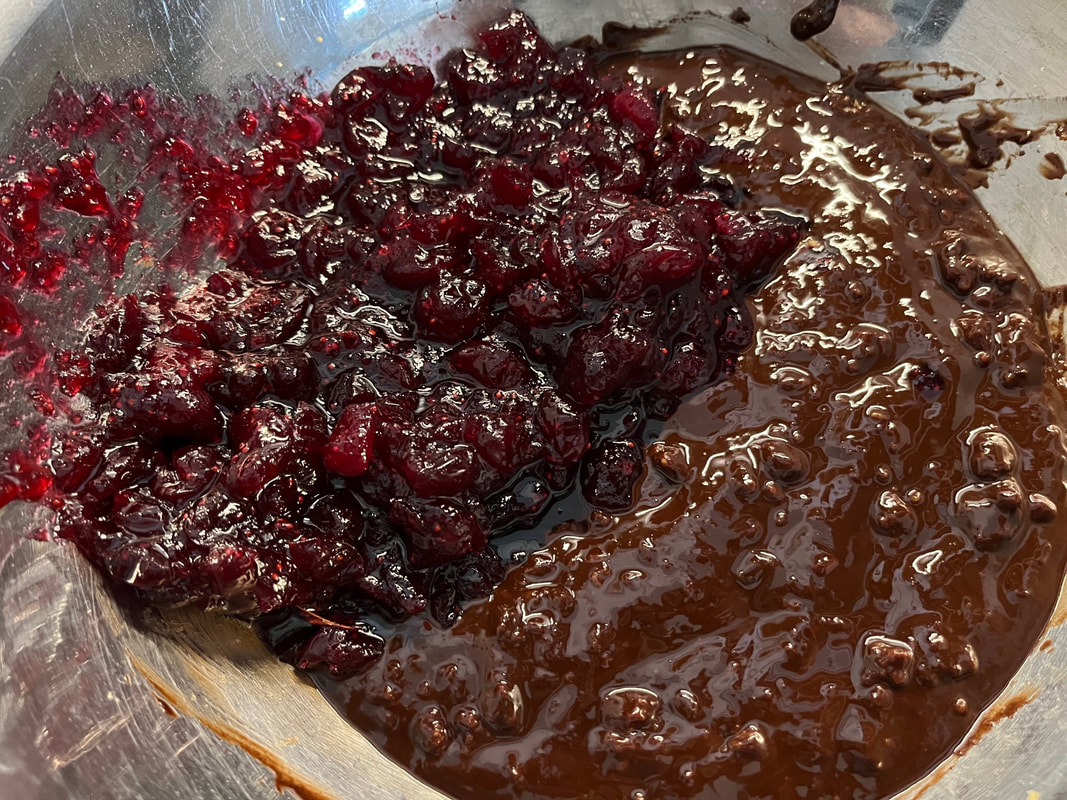 2. In a large mixing bowl, beat egg yolks and sugar until thick and light. With mixer on low speed, add flour and nut mixture to egg yolks, beating until just mixed. Add chocolate-butter mixture and blend gently. Stir in cranberries and almond extract by hand. 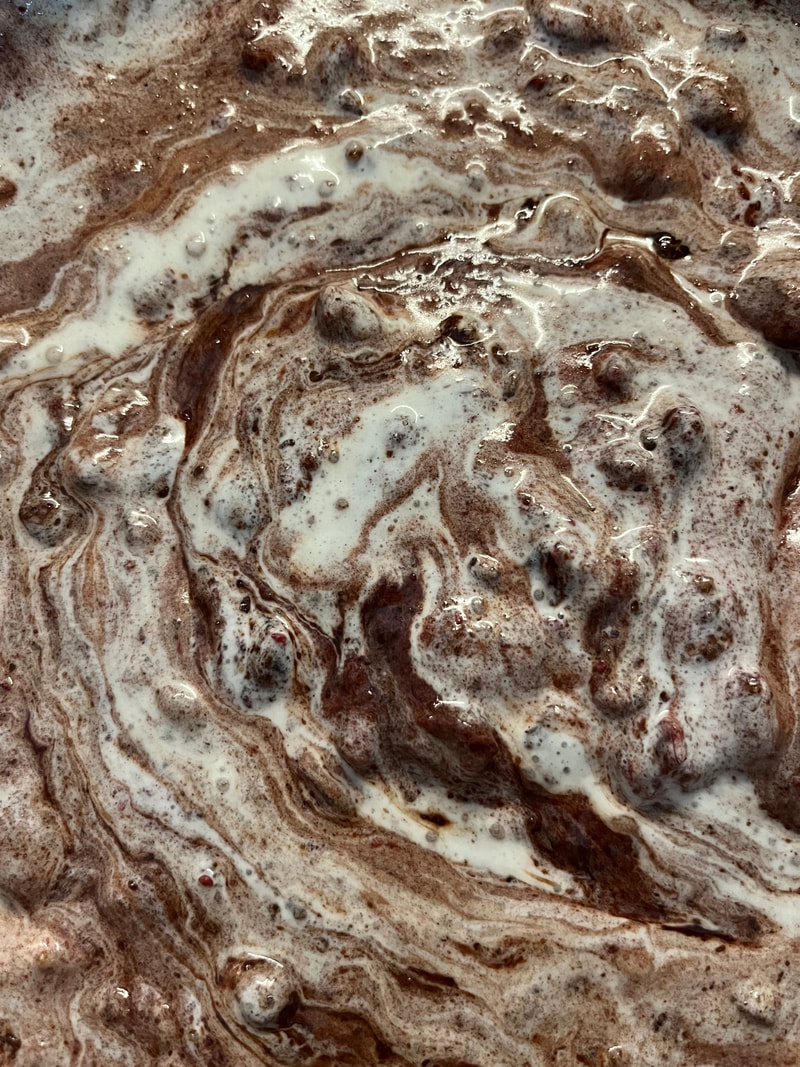 3. Beat egg whites until they hold their shape but are not dry. Fold egg whites into cranberry batter. Pour into a greased and floured 9-inch springform pan and smooth the top with a rubber spatula. 4. Bake in a 350-degree oven for about 50-55 minutes. Remove from oven and cool completely while still in pan. Place in refrigerator until chilled (about 1 hour). When ready to serve, use a knife to release the edge of the torte, and remove it from the springform pan. 5, As the torte cools, combine jelly and cranberry juice in a small saucepan, over medium heat. Brush the chilled torte with warm glaze and allow to set. Give the top of the torte a second coating. Sprinkle with ground walnuts or almonds if desired. HOMEMADE CRANBERRY SAUCE 1 ¼ cups sugar ¾ cup water 12-ounce bag of fresh cranberries 1. Combine all ingredients in a large saucepan, stir together, cover and bring to a boil. Leave on high heat until you hear berries popping open. 2. Reduce heat to simmer for approximately 20 minutes. Stir occasionally. 3. Remove lid and simmer for another 15 minutes, to reduce liquid. Cool to room temperature and then add to recipe according to directions. 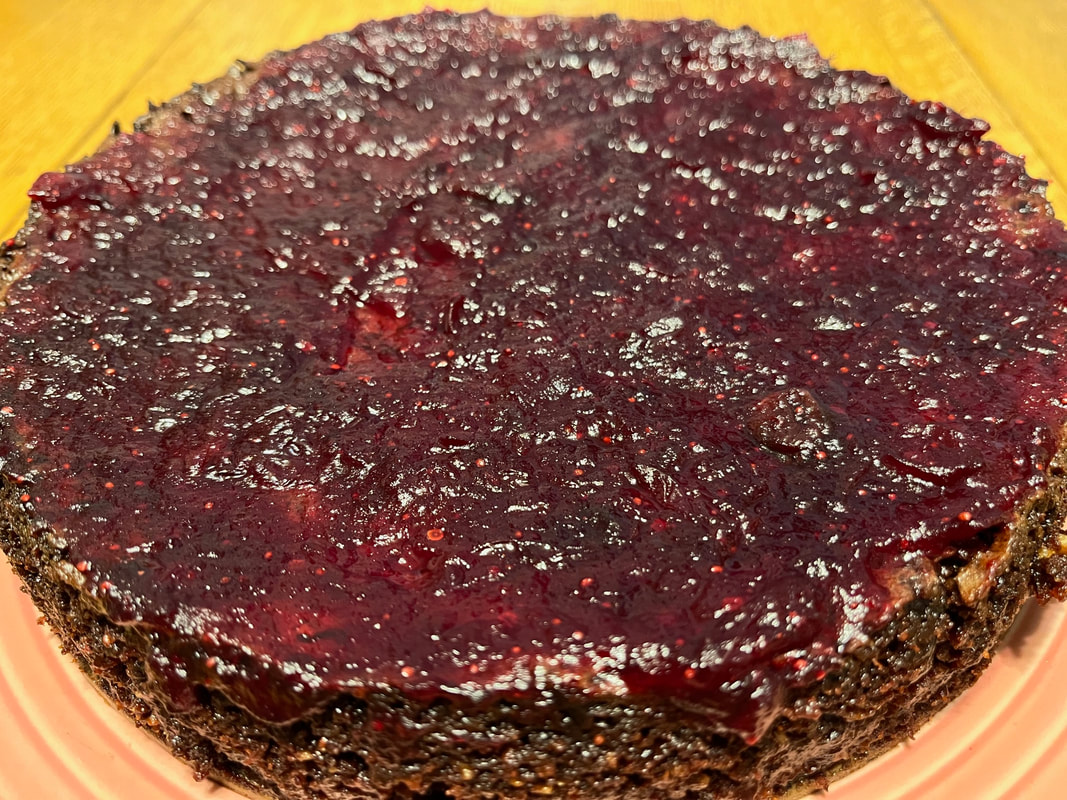 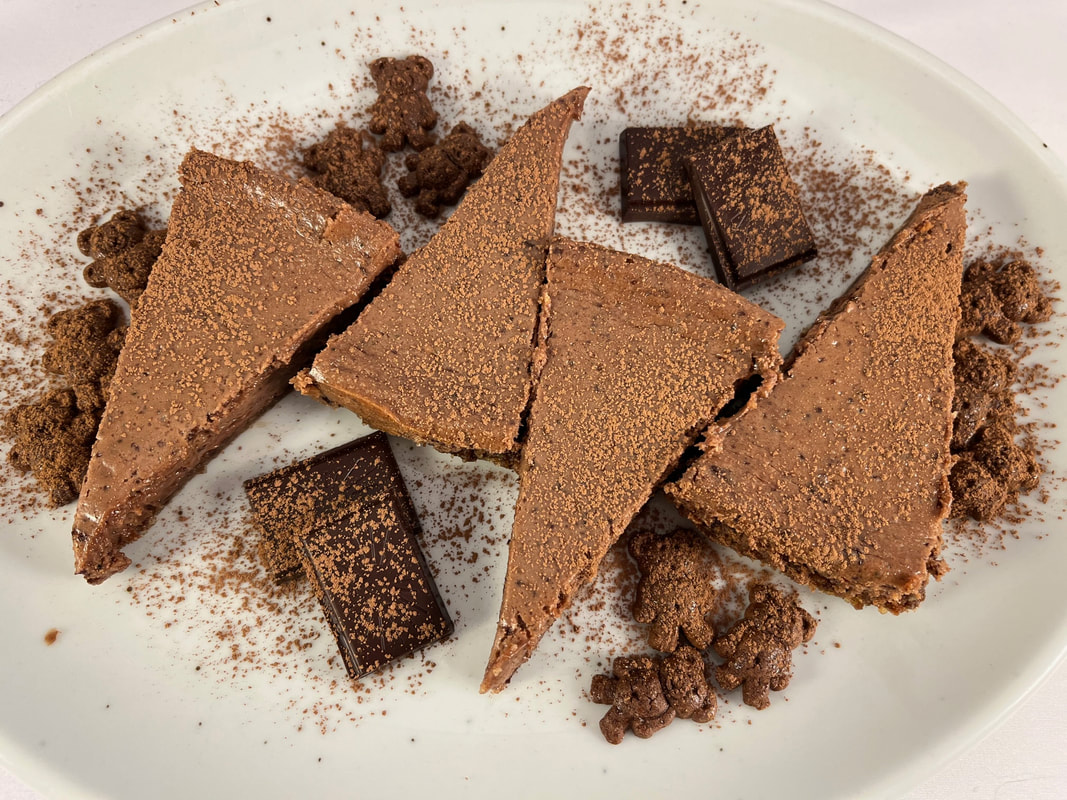 It’s been several years since I made this luscious cheesecake, which tastes just as rich and decadent as my ‘regular’ cheesecake. But egg whites and low-fat cream cheese make all the difference in the amount of fat. I don’t even remember when or where my original copy of this recipe came from. But, of course, I’ve tinkered with it quite a bit. And the original is old enough that it assumed easy availability of chocolate graham crackers. When my large grocery store didn’t have any, I felt fortunate to find a chocolate version of teddy bear graham crackers. A pleasant ‘side effect’ of using them was the touch of crunch they added to this cheesecake crust. Making this dessert requires much more kitchen equipment than I remembered. Two mixing bowls, my food processor, a double boiler bowl, two measuring cups, two mixer blades, a spatula, and measuring spoons helped me to pull everything together. Is it worth the cleanup involved? You bet. In fact, this is one of my favorite chocolate recipes. Let me know if you agree. Reduced Fat Dark Chocolate Cheesecake Makes 12 servings INGREDIENTS Safflower or mild olive oil Chocolate crust ½ cup walnuts ¾ cup chocolate graham crackers ¼ cup sugar 3 tablespoons melted butter Cheesecake filling 4 large egg whites, room temperature 1 ounce bittersweet or semi-sweet chocolate, melted and cooled ¾ cup sugar 12 ounces low-fat/Neufchatel cream cheese, softened ¼ cup Dutch process cocoa powder 1 teaspoon espresso or coffee powder 1 teaspoon vanilla DIRECTIONS 1. Preheat oven to 350 degrees. 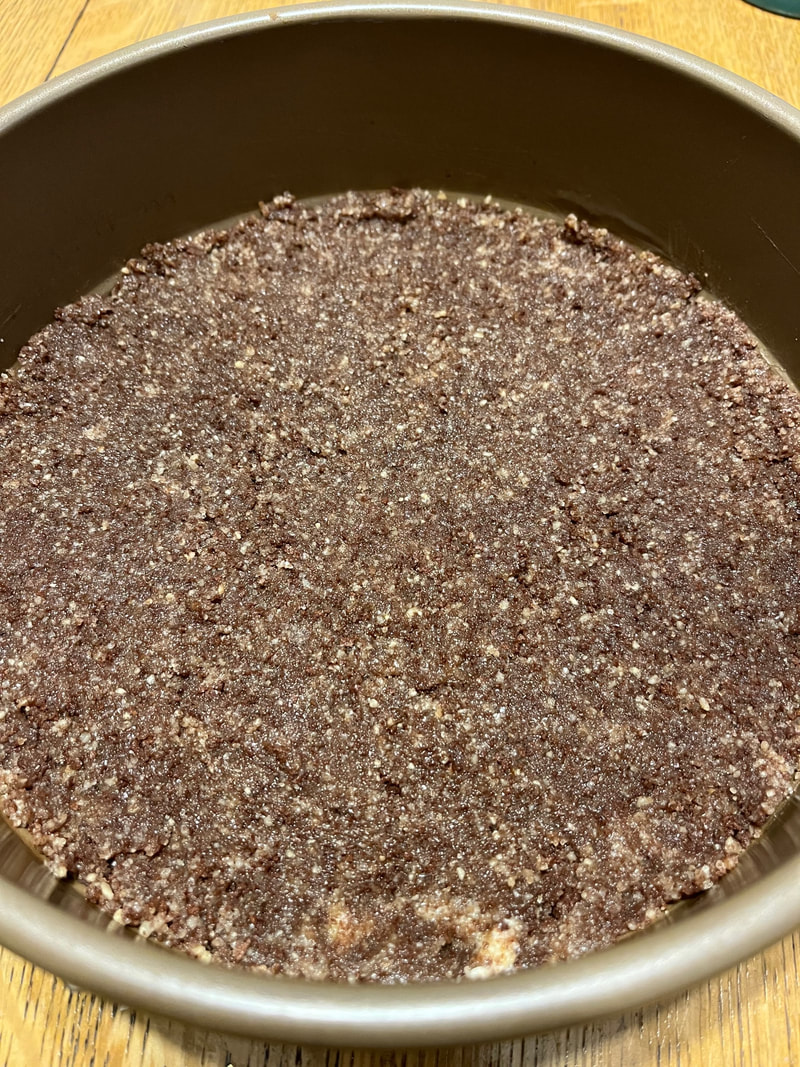 2. Grease a 9-inch springform pan. To make the crust, combine walnuts, graham crackers, and sugar in a food processor until chopped ultrafine. Add melted butter and combine thoroughly. Press onto the pan bottom to just cover the ‘seam’ at the side. 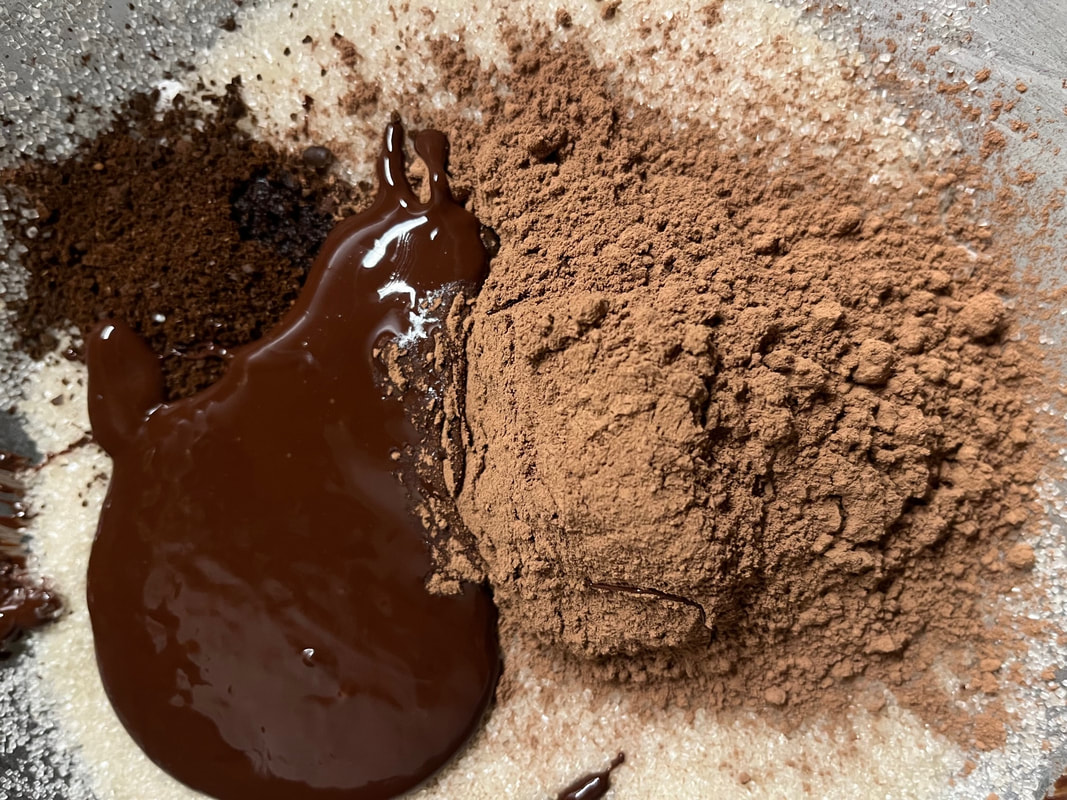 3. Melt chocolate and set aside to cool. Beat together cream cheese and sugar. Add the melted chocolate, cocoa powder, espresso powder, and vanilla. Beat thoroughly. 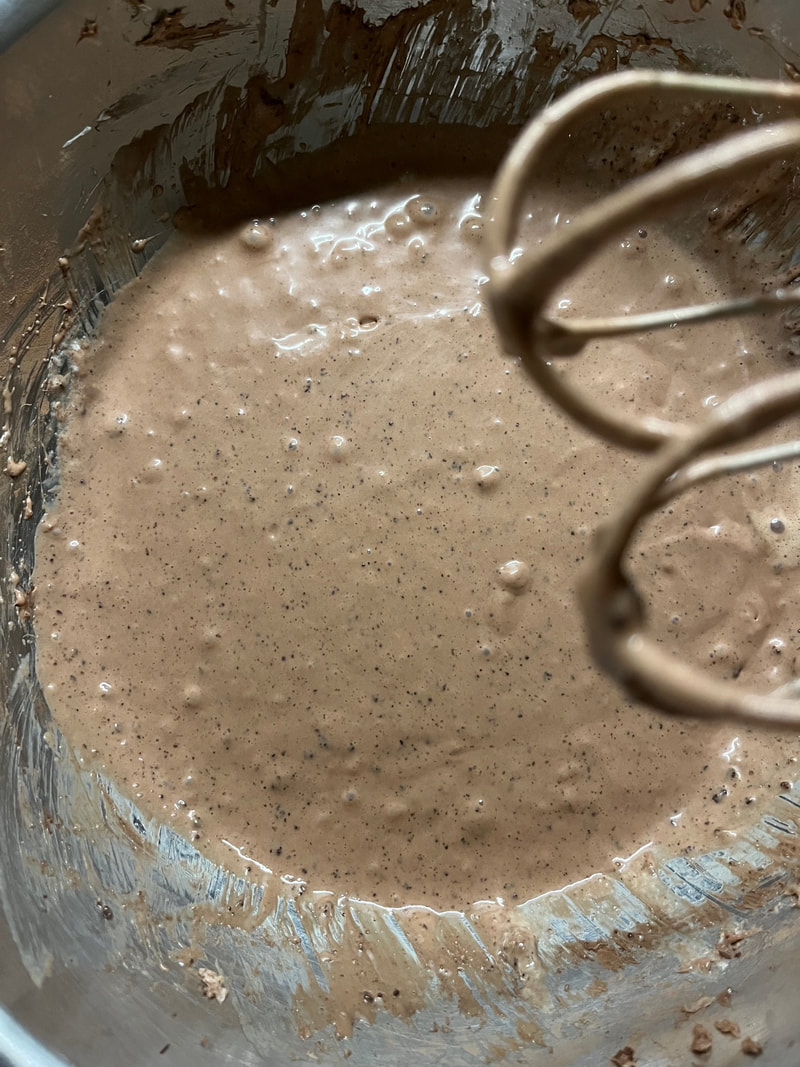 4. In a grease-free medium bowl, using an electric mixer, beat egg whites until foamy. Continue beating until stiff peaks form. Add egg whites to other batter ingredients and beat together, without overmixing. 5. Turn into the prepared pan and smooth the top. 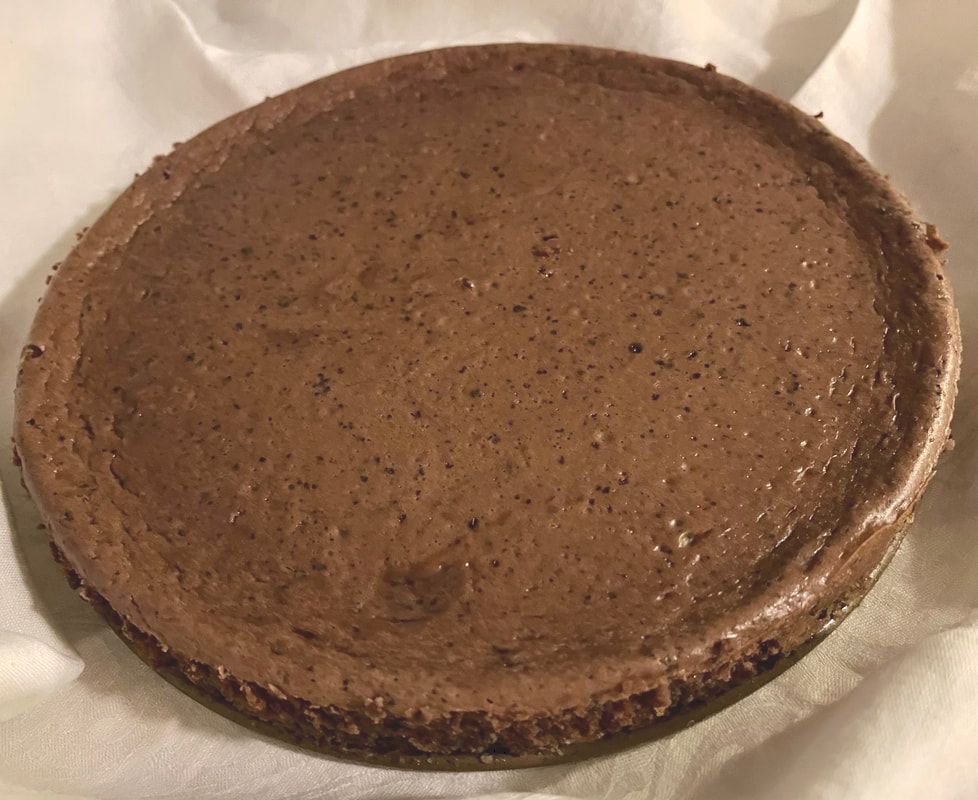 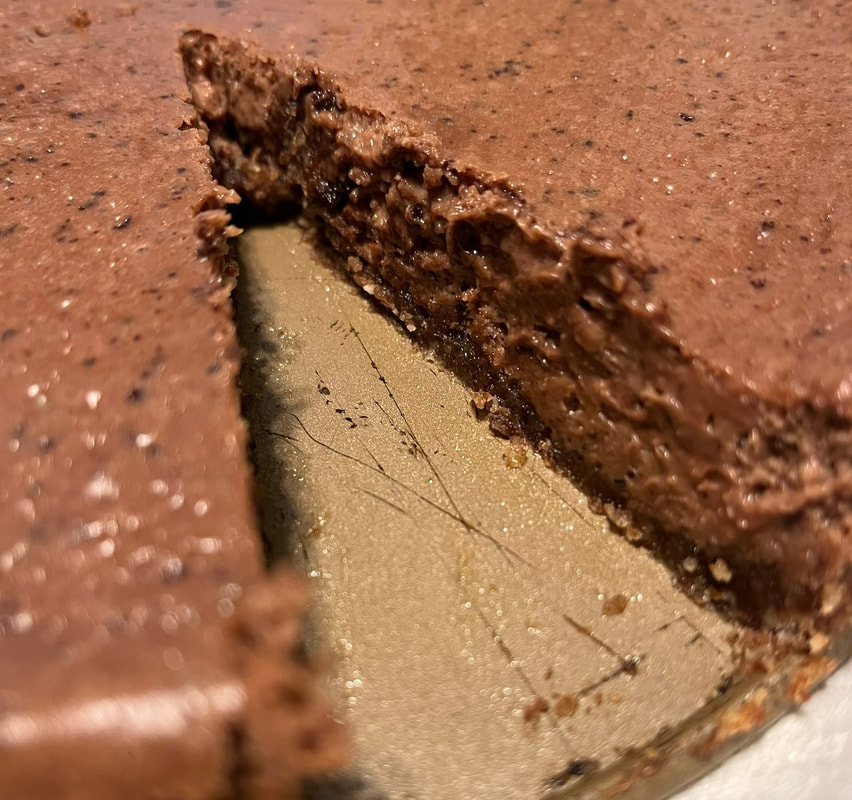 6. Bake until the edges of the cheesecake are slightly puffy and browned, about 25 minutes. A toothpick should come out clean. Cool on a rack until it reaches room temperature. Using a knife, carefully separate the filling from the side of the cheesecake pan. Gently remove the pan side and then chill until ready to serve.
|
Welcome to Visual Traveler.I love crafting stories about fantastic food & beverages, must-visit destinations & eco-friendly topics. I wrote a 350+ page book about Kansas. And I've worked with dozens of additional clients - from Fodors.com & AAA magazines to USA Today 10Best & WanderWithWonder. 
Grab a chair & join me as you explore photo-rich stories reflecting U.S. & international travels, plus home kitchen views.
Archived posts featuring Arizona, California, Kansas, New Mexico & chocolate
December 2023
|
 RSS Feed

|
|
Lisa Waterman Gray
Overland Park, KS, in the Kansas City metropolitan area ► E-mail Lisa | 816-805-8918 Copyright © 2021 by Lisa Waterman Gray Site Development by Limestone9Consulting |


